
As I stood in the kitchen, the delightful scent of creamy peanut butter whisked me away to my childhood, where no-bake desserts were the highlight of summer picnics and birthday parties. Today, I’m excited to share my No-Bake Easy Peanut Butter Pie, a luscious treat that combines rich flavors and a light, airy texture—perfect for peanut butter enthusiasts. This dessert not only takes just 20 minutes to whip up, but it’s also a surefire crowd-pleaser that impresses at any gathering or simply serves as a comforting sweet escape at home. Whether you’re serving it for a special occasion or indulging on a quiet evening, this pie invites you to savor every bite. Curious how to make this dreamy dessert? Let’s dive into the delicious details together!

Why is This Peanut Butter Pie a Must-Try?
Irresistible, Creamy Goodness: This Peanut Butter Pie boasts an ultra-smooth filling that melts in your mouth, turning every slice into a heavenly experience.
Quick and Easy: With just 20 minutes of prep time, you can create a show-stopping dessert without turning on the oven—perfect for busy nights.
Endless Customization: Swap the Oreo crust for Nutter Butter or chocolate graham crackers for a delicious twist that can cater to any taste.
Perfect for Gatherings: Your friends and family will rave about this pie at picnics, parties, and potlucks, making it an instant crowd favorite!
Make-Ahead Convenience: Prepare it in advance and let it chill overnight; it gets even better with time, which means you’ll be ready for any unexpected guests!
Elevate your dessert game and serve this pie alongside my Gooey Butter Pecan for a fantastic treat combo.
Peanut Butter Pie Ingredients
• Dive into the world of creamy indulgence with this Peanut Butter Pie!
For the Crust
- Oreo Cookies – The classic base for a rich, chocolatey flavor; swap for Nutter Butter or chocolate graham crackers for a twist.
- Melted Butter – Binds the crust perfectly; use freshly melted for an even mix and deliciously crisp texture.
For the Filling
- Cream Cheese – Gives a rich and creamy texture; ensure it’s softened for a smooth blend.
- Creamy Peanut Butter – Offers that beloved nutty flavor; no substitutions here for the finest taste.
- Powdered Sugar – Sweetens up the mixture and stabilizes the filling; adjust to your sweetness preference.
- Heavy Whipping Cream – Creates a light, fluffy filling; whip to stiff peaks for the best texture.
- Vanilla Extract – Enhances the flavor profile; feel free to omit if you prefer a simpler taste.
Step‑by‑Step Instructions for No-Bake Easy Peanut Butter Pie
Step 1: Prepare the Crust
Begin by pulsing Oreo cookies in a food processor until finely crumbed, about 15-20 seconds. In a bowl, mix the crumbs with melted butter until well combined. Press this mixture firmly into a 9.5-inch pie plate, creating an even layer. Refrigerate for 1 hour or freeze for 20-30 minutes until it’s set and firm to the touch.
Step 2: Make the Filling
In a separate mixing bowl, beat softened cream cheese and creamy peanut butter with an electric mixer on medium speed until smooth, about 2-3 minutes. Gradually add in powdered sugar and vanilla extract, mixing until fully incorporated and creamy. The filling should be thick and luxurious, showcasing the delicious peanut butter flavor in your Peanut Butter Pie.
Step 3: Whip the Cream
In another chilled bowl, whip heavy cream on high speed until stiff peaks form, which will take about 3-5 minutes. This whipped cream will add lightness to the filling, so keep an eye on it to avoid overwhipping. Once you achieve those stiff peaks, gently fold the whipped cream into the peanut butter mixture, being careful not to deflate the airy texture.
Step 4: Assemble the Pie
Pour the creamy filling mixture into the chilled Oreo crust, smoothing it out evenly with a spatula. Ensure there are no air pockets to get that perfect finish. Once smooth, cover the pie with plastic wrap and place it in the refrigerator. Allow it to set for at least 4 hours, or ideally overnight, so it firms up beautifully.
Step 5: Serve the Pie
When it’s time to enjoy your no-bake Peanut Butter Pie, remove it from the refrigerator and peel off the plastic wrap. Cut into generous slices and serve chilled. For a delightful touch, consider adding optional toppings like whipped cream or crushed candies to elevate your dessert and impress your guests.

Make Ahead Options
These Peanut Butter Pie options are perfect for meal prep and make entertaining a breeze! You can prepare the crust up to 24 hours in advance by mixing the Oreo cookie crumbs with melted butter and pressing it into the pie plate. Cover it with plastic wrap and refrigerate until you’re ready to fill it. The filling can also be made up to 3 days ahead; simply store it in an airtight container in the refrigerator before gently folding in the whipped cream. On the day you plan to serve, just pour the filling into the chilled crust and let it set for at least 4 hours or overnight for optimal taste. By prepping ahead, you ensure that your Peanut Butter Pie is just as delicious while saving valuable time for entertaining or busy weeknights!
What to Serve with Easy Peanut Butter Pie?
As you prepare to delight your guests with a slice of creamy indulgence, consider these delicious accompaniments that enhance the experience.
-
Fresh Berries: Juicy strawberries or raspberries provide a refreshing burst of tartness that perfectly balances the pie’s rich sweetness.
-
Whipped Cream: Fluffy dollops of homemade whipped cream add a light texture, enriching each bite of the decadent peanut butter pie.
-
Chocolate Drizzle: A sweet drizzle of melted chocolate gives an elegant touch, complementing the pie’s flavors while adding a rich note of cocoa.
-
Ice Cream: A scoop of vanilla or chocolate ice cream brings a creamy contrast, enhancing the overall indulgence of your dessert spread.
Indulging in this dreamy pie? Pairing it with a zesty fruit salad can introduce a crunchy texture and vibrant colors, making your dessert table a feast for the eyes and palate.
-
Hot Fudge Sauce: For those who crave extra decadence, warm hot fudge sauce poured over each slice creates an irresistible combination that peanut butter lovers will adore.
-
Coffee or Tea: A cup of rich coffee or soothing herbal tea can beautifully offset the dessert’s richness, perfect for winding down after a sweet feast.
How to Store and Freeze Peanut Butter Pie
Fridge: Store your Peanut Butter Pie covered in plastic wrap or an airtight container for up to 2 days. This allows the flavors to meld and actually improves the taste!
Freezer: For longer storage, wrap the pie tightly in a freezer-safe dish and freeze for up to 2-3 months. Thaw overnight in the refrigerator before serving for the best texture.
Wrapping: If you’ve made individual slices, wrap each slice tightly in plastic wrap before placing them in an airtight container for easy grab-and-go treats.
Reheating: This pie is best served chilled, so simply remove it from the fridge or freezer right before serving to enjoy its creamy deliciousness!
Expert Tips for Peanut Butter Pie
-
Cream Cheese Consistency: Make sure to use softened cream cheese; if it’s too cold, your filling will be lumpy and not as creamy.
-
Whipping Cream Precaution: Avoid overwhipping the heavy cream. Stop when you reach stiff peaks, or the filling may become grainy.
-
Crust Shortcut: For a faster prep, consider using a store-bought crust instead of making your own—delicious and saves time!
-
Chill Time Matters: Letting your Peanut Butter Pie chill overnight ensures the best texture and flavor. Impatience can lead to a less satisfying slice.
-
Creative Toppings: Enhance your presentation with whipped cream or crushed candies and mini Reese’s cups on top; it adds fun and extra flavor!
Peanut Butter Pie Variations & Substitutions
Feel free to make this peanut butter pie your own with these exciting adaptations!
- Dairy-Free: Use coconut cream and vegan cream cheese for a delicious dairy-free version that’s just as creamy.
- Nut-Free: Substitute creamy sunflower seed butter for a nut-free alternative that still packs a punch.
- Sugar-Free: Swap powdered sugar for a sugar-free alternative, like erythritol, for a guilt-free indulgence for diet-conscious friends.
- Chocolate Drizzle: Melt some chocolate and drizzle over the top before serving for an extra layer of decadent flavor. The combination of peanut butter and chocolate is simply divine!
- Texture Twist: Add crushed pretzels to the crust for an added salty crunch, elevating the overall experience to new heights.
- Spicy Kick: Mix in a dash of cayenne pepper to the filling for a surprising warm heat that complements the sweetness beautifully.
- Layered Delight: Create a layered pie by alternating the peanut butter filling with layers of chocolate mousse. This dessert will steal the show, just like my No-Bake Cookie Butter Icebox Cake.
Let your creativity shine while making your own peanut butter pie masterpiece!

Peanut Butter Pie Recipe FAQs
How do I choose ripe ingredients for my Peanut Butter Pie?
Absolutely! To ensure the best flavor for your Peanut Butter Pie, use fresh, quality ingredients. Make sure your cream cheese is fully softened at room temperature, which usually takes about 30 minutes. This will prevent lumps in your filling, providing that ultra-smooth texture we love. For powdered sugar, look for a fine consistency without any lumps to ensure even sweetness.
How should I store my Peanut Butter Pie, and how long will it last?
Very! You can store your Peanut Butter Pie in the refrigerator for up to 2 days. Just cover it with plastic wrap or an airtight lid. This chilling not only keeps it fresh, but the flavors also meld together beautifully over time. For best results, enjoy it within that timeframe.
Can I freeze the Peanut Butter Pie?
Absolutely! You can definitely freeze your Peanut Butter Pie for longer storage. Wrap the entire pie tightly in a freezer-safe dish or use plastic wrap, then store it in the freezer for up to 2-3 months. When you’re ready to enjoy a slice, simply thaw it overnight in the refrigerator. This will help maintain its creamy texture!
What should I do if my heavy cream doesn’t whip to stiff peaks?
Oh no! If your heavy cream isn’t whipping properly, make sure it’s cold; chilling both the bowl and the beaters for about 15 minutes in the freezer can really help. Whip on high speed for about 3–5 minutes until you see stiff peaks forming. If it’s still not achieving the right texture, it may be past its expiration date. Instead of tossing it out, use it in coffee or smoothies for a tasty beverage.
Are there any dietary concerns for pets with this Peanut Butter Pie?
Yes! Peanut butter is often safe for dogs in moderation, but ensure it doesn’t contain xylitol, a sweetener that can be harmful to pets. Additionally, this pie contains cream cheese and heavy cream, which may not sit well with some pets. Always check with your veterinarian before sharing human treats with your furry friends. Enjoy responsibly!
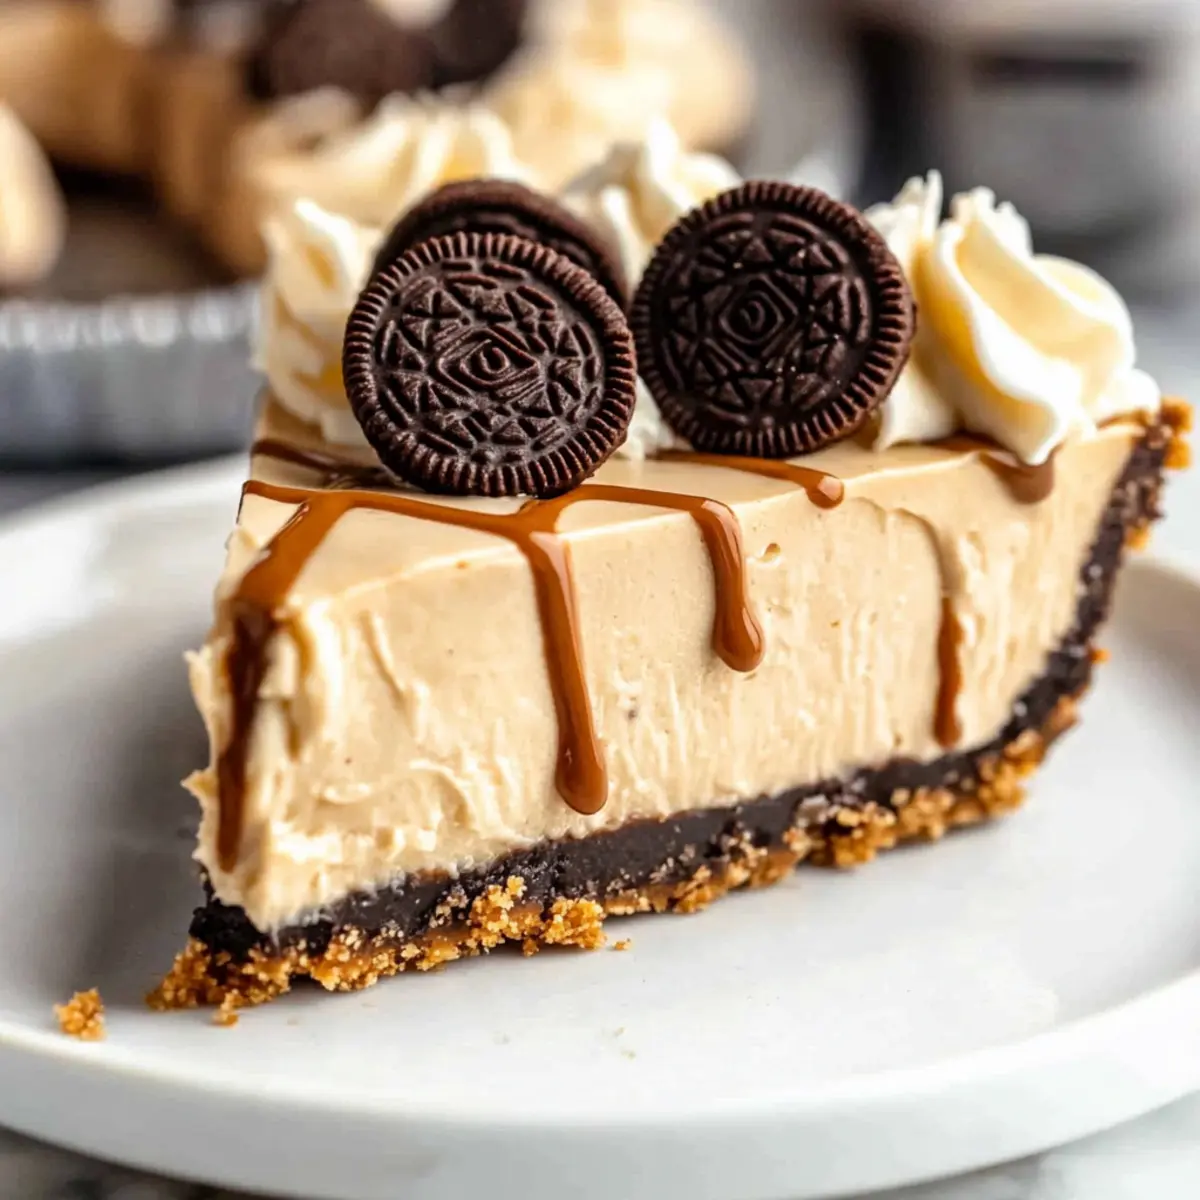
Creamy No-Bake Peanut Butter Pie for Easy Indulgence
Ingredients
Equipment
Method
- Pulse Oreo cookies in a food processor until finely crumbed, about 15-20 seconds.
- Mix crumbs with melted butter in a bowl until well combined.
- Press mixture into a 9.5-inch pie plate and refrigerate for 1 hour or freeze for 20-30 minutes.
- Beat cream cheese and peanut butter with an electric mixer until smooth.
- Gradually add powdered sugar and vanilla extract, mixing until creamy.
- Whip heavy cream on high speed until stiff peaks form, then fold into peanut butter mixture.
- Pour filling into the chilled crust and smooth out evenly.
- Cover with plastic wrap and refrigerate for at least 4 hours, ideally overnight.
- Remove from refrigerator, slice, and serve chilled.
Leave a Reply