
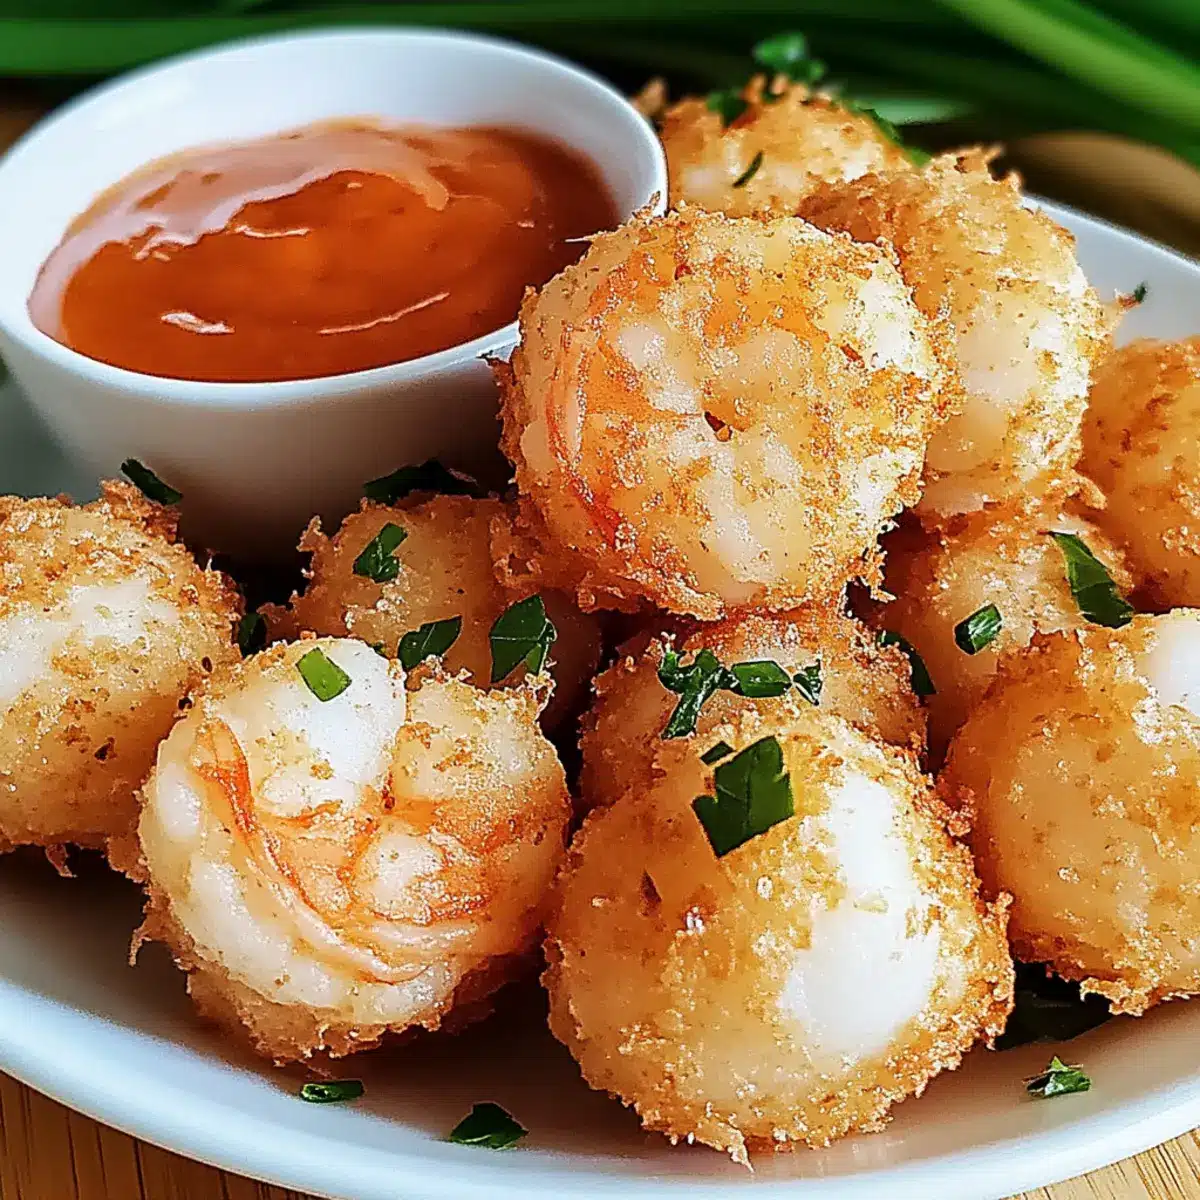
It’s one of those evenings where takeout just won’t cut it, and the thought of preparing something impressive feels like a mini mountain to climb. Enter my go-to Shrimp Balls Recipe! These crispy, golden seafood bites are not only a delightful treat for the taste buds but also super easy to whip up. Whether you’re hosting friends, preparing a quick date-night snack, or just wanting to elevate your weeknight dinner, these shrimp balls serve as the perfect canvas for creativity. What’s even better? They can be customized to suit any palate and are a fantastic way to impress without spending hours in the kitchen. I can almost smell the savory aroma wafting through the air! Ready to dive into making these delicious morsels?
Why Are Shrimp Balls a Must-Try?
Versatile and customizable, Shrimp Balls can adapt to any taste, making them a hit at gatherings. Crispy texture on the outside meets juicy shrimp on the inside, creating a delightful contrast with every bite. Quick to prepare, this recipe can be on your table in under 30 minutes, perfect for busy weeknights. Serve them as appetizers with a range of dipping sauces, like spicy mayo or garlic aioli, or elevate your meal with a side of Duchess Potatoes. With their crowd-pleasing appeal, these shrimp balls are guaranteed to leave your guests impressed!
Shrimp Balls Recipe Ingredients
These ingredients create the perfect foundation for your delicious Shrimp Balls!
For the Shrimp Mixture
• Shrimp – Fresh, peeled, and deveined shrimp provide the best texture and flavor for a satisfying bite.
• Breadcrumbs – This crunchy coating embraces the shrimp, adding a delightful texture; swap with gluten-free breadcrumbs if needed.
• Egg – Acts as a binder to hold everything together; for a vegan option, replace with a flax egg.
• Garlic Powder – This seasoning boosts the savory flavor; feel free to use fresh garlic for a more vibrant taste.
• Onion Powder – Adds depth and warmth; finely chopped fresh onion can be used for added texture.
• Salt – Balances the dish; adjust according to your taste or try a low-sodium alternative.
• Pepper – Delivers a touch of spice; cayenne pepper can be used for an extra kick.
• Fresh Herbs (optional, e.g., parsley or chives) – Introduces freshness; dried herbs work too—just use less!
For Frying
• Cooking Oil – A good amount of oil is essential for frying; use a neutral oil with a high smoke point like vegetable or canola oil for best results.
These ingredients come together to make a flavor-packed Shrimp Balls Recipe that will tantalize your taste buds!
Step‑by‑Step Instructions for Shrimp Balls Recipe
Step 1: Preparation
Begin by finely chopping fresh shrimp into small pieces, ensuring a consistent texture. In a mixing bowl, combine the chopped shrimp with breadcrumbs, stirring gently to distribute evenly. This mixture serves as the foundation for your Shrimp Balls. Take a moment to savor the aroma of the shrimp as you prepare for the next step.
Step 2: Seasoning
Add garlic powder, onion powder, salt, and pepper to the shrimp mixture, enhancing the flavor profile. If you’re adding fresh herbs like parsley or chives, chop them finely and mix them in now. This seasoning blend will elevate your Shrimp Balls, making them irresistibly savory. Ensure everything is well incorporated before moving on.
Step 3: Binding
Crack an egg into the shrimp and breadcrumb mixture, using a fork to thoroughly combine all ingredients. The egg acts as a binder, ensuring your Shrimp Balls hold their shape during cooking. Mix until you no longer see any dry crumbs, and the mixture is cohesive. This step is crucial for achieving a perfect texture.
Step 4: Shaping
With clean hands, scoop out portions of the mixture and roll them into small balls, about 1-2 inches in diameter. Place the shaped Shrimp Balls onto a baking sheet lined with parchment paper to keep them organized. It’s satisfying to feel the mixture transform into delightful bites, perfect for frying.
Step 5: Cooking
Heat a generous amount of neutral oil in a large skillet over medium heat until it shimmers slightly, indicating it’s hot enough. Carefully lower the shrimp balls into the hot oil, ensuring not to overcrowd the pan. Fry them for about 4-5 minutes on each side or until they turn a beautiful golden brown and crispy.
Step 6: Drain
Once cooked, use a slotted spoon to remove the Shrimp Balls from the oil, letting excess oil drip back into the pan. Transfer them to a plate lined with paper towels to absorb any remaining oil. This step helps retain the crispiness of your delectable Shrimp Balls, making them ready for serving.
Make Ahead Options
These Shrimp Balls are perfect for meal prep enthusiasts! You can shape the mixture into balls up to 24 hours in advance and refrigerate them in an airtight container. Just remember to separate layers with parchment paper to prevent sticking and maintain that delightful texture. When you’re ready to serve, simply fry them straight from the fridge following the cooking instructions, and enjoy crispy, golden Shrimp Balls that taste just as fresh! Alternatively, you can freeze the uncooked shrimp balls for up to 3 months. To cook from frozen, just add a few extra minutes to the frying time, and you’ll still achieve that flavorful crunch everyone loves.
Expert Tips for Shrimp Balls Recipe
- Oil Temperature: Ensure your oil is hot enough before adding the shrimp balls; this prevents them from becoming greasy and helps create that desired crispy exterior.
- Don’t Overcrowd: Fry in batches if necessary. Overcrowding the pan can drop the oil temperature, resulting in soggy shrimp balls instead of crispy ones.
- Custom Seasonings: Feel free to experiment with different spices like cumin or paprika to personalize your shrimp balls and elevate the flavor profile.
- Baking Option: Prefer a healthier approach? Bake your shrimp balls at 400°F for 20-25 minutes, flipping halfway, until they are golden brown and crispy.
- Storage Tips: Prepare your shrimp balls ahead of time! They can be stored in the refrigerator for up to 24 hours before frying, or frozen prior and cooked directly from frozen for convenience.
Shrimp Balls Recipe: Flavorful Twists Await!
Don’t hesitate to get creative with this recipe—there are countless ways to customize it and make it your own!
-
Crab Meat: Replace shrimp with fresh crab meat or imitation crab for a unique seafood twist. Both options add a rich, sweet flavor that complements the dish beautifully. You’ll appreciate the difference in texture and taste!
-
Spice It Up: Add a dash of cayenne pepper or red pepper flakes to the mix for an extra kick! Enhance the overall flavor profile and get everyone reaching for the water.
-
Herb Infusion: Try using fresh dill or cilantro instead of parsley for a fresh touch. The herbal notes will take your shrimp balls to a whole new level. Feel free to include a mix of your favorites for even more complexity!
-
Cheesy Goodness: Mix in some cream cheese or shredded cheddar before shaping the balls. This will lend a creamy interior that contrasts beautifully with the crispy outside. The gooey center is sure to be a hit!
-
Nutty Crunch: Roll the shaped balls in chopped nuts or panko breadcrumbs before frying for a delightful crunch. Almonds or walnuts bring a subtle sweetness that pairs nicely with the shrimp.
-
Baked Version: Swap the frying method for baking at 400°F for a health-conscious version that still gets crispy. Options like baked shrimp balls make for a light yet satisfying appetizer.
-
Flavorful Marinade: Marinate the shrimp in lemon juice, soy sauce, or a splash of hot sauce beforehand for a flavor boost. This simple step elevates the taste of your shrimp balls with a zing!
Incorporate these variations into your next batch of shrimp balls, and for even more serving ideas, consider pairing them with delightful dipping sauces like garlic aioli or a refreshing sweet and sour sauce. Enjoy customizing this dish!
Storage Tips for Shrimp Balls
Fridge: Store cooked Shrimp Balls in an airtight container for up to 3 days to maintain their crispiness and flavor.
Freezer: Freeze uncooked shrimp balls in a single layer on a baking sheet, then transfer to a freezer-safe bag or container; they can last for up to 3 months.
Reheating: To reheat, place thawed shrimp balls in a preheated oven at 375°F for 10-15 minutes until crispy again.
Make-Ahead: Prepare shrimp balls ahead of time and refrigerate for up to 24 hours before frying for a convenient, last-minute appetizer at gatherings.
What to Serve with Crispy Shrimp Balls?
Indulging in crispy shrimp balls opens up a world of delightful pairing possibilities to transform your meal into something special.
-
Spicy Mayo: This zesty dipping sauce adds a kick, elevating the shrimp ball experience with every crunchy bite.
-
Sweet and Sour Sauce: Perfectly balancing flavors, this sauce offers a delightful contrast to the savory shrimp, making each mouthful tantalizing.
-
Garlic Aioli: Creamy and rich, this garlic-infused sauce complements the shrimp balls’ crunch and brings a lush, velvety touch.
-
Crispy Green Salad: A toss of fresh greens brings a refreshing contrast to the hearty shrimp balls, cutting through the richness beautifully.
-
Coconut Rice: With its subtle sweetness and fluffy texture, coconut rice pairs wonderfully, enhancing the flavors and making for a tropical vibe.
-
Mango Salsa: Sweet, tangy, and vibrant, this salsa adds a fresh burst of flavor, making your plate visually appealing and uplifting every bite.
-
Duchess Potatoes: These buttery yet light potato puffs elegantly accompany shrimp balls, uniting textures and making your meal feel gourmet.
-
Coleslaw: Its crunch and crispness elevate the overall dining experience, providing a refreshing contrast to the rich and savory shrimp balls.
-
Chardonnay: A glass of this chilled white wine pairs nicely, enhancing the oceanic notes of shrimp while balancing out the meal’s richness.
-
Lemon Sorbet: For dessert, this refreshing treat cleanses the palate and provides a sweet note to conclude your flavorful seafood feast.
Shrimp Balls Recipe FAQs
What kind of shrimp should I use?
Absolutely! For the best texture and flavor, it’s ideal to use fresh, peeled, and deveined shrimp. If fresh is unavailable, you can also use frozen shrimp, but ensure they’re fully thawed and drained before chopping.
How long can I store shrimp balls in the fridge?
Cooked Shrimp Balls can be stored in an airtight container in the refrigerator for up to 3 days. They may lose some crispiness over time, but a quick reheat in the oven can help revitalize their texture.
Can I freeze shrimp balls?
Very! You can freeze uncooked shrimp balls for up to 3 months. To do this, place them in a single layer on a baking sheet, freeze until solid, then transfer them to a freezer-safe bag. When you’re ready to cook, there’s no need to thaw—just fry them straight from the freezer, adding a couple of extra minutes to the cooking time.
What should I do if my shrimp balls fall apart while cooking?
No need to worry! If your shrimp balls are falling apart, it usually indicates that the mixture is too dry. Consider adding a bit more egg or a splash of water to bind it better. Ensure you’re also mixing the ingredients thoroughly in the binding step and shaping them firmly.
Are shrimp balls safe for people with shellfish allergies?
Great question! Unfortunately, shrimp balls are not safe for individuals with shellfish allergies. It’s always important to read ingredient labels and consult with those you’re serving to ensure everyone can enjoy these delicious bites.
How can I customize my shrimp balls?
The more the merrier! You can swap out shrimp for crab meat or add different spices like cumin or paprika for a unique flavor. Fresh herbs like cilantro or even a dash of lemon zest can also add a fresh twist, so feel free to get creative!
Savory Shrimp Balls Recipe: Easy, Crispy Delights Await!
Ingredients
Equipment
Method
- Finely chop fresh shrimp into small pieces and combine with breadcrumbs in a mixing bowl.
- Add garlic powder, onion powder, salt, and pepper; mix in fresh herbs if using.
- Add the egg and mix thoroughly to combine all ingredients until cohesive.
- Shape the mixture into small balls, about 1-2 inches in diameter, and place on a baking sheet.
- Heat oil in a skillet over medium heat, then fry the shrimp balls for 4-5 minutes on each side until golden brown.
- Remove cooked shrimp balls with a slotted spoon and drain on paper towels.
Leave a Reply