
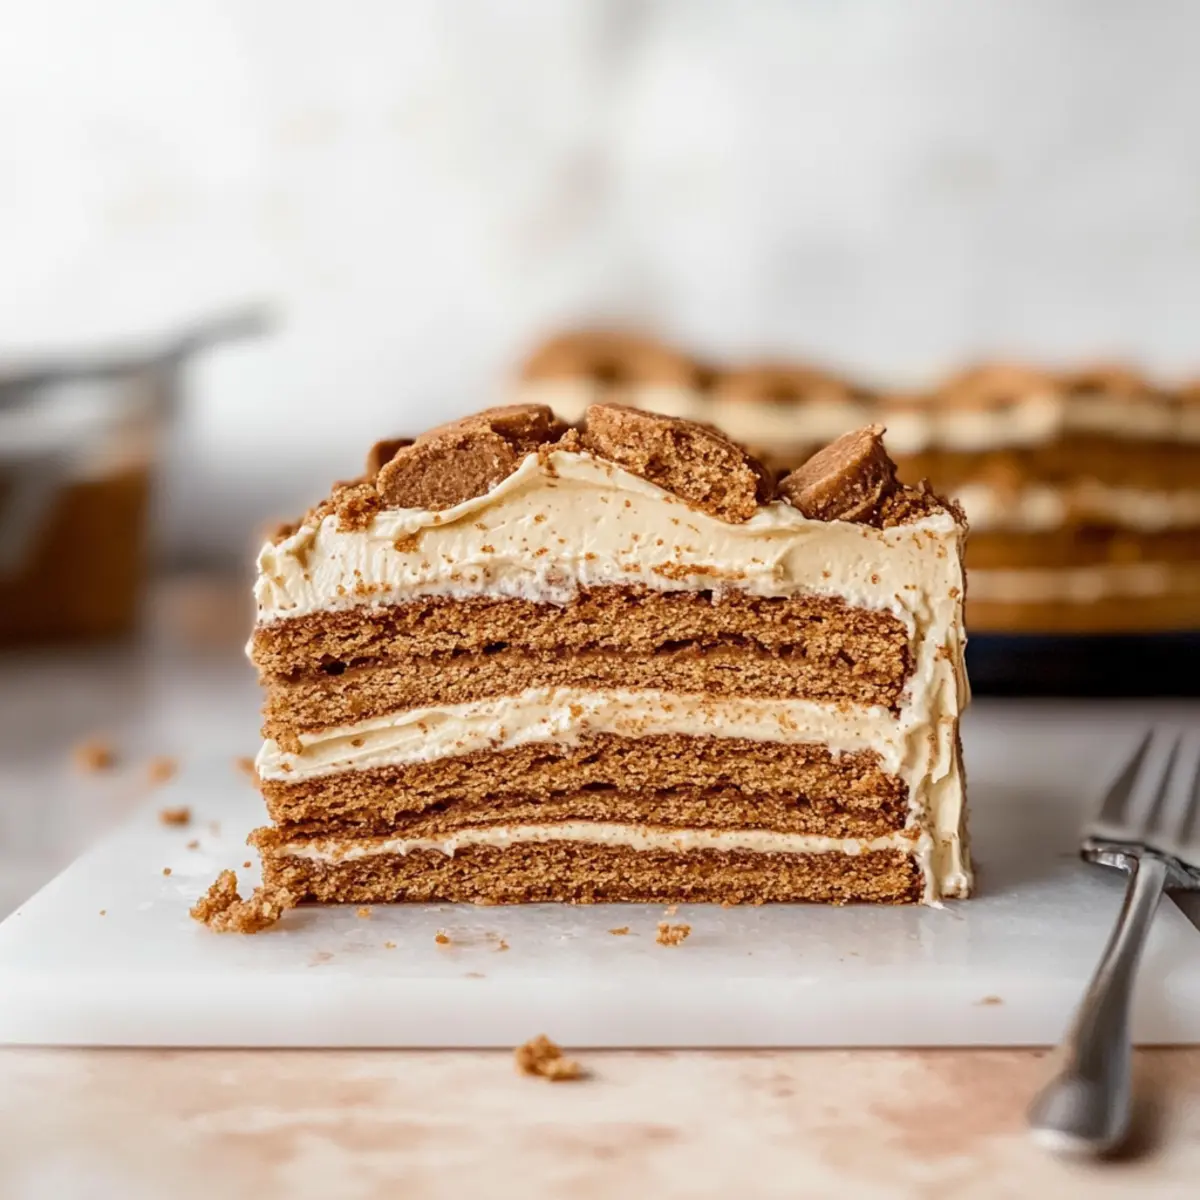
“Who knew dessert could be so wonderfully simple yet utterly elegant?” The No-Bake Cookie Butter Icebox Cake is here to steal the show at your next gathering, offering an effortless indulgence without ever needing to turn on the oven. With layers of creamy, dreamy cookie butter whipped cream paired with crunchy Lotus Biscoff cookies that transform into a delightful melt-in-your-mouth texture, this make-ahead dessert will be your new go-to. Perfect for those busy weeknights or last-minute get-togethers, it’s a crowd-pleaser that will have everyone coming back for seconds. Ready to discover how this delightful dessert can brighten your table with minimal fuss? Let’s dive in!
Why is this cake a must-try?
Effortless Preparation: This No-Bake Cookie Butter Icebox Cake will have you enjoying dessert without the hassle of turning on the oven!
Irresistible Flavor: The combination of creamy cookie butter and crunchy Biscoff cookies creates an unforgettable taste experience.
Versatile Variations: Feel free to mix it up! Swap the Biscoff cookies for graham crackers or chocolate wafers to suit your cravings.
Make-Ahead Convenience: Prepare this cake in advance! It refrigerates beautifully, gaining an even richer flavor after an overnight chill.
Crowd-Pleasing Appeal: Perfect for gatherings or weeknight treats, this indulgent dessert will wow your guests and family alike, ensuring everyone asks for the recipe!
No-Bake Cookie Butter Icebox Cake Ingredients
For the Whipped Cream Layer
• Heavy Cream – Adds richness and volume to the whipped mixture. Substitution Note: Whipping cream can be used if heavy cream is unavailable.
• Lotus Biscoff Spread – Provides the signature cookie butter flavor and creamy texture. Substitution Note: Can be replaced with peanut butter or Nutella for different flavor profiles.
• Mascarpone Cheese – Adds a creamy texture and slight tang. Substitution Note: Cream cheese can be used; add extra sugar to balance the taste.
• Vanilla Extract – Enhances overall flavor depth. Substitution Note: Use fresh vanilla bean for a more intense flavor if desired.
• Kosher Salt – Balances sweetness. No substitutions necessary.
• Confectioner’s Sugar – Sweetens the whipped cream while preventing it from becoming too stiff. Note: Adjust the quantity based on taste preference.
For the Cake Layers
• Lotus Biscoff Cookies – Form the cake layers, providing a crunchy texture. Note: Use about 1½ packages for the standard loaf pan size (32 cookies each). Graham crackers or chocolate wafers are alternative options.
Step‑by‑Step Instructions for No-Bake Cookie Butter Icebox Cake
Step 1: Whip the Cream
In a stand mixer fitted with a whisk attachment, pour 2 cups of heavy cream. Whip on medium speed for about 2-3 minutes or until medium peaks form. The cream should be thick enough to hold its shape but still spreadable. This fluffy cream forms the base of your No-Bake Cookie Butter Icebox Cake, adding a luscious texture.
Step 2: Combine the Ingredients
Slowly add ½ cup of Lotus Biscoff spread to the whipped cream, along with 8 ounces of mascarpone cheese, 1 teaspoon of vanilla extract, a pinch of kosher salt, and ½ cup of confectioner’s sugar. Using a spatula, gently fold the mixture until everything is fully combined and smooth. The cream should be light and airy, perfectly blended for your cake layers.
Step 3: Prepare the Loaf Pan
Line a standard loaf pan with plastic wrap, ensuring there’s enough overhang to cover the top later. This step will help you easily unmold the finished No-Bake Cookie Butter Icebox Cake. Make sure the plastic wrap is securely in place to prevent any spills as you layer the components of the dessert.
Step 4: Layer the Cookies and Cream
Start by placing a single layer of Lotus Biscoff cookies at the bottom of the prepared pan, arranging them to cover the surface completely. Spread a generous layer of the cookie butter cream mixture over the cookies, smoothing it out evenly with a spatula. Repeat this process, layering cookies and cream until you reach the top of the pan, finishing with a layer of cookies.
Step 5: Chill the Cake
Cover the loaf pan tightly with plastic wrap to seal in the flavors. Place the pan in the refrigerator and let it chill for at least 24 hours, although up to 3 days is even better. This chilling time allows the cookies to soften and the flavors of the No-Bake Cookie Butter Icebox Cake to meld beautifully.
Step 6: Unmold and Serve
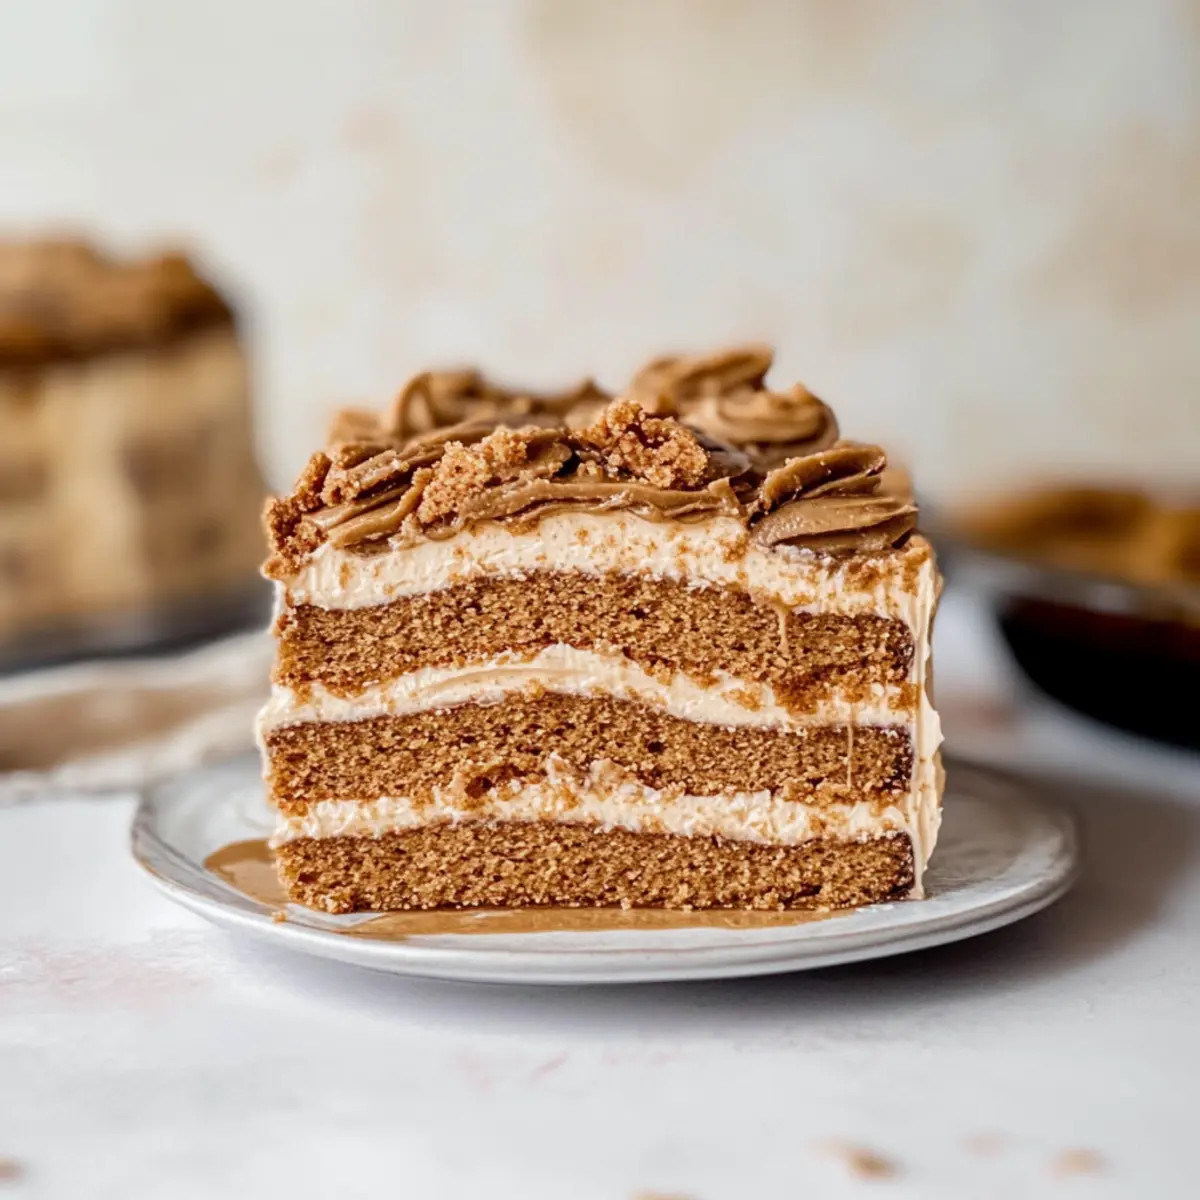
After chilling, remove the cake from the refrigerator and carefully lift it out of the pan using the overhanging plastic wrap. Place the cake upside down on a serving platter. Remove the plastic wrap and drizzle warmed cookie butter over the top. For an added crunch, sprinkle some crushed Biscoff cookies before slicing into this delightful treat.
What to Serve with No-Bake Cookie Butter Icebox Cake
This delightful dessert pairs wonderfully with a variety of accompaniments to create a well-rounded feast.
- Fresh Fruit Salad: The bright acidity of seasonal fruits cuts through the richness of the cake for a refreshing balance.
- Whipped Cream: A fluffy dollop adds extra creaminess, making each bite feel like an indulgent cloud of sweetness.
- Chocolate Drizzle: A drizzle of melted chocolate over the top enhances sweetness and adds a touch of elegance to the presentation.
- Coffee or Espresso: The rich, bold flavors of coffee contrast beautifully with the cake’s sweetness, creating a delightful after-dinner pairing.
- Ice Cream: Creamy vanilla ice cream complements the flavors perfectly while adding a contrasting temperature and texture.
- Almond Biscotti: This crunchy treat plays well with the soft cake layers, providing a satisfying textural contrast.
- Toffee Sauce: A warm drizzle of toffee sauce introduces a caramel-like richness that pairs beautifully with the cookie butter profile.
- Sparkling Water: Light and refreshing, it cleanses the palate, allowing you to fully appreciate the layers of flavor in each bite.
Expert Tips for No-Bake Cookie Butter Icebox Cake
-
Chill Thoroughly: Make sure to refrigerate the cake for at least 24 hours to achieve the best texture and flavor melding.
-
Whipping Cream Secret: When whipping cream, stop once you reach medium peaks to avoid it becoming overwhipped and grainy.
-
Layering Precision: Ensure you layer the cookies flat without gaps to avoid a lopsided cake. This promotes even flavor in your No-Bake Cookie Butter Icebox Cake.
-
Sweetness Control: Adjust the confectioner’s sugar to your taste; less if you prefer a less sweet dessert.
-
Experiment with Flavors: Don’t hesitate to try different cookie spreads or cookies to personalize your cake!
Make Ahead Options
These No-Bake Cookie Butter Icebox Cakes are a fantastic choice for busy home cooks looking to save time while still delivering an irresistible dessert! You can prepare the entire cake up to 3 days in advance, allowing the flavors to develop beautifully during that time. Simply layer your cookies and whipped cream as outlined, then cover the loaf pan tightly with plastic wrap and refrigerate. This technique ensures that the cookies soften perfectly without becoming mushy. When you’re ready to serve, just remove the cake from the fridge, unmold it onto a plate, and drizzle with warmed cookie butter for that fresh finish. Enjoy the delight of effortless baking while saving time for what matters most!
No-Bake Cookie Butter Icebox Cake Variations
Feel free to get creative and customize your No-Bake Cookie Butter Icebox Cake for every occasion!
-
Dairy-Free: Use coconut cream and dairy-free cream cheese for a luscious alternative that keeps it creamy yet vegan-friendly. Coconut adds a subtle tropical twist!
-
Nut-Free: Swap cookie butter for sunflower seed butter, ensuring a nut-free version that’s just as delightful for allergy-friendly gatherings.
-
Chocolate Lovers: Incorporate chocolate wafers instead of Biscoff cookies for an indulgent chocolate experience that complements the cookie butter beautifully.
-
Fruity Addition: Layer in fresh raspberries or strawberries between the cream layers for a refreshing burst of flavor. This twist adds a pretty touch and balances richness.
-
Spice It Up: Add a dash of cinnamon or nutmeg to the whipped cream mixture for a warm, cozy flavor that evokes pleasant memories of holiday treats.
-
Coffee Infusion: Stir in a tablespoon of instant coffee granules into your whipped cream mixture for a delightful coffee kick, perfect for coffee lovers!
-
Toffee Crunch: Sprinkle some crushed toffee pieces between layers for an exciting crunch, providing a delightful contrast with the smoothness of the whipped cream.
-
S’mores Style: Swap the Biscoff cookies for graham crackers and add a layer of mini marshmallows and melted chocolate for a nostalgic s’mores-inspired treat.
As you explore these variations, you might also want to check out our Sugar Cookie Cheesecake for another sweet delight or the refreshing No-Bake Lemon Blueberry Cream Cake for a zesty alternative. Happy Baking!
How to Store and Freeze No-Bake Cookie Butter Icebox Cake
Fridge: Store leftovers tightly wrapped in the loaf pan in the fridge for up to 3 days. This helps maintain the cake’s delightful texture and allows the flavors to continue melding.
Freezer: For longer storage, wrap the whole cake tightly in plastic wrap, then place it in an airtight container. It can be frozen for up to 1 month; thaw overnight in the refrigerator before serving.
Reheating: If you enjoy a slightly soft texture, let the cake sit at room temperature for about 15 minutes before serving. This enhances the creamy layers of the No-Bake Cookie Butter Icebox Cake.
Serving Tip: Always serve with a drizzle of warmed cookie butter and a sprinkle of crushed cookies for a delightful finish!

No-Bake Cookie Butter Icebox Cake Recipe FAQs
How do I choose ripe ingredients for the No-Bake Cookie Butter Icebox Cake?
Absolutely! For this recipe, the most crucial ingredient is the heavy cream, which should be fresh and cold to whip properly. If you’re substituting with mascarpone or cream cheese, ensure they’re also fresh and creamy. For the Biscoff spread, look for ones that are smooth and creamy, without any visible separation or dark spots, indicating it’s past its prime.
How should I store my No-Bake Cookie Butter Icebox Cake?
Very! Store your leftovers tightly wrapped in plastic wrap or in an airtight container in the fridge for up to 3 days. This helps maintain that delightful texture and allows the flavors to continue melding. Just be sure to keep it covered to prevent it from absorbing any odors from the fridge.
Can I freeze the No-Bake Cookie Butter Icebox Cake?
Absolutely! To freeze, first wrap the entire cake tightly in plastic wrap, then place it into an airtight container. This will keep it fresh for up to a month. When you’re ready to serve it, move the cake to the refrigerator to thaw overnight. For an enhanced creamy texture, let it sit at room temperature for about 15 minutes before slicing.
What should I do if my whipped cream doesn’t thicken properly?
No worries! If your whipped cream isn’t thickening, try making sure your equipment is clean and that your cream is cold—not just cool. Whip it at high speed, but stop as soon as medium peaks form. If it’s too warm, it might take a bit longer to whip up. Also, using chilled bowls and beaters can help achieve that perfect consistency!
Are there any dietary considerations for this No-Bake Cookie Butter Icebox Cake?
Definitely! For those with allergies, be aware that Biscoff cookies may contain gluten and nuts, so consider using gluten-free graham crackers or alternative cookies. If you’re making it nut-free, you can swap in sunflower butter for the cookie butter. Always check ingredients on products to ensure they suit your dietary needs. It’s easy to tailor this recipe to your guests’ needs!
Can I make this cake ahead of time?
You bet! This No-Bake Cookie Butter Icebox Cake is perfect for make-ahead preparation. It can be refrigerated for up to 3 days or frozen for longer storage. Just remember to allow enough time for it to chill and for the flavors to meld beautifully—24 hours is ideal!

No-Bake Cookie Butter Icebox Cake: Dreamy Dessert Delight
Ingredients
Equipment
Method
- In a stand mixer fitted with a whisk attachment, pour 2 cups of heavy cream. Whip on medium speed for about 2-3 minutes or until medium peaks form.

- Slowly add ½ cup of Lotus Biscoff spread to the whipped cream, along with 8 ounces of mascarpone cheese, 1 teaspoon of vanilla extract, a pinch of kosher salt, and ½ cup of confectioner’s sugar. Using a spatula, gently fold the mixture until fully combined and smooth.
- Line a standard loaf pan with plastic wrap, ensuring there's enough overhang to cover the top later.
- Start by placing a single layer of Lotus Biscoff cookies at the bottom of the prepared pan, and spread a generous layer of the cookie butter cream mixture over the cookies.
- Cover the loaf pan tightly with plastic wrap to seal in the flavors. Place the pan in the refrigerator and let it chill for at least 24 hours.
- After chilling, remove the cake from the refrigerator using the overhanging plastic wrap. Place the cake upside down on a serving platter.
Leave a Reply