
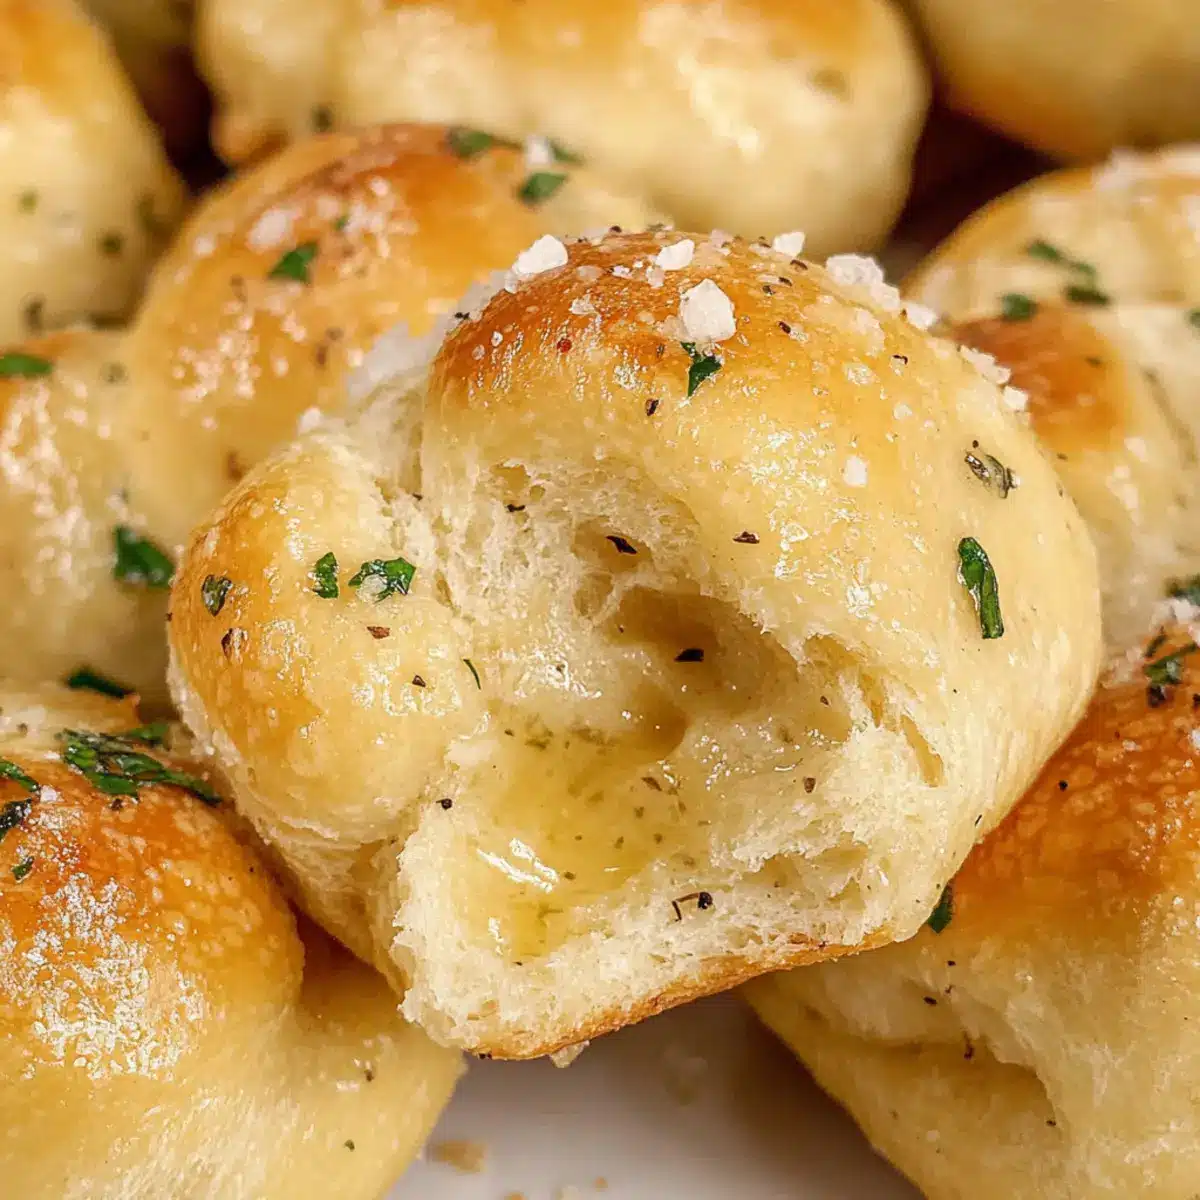
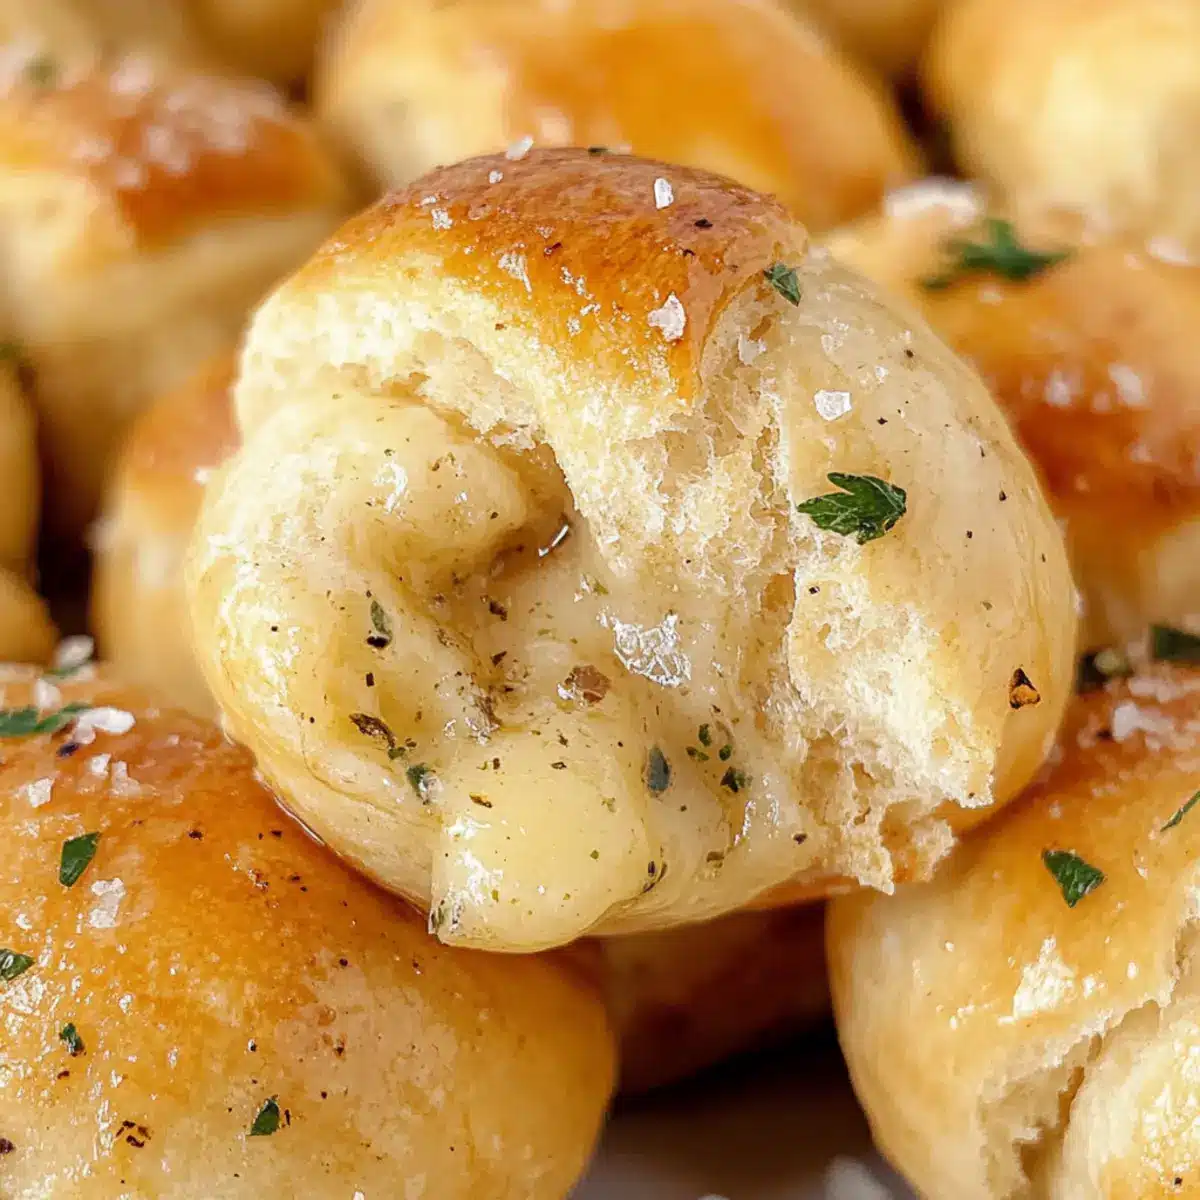
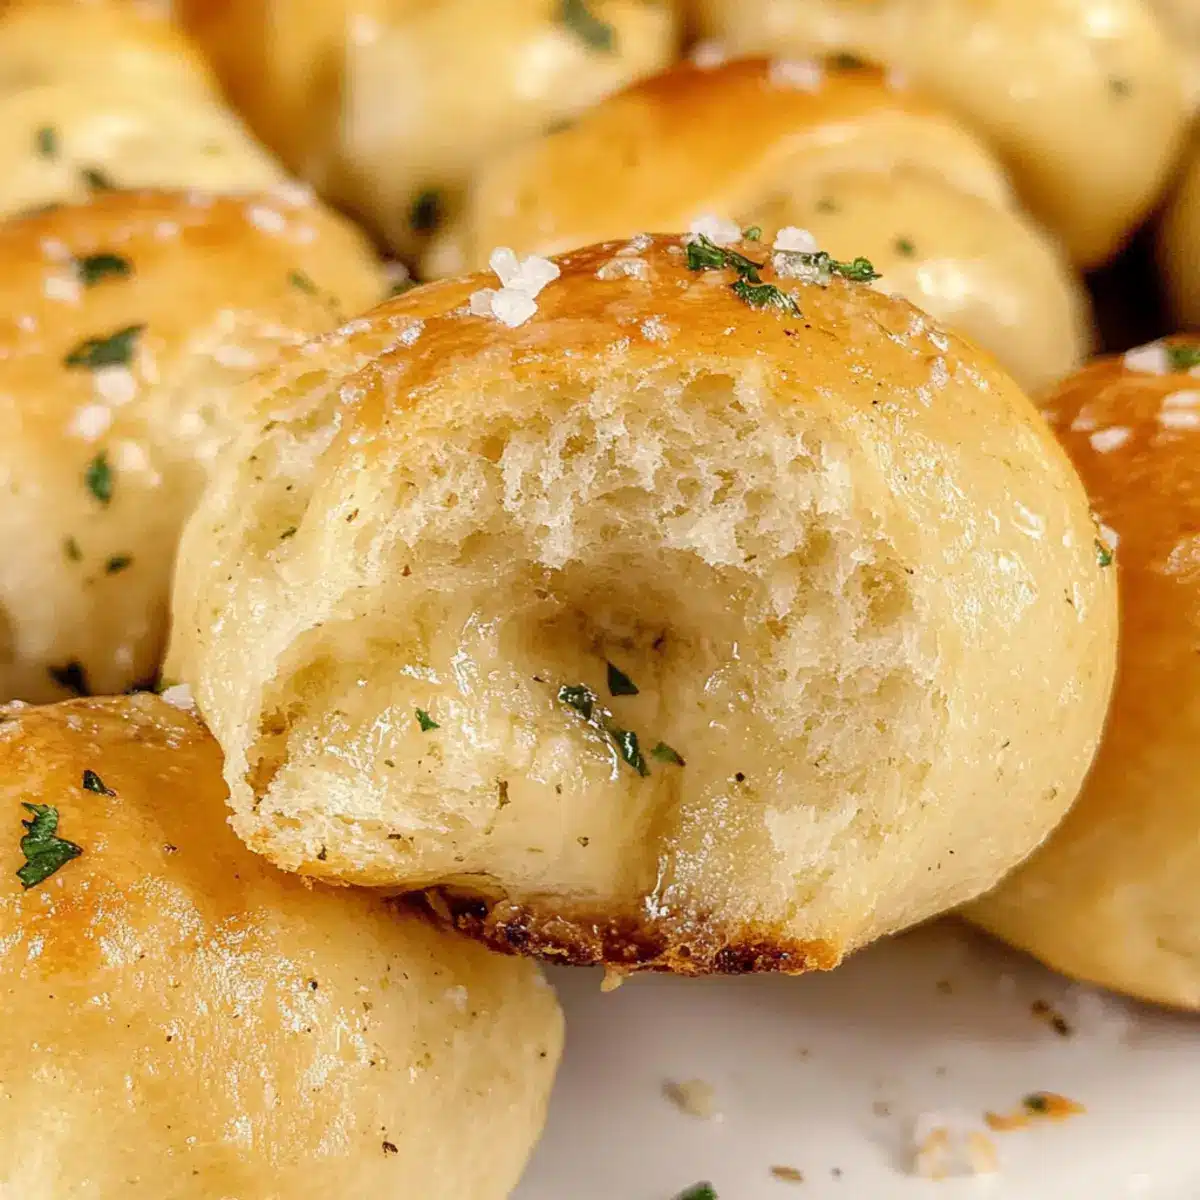
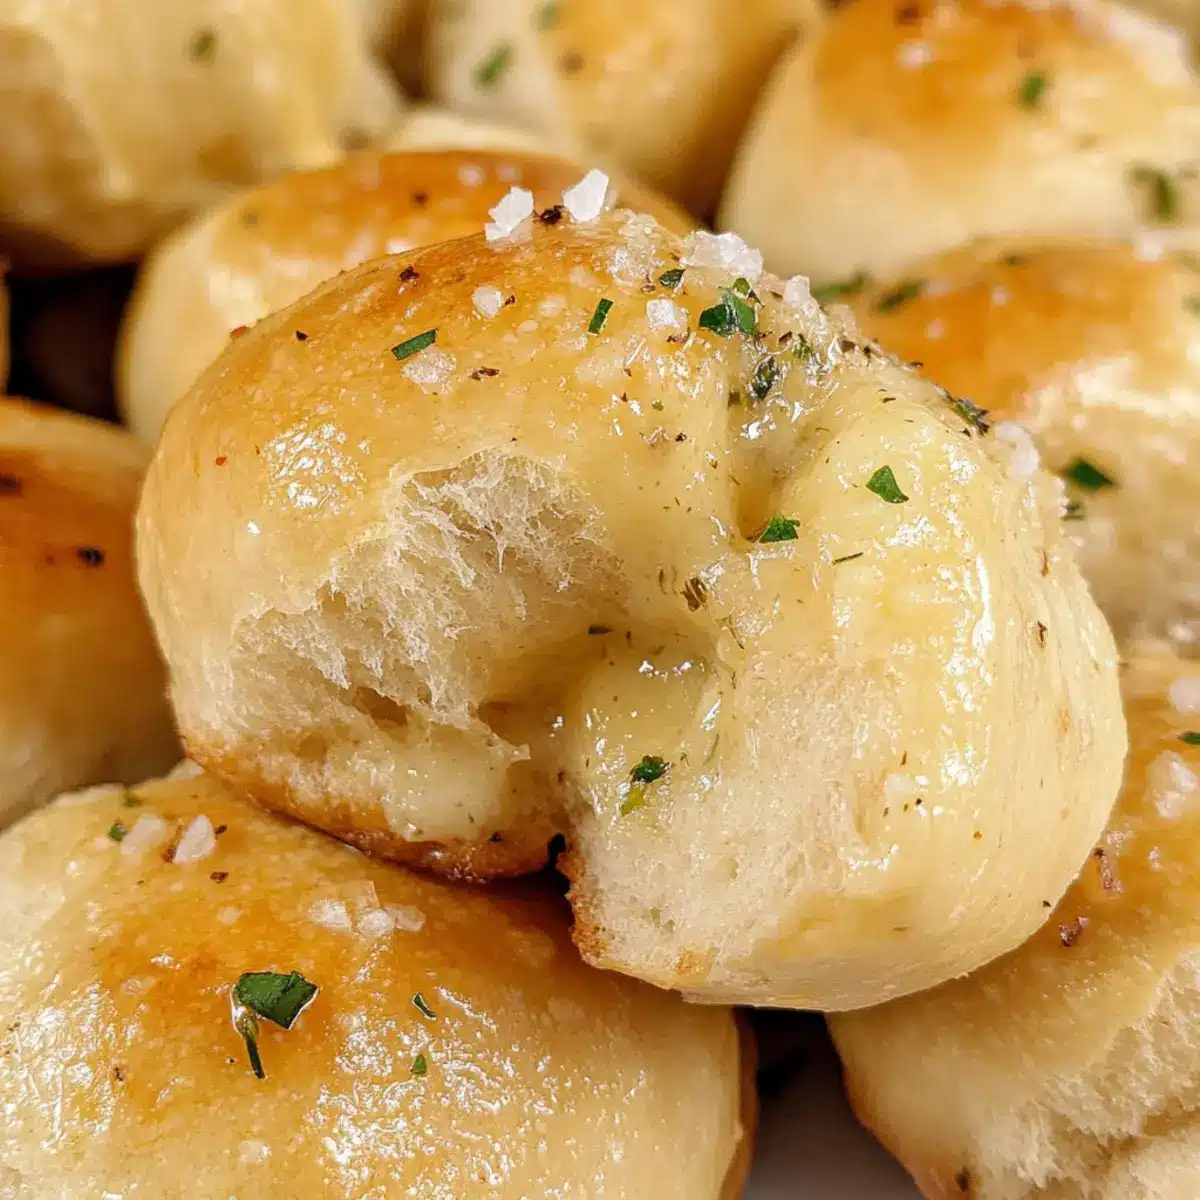
The warm, tantalizing aroma of freshly baked bread has a way of transporting me back to my childhood kitchen, where laughter and delicious smells danced in the air. Today, I’m excited to share my homemade garlic knots recipe, the ultimate comfort food that blends simplicity with flavor. These buttery, soft rolls are not only easy to whip up, but they also make for the perfect side dish to any Italian meal, capturing the essence of cozy family dinners. Plus, you can customize them with fun variations like a sprinkle of parmesan or a dip in marinara sauce. Could anything be more satisfying than pulling a tray of these golden knots from your oven? Let’s dive into making these delightful bites!
Why Make Homemade Garlic Knots?
Irresistible Texture: These garlic knots are the perfect blend of softness and chewiness; every bite is a delight.
Flavor Explosion: Coated in a rich garlic butter sauce, they deliver mouthwatering flavors that elevate any meal.
Easy to Customize: Whether adding parmesan cheese or serving with marinara, you can make them your own!
Perfect for Sharing: Ideal as an appetizer or side, these knots are guaranteed crowd-pleasers, bringing smiles to dinner parties.
Quick and Simple: Even beginners can whip these up in no time, making them a go-to recipe for busy weeknights or family gatherings! Don’t forget to pair them with a warm bowl of Roasted Garlic Tomato soup for a comforting meal!
Homemade Garlic Knots Ingredients
For the Dough
• Warm Water – Activates the yeast; use lukewarm water for optimal growth.
• Sugar – Feeds the yeast and helps with browning; any granulated sugar works as a substitute.
• Vegetable Oil – Adds moisture; can be substituted with olive oil for extra flavor.
• Coarse Sea Salt – Enhances flavor; regular table salt can be used in a pinch.
• Yeast – Leavens the bread for a soft texture; instant yeast can replace active dry yeast without pre-dissolving.
• Egg – Provides structure and richness; for a vegan option, use a flax egg or applesauce.
• Flour – Creates the primary structure; all-purpose flour is recommended, but whole wheat can be used for a denser knot.
For the Garlic Butter
• Butter – The base for the sauce, adding richness; substitute with olive oil for a dairy-free option.
• Garlic Cloves – Infuses flavor into the butter; garlic powder can be used as an alternative.
• Homemade Italian Seasoning – Adds herby notes; pre-mixed Italian seasoning can be substituted.
• Additional Coarse Sea Salt – Enhances the flavor of the garlic butter; sprinkle sparingly to taste.
Feel free to explore variations and make these homemade garlic knots uniquely yours!
Step‑by‑Step Instructions for Homemade Garlic Knots
Step 1: Prep the Dough
In a medium bowl, combine 1 cup of warm water, 1 tablespoon of sugar, 2 tablespoons of vegetable oil, and 1 packet of active dry yeast. Allow this mixture to sit for about 10 minutes until it becomes foamy, indicating that the yeast is activated. This foamy start is crucial for achieving that soft texture that makes homemade garlic knots irresistibly fluffy.
Step 2: Mix Dry Ingredients
In a large mixing bowl, add 2 cups of all-purpose flour and 1 teaspoon of coarse sea salt. Create a well in the center and pour in the frothy yeast mixture. Using a stand mixer fitted with a dough hook, mix on low speed until the flour is incorporated. The dough should be slightly sticky but easily form a ball as you combine the ingredients.
Step 3: Add Ingredients
Crack in 1 large egg into the dough and gradually add an additional 1 to 2 cups of flour, mixing until the dough pulls away from the sides of the bowl. Knead the dough for about 5 minutes on medium speed. This process develops the gluten, ensuring your homemade garlic knots are delightfully chewy and airy once baked.
Step 4: First Rise
Transfer the kneaded dough to a lightly greased bowl and cover it with a clean kitchen towel. Place it in a warm, draft-free area and let it rise until it has doubled in size, which takes approximately 1 hour. You’ll know it’s ready when it feels soft and puffy, a sign that your homemade garlic knots will be perfectly fluffy.
Step 5: Shape Knots
After the dough has risen, punch it down gently to remove excess air. On a floured surface, roll the dough into a long log, about 24 inches in length. Divide the dough into 12 equal pieces, then roll each piece into a snake shape and tie it into a knot. The fun part is ensuring your knots are snug but not too tight, allowing for the perfect rise.
Step 6: Second Rise
Line a baking sheet with parchment paper and place the shaped knots evenly spaced. Cover them with a towel and allow them to rise for another 20 minutes. During this time, they’ll expand, becoming soft and puffy, an essential step for achieving those light and airy homemade garlic knots.
Step 7: Bake
Preheat your oven to 375°F (190°C). Once the knots have risen, place the baking sheet in the oven and bake for 18-22 minutes or until they are golden brown and have a deliciously warm aroma wafting from your kitchen. Keep an eye on them; they should be perfectly browned and soft to the touch.
Step 8: Garlic Butter
While the knots are baking, prepare the garlic butter by melting 1/2 cup of butter in a saucepan over low heat. Stir in 4 minced garlic cloves, 1 teaspoon of Italian seasoning, and a pinch of salt. Once the knots are out of the oven, generously brush the warm garlic butter over each knot using a pastry brush to ensure that every bite is packed with flavor.
Homemade Garlic Knots Variations
Feeling adventurous in the kitchen? Customize your homemade garlic knots with these delightful twists!
-
Cheesy Garlic Knots: Sprinkle shredded mozzarella or parmesan cheese on top before baking for an ooey-gooey delight. The bubbling cheese melds beautifully with the garlic butter!
-
Spicy Garlic Knots: Add a pinch of red pepper flakes to the garlic butter for a zesty kick. It’s a simple way to bring the heat and wake up your taste buds.
-
Herbed Delight: Mix in fresh chopped herbs like rosemary or basil into your dough or garlic butter. Fresh herbs infuse the knots with vibrant flavors that are simply irresistible.
-
Garlic Lovers: Replace some or all of the fresh garlic with roasted garlic for a sweeter, mellow garlic flavor. Roasting brings a whole new depth, making every bite utterly divine.
-
Vegan Twist: Use a flax egg or applesauce instead of a regular egg, and swap butter for olive oil. These small changes offer a delicious vegan version that still satisfies.
-
Nutty Crunch: For added texture, sprinkle sunflower seeds or pine nuts on the knots before baking. This gives a delightful crunch and a unique flavor that pairs remarkably well with the soft dough.
-
Dip It Good: Serve your garlic knots with a side of creamy ranch or zesty marinara sauce for unique, flavorful dipping experiences. A little something extra never hurts!
Feel free to explore variations and make these homemade garlic knots uniquely yours. They pair perfectly with a warm bowl of Garlic Bread Grilled cheese for a delightful meal out on the table!
Storage Tips for Homemade Garlic Knots
Room Temperature: Store leftover homemade garlic knots in an airtight container at room temperature for up to 3 days to maintain their freshness.
Fridge: If you want to keep them longer, refrigerate them in a sealed container for up to 5 days. However, be aware that they may lose some softness.
Freezer: For longer storage, freeze individual knots in a single layer on a baking sheet. Once firm, transfer them to a freezer bag for up to 2 months.
Reheating: To enjoy the best texture, reheat garlic knots in the oven at 350°F for about 5-10 minutes, or microwave for a few seconds for a quick snack!
Expert Tips for Homemade Garlic Knots
-
Yeast Activation: Ensure your warm water is just above room temperature; too hot can kill the yeast, leading to dense knots instead of fluffy ones.
-
Knot Technique: Don’t tie your knots too tightly; they need space to expand in the oven. A loose knot will yield a lighter, airier texture.
-
Ideal Rising Environment: Let your dough rise in a warm, draft-free place. The warmth encourages yeast activity, helping your homemade garlic knots achieve the perfect rise.
-
Brush While Warm: Always brush the garlic butter on your knots right after baking. This allows for maximum absorption and a burst of flavor in every bite.
-
Extra Flavor: Don’t hesitate to experiment with variations like adding cheese or herbs. You can truly personalize these homemade garlic knots to suit your family’s tastes!
What to Serve with Homemade Garlic Knots?
The perfect meal is just a few delightful pairings away, ready to transport your taste buds to the heart of Italy.
- Marinara Sauce: A classic and tangy dip, it complements the buttery knots beautifully, enhancing their flavors.
- Creamy Parmesan Risotto: This rich and velvety dish pairs wonderfully, balancing the softness of the garlic knots with creamy texture.
- Caesar Salad: The crisp freshness of romaine, tangy dressing, and crunchy croutons contrast nicely with the knots’ soft, buttery goodness.
- Roasted Vegetables: The caramelized sweetness of seasonal veggies offers a wonderful balance and adds color to your plate.
- Italian Sausage: Juicy, flavorful sausages bring a savory heartiness, making for a satiating meal when enjoyed together.
- Red Wine: A glass of Chianti adds a robust, fruity character that complements the garlic and buttery notes of your garlic knots.
- Tiramisu: For dessert, this classic Italian treat completes the meal with its rich flavors and mascarpone cream, a blissful end note.
- Pesto Dip: A scoop of vibrant basil pesto provides fresh, herbal flavors that elevate each bite of garlic knot in a delightful way.
- Stuffed Peppers: These colorful, savory treats filled with rice and vegetables offer a satisfying companion, perfect for an Italian feast.
- Garlic Butter Shrimp: Juicy shrimp sautéed in garlic butter create a complementary dish, echoing the flavors found in the garlic knots.
Make Ahead Options
Preparing these Homemade Garlic Knots ahead of time is a fantastic way to save time during busy weeknights! You can prepare the dough and shape the knots up to 24 hours in advance. Simply follow the recipe up through the second rise, then place the shaped knots on a parchment-lined baking sheet, cover them with plastic wrap, and refrigerate. This allows the flavors to deepen while keeping them fresh. When you’re ready to bake, let the knots sit at room temperature for about 30 minutes before preheating the oven, then bake as instructed. Enjoy the same delicious, fluffy texture without the last-minute fuss!
Homemade Garlic Knots Recipe FAQs
What kind of water should I use for the dough?
Absolutely! Use lukewarm water when activating your yeast—ideal temperatures are around 100°F to 110°F. This warmth helps the yeast to froth up beautifully. Too hot, and you risk killing the yeast; too cold, and it won’t activate properly, leading to dense knots.
How should I store leftover garlic knots?
For best results, store leftover homemade garlic knots in an airtight container at room temperature for up to 3 days. If you’d like to keep them longer, refrigeration is an option, but be aware that they may lose some of their delightful softness. Just remember to reheat them gently for a lovely fresh taste!
Can I freeze homemade garlic knots?
Absolutely, you can freeze the knots! To ensure they retain their tasty goodness, freeze them individually on a baking sheet in a single layer for about 1-2 hours. Once firm, transfer them to a freezer bag, where they can last up to 3 months. When ready to enjoy, bake them straight from the freezer by adding a few extra minutes to your baking time.
What if my dough isn’t rising?
If your dough isn’t rising, several factors could be at play. First, check the freshness of your yeast; expired yeast won’t work well. Ensure you used warm water (not hot) to activate the yeast—remember, too warm can kill it! Lastly, if your kitchen is particularly cold, try placing the bowl in a warm, draft-free area or even in an unheated oven with the light on to create a cozy rising spot.
Can I make these knots vegan?
Yes, you can make delightful vegan adaptations! Simply substitute the egg with a flax egg (1 tablespoon ground flaxseed mixed with 2.5 tablespoons water), or use unsweetened applesauce in a 1:1 ratio. Replace butter with olive oil in the garlic butter mixture. With these adjustments, you’ll still get soft, fluffy knots full of flavor!
Homemade Garlic Knots: Irresistibly Soft and Flavor-Packed
Ingredients
Equipment
Method
- In a medium bowl, combine warm water, sugar, vegetable oil, and yeast. Allow to sit for about 10 minutes until foamy.
- In a large mixing bowl, add flour and salt. Create a well and pour in the yeast mixture. Mix on low speed until incorporated.
- Crack in the egg and gradually add more flour until the dough pulls away from the sides. Knead for about 5 minutes.
- Transfer the dough to a greased bowl, cover with a towel, and let it rise in a warm place for about 1 hour until doubled.
- Punch down the dough, roll into a log, and divide into 12 pieces. Shape each piece into a knot.
- Place the knots on a lined baking sheet, cover, and let them rise for another 20 minutes.
- Preheat oven to 375°F. Bake the knots for 18-22 minutes until golden brown.
- Melt butter and stir in garlic, Italian seasoning, and salt. Brush the garlic butter over warm knots.
Leave a Reply