
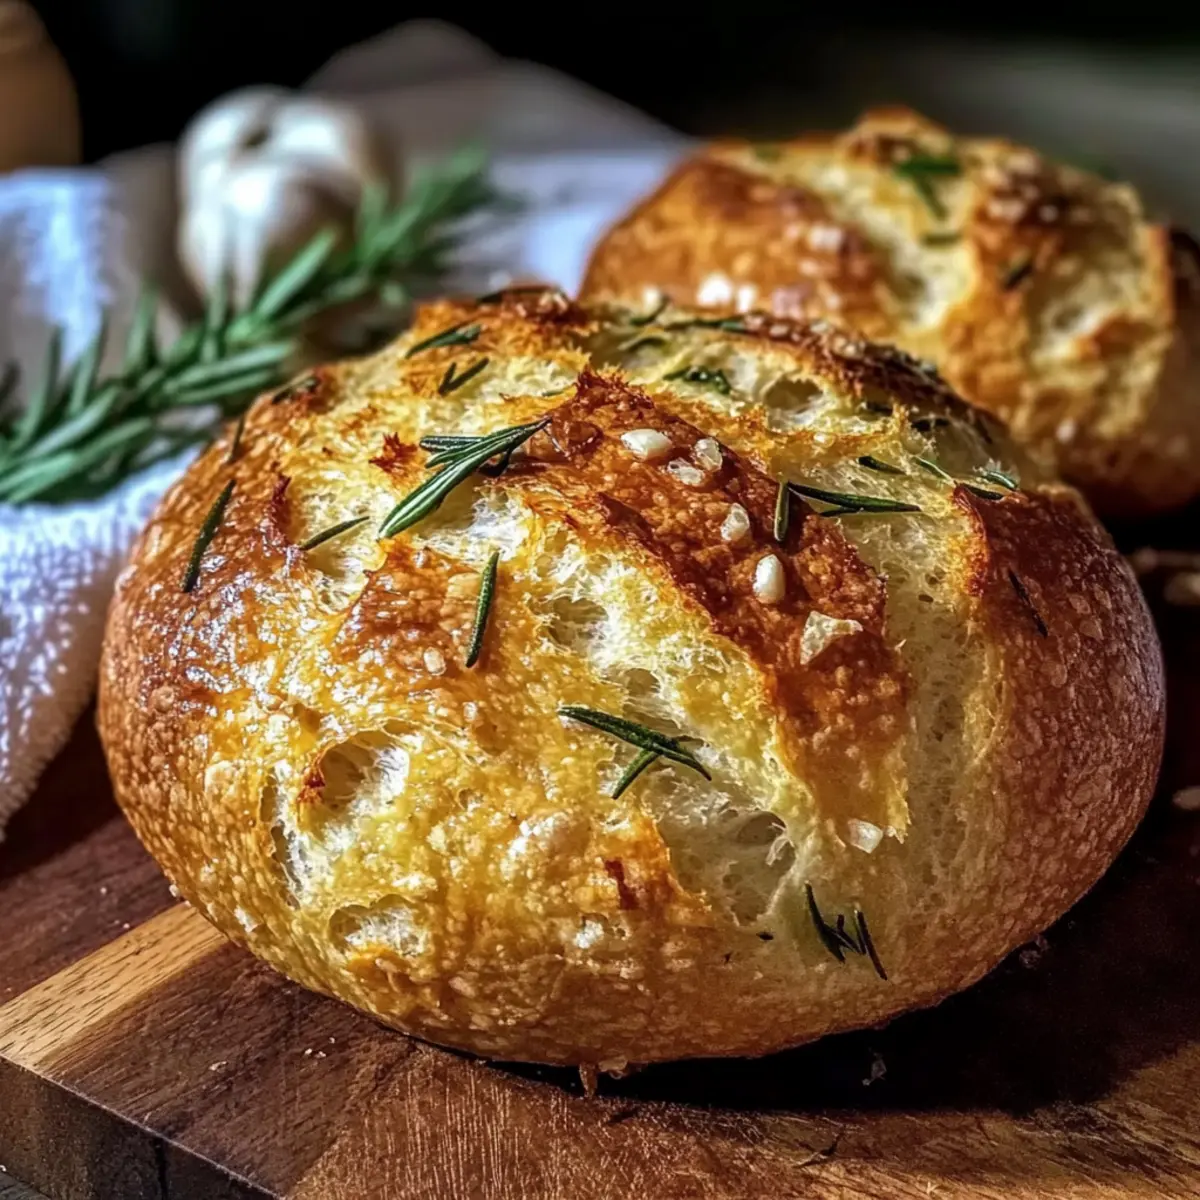
The moment I pulled this Homemade Garlic Rosemary Bread from the oven, my kitchen was alive with the warm, inviting scent of roasted garlic and fresh herbs—a sensory experience that instantly transports me to cozy family dinners long ago. This Garlic Rosemary Bread Recipe is a delightful blend of a crispy crust and a fluffy interior, making it a versatile choice for everything from casual weeknight meals to elegant brunch gatherings. With just a handful of pantry staples, this easy bread recipe is not only satisfying to make but also a true crowd-pleaser that even the busiest home chef can conquer. Imagine serving warm, irresistible slices alongside your favorite dishes or savoring them on their own! Are you ready to transform your kitchen into a fragrant bakery?
What makes this bread recipe special?
Irresistible Aroma: The moment you mix fresh garlic and rosemary, your kitchen will be filled with a comforting scent that beckons everyone to the table.
Crispy and Fluffy: Enjoy a satisfying contrast between the crispy crust and soft, airy inside—a texture that elevates any meal.
Effortless Process: Made with just a few simple ingredients, this recipe is perfect for both novice and experienced bakers alike.
Versatility: Pair it with a warm bowl of Roasted Garlic Tomato soup or serve alongside a hearty stew for an unforgettable dining experience.
Crowd-Pleaser: Impress your guests at dinner parties or casual get-togethers; it’s a sure way to enhance any meal!
Fun Variations: Feel free to get creative by adding cheese or other herbs—make each loaf uniquely yours!
Garlic Rosemary Bread Ingredients
-
For the Dough
• All-purpose flour – Provides structure; can substitute with a 1:1 gluten-free blend for a gluten-free version.
• Warm water – Activates yeast; ensure it’s warm (not hot) for optimal yeast activation.
• Active dry yeast – Leavening agent; verify freshness for proper rise.
• Salt – Enhances flavor; essential for overall taste.
• Olive oil – Adds moisture and flavor; can be swapped with melted butter for a different taste. -
For the Flavor
• Fresh garlic – Adds robust flavor; use fresh for the best sensory experience; dried garlic can work in a pinch.
• Fresh rosemary – Provides aromatic taste; if unavailable, use dried rosemary at half the amount.
This Garlic Rosemary Bread Recipe not only fills your kitchen with irresistible aromas but also promises a delightful texture that will wow your guests!
Step‑by‑Step Instructions for Garlic Rosemary Bread Recipe
Step 1: Prepare the Yeast Mixture
In a small bowl, combine 1 cup of warm water (about 110°F) and 2 teaspoons of active dry yeast. Let this mixture sit for approximately 5 minutes, or until it becomes frothy and bubbly, which indicates that the yeast is active. This is a crucial step in ensuring your Garlic Rosemary Bread rises beautifully.
Step 2: Combine the Dry Ingredients
In a large mixing bowl, whisk together 3 cups of all-purpose flour and 1 teaspoon of salt. This helps evenly distribute the salt, which enhances the flavor of your Garlic Rosemary Bread. Make a well in the center and pour in the activated yeast mixture along with 2 tablespoons of olive oil to add moisture and flavor.
Step 3: Mix and Form the Dough
Using a wooden spoon or your hands, mix the ingredients until they start to come together to form a cohesive dough. It will be slightly sticky; don’t worry! Once combined, transfer the dough to a floured surface and knead for about 10 minutes until it is smooth and elastic, which is key to achieving a fluffy texture in your bread.
Step 4: First Rise
Place the kneaded dough in a greased bowl, turning it to coat all sides with oil. Cover the bowl with a clean kitchen towel and let it rise in a warm place for about 1 hour, or until the dough has doubled in size. You will know it’s ready when it feels light and airy to the touch; this fluffy texture is essential for your Garlic Rosemary Bread.
Step 5: Shape the Dough
After the first rise, gently punch down the dough to release air bubbles. On a floured surface, shape it into a loaf by flattening it into a rectangle, then rolling it tightly from one end to the other. Place the formed loaf seam side down in a greased 9×5 inch loaf pan, ready for its second rise.
Step 6: Second Rise and Preheat the Oven
Cover the loaf with the kitchen towel again and let it rise for another 30 minutes in a warm spot. Meanwhile, preheat your oven to 375°F (190°C). The dough should puff up nicely, indicating that it’s prepared for baking, ensuring that your Garlic Rosemary Bread will achieve the perfect rise and texture.
Step 7: Bake the Bread
Once the bread has risen, place a small oven-safe dish filled with water on the bottom rack to create steam, which helps achieve a crispy crust. Bake the loaf in the preheated oven for 30-35 minutes, checking for a golden brown color on top. You’ll know it’s done when you tap the bottom of the loaf and hear a hollow sound.
Step 8: Cool Before Slicing
Remove the Garlic Rosemary Bread from the oven and let it cool in the pan for about 10 minutes before transferring it to a wire rack. Allow it to cool completely before slicing to prevent a gummy texture. The delightful aroma will invite everyone to enjoy this freshly baked loaf!
What to Serve with Homemade Garlic Rosemary Bread
The perfect accompaniment can elevate your delicious bread into a memorable meal, creating a warming atmosphere for any occasion.
-
Creamy Tomato Soup: The rich, velvety texture of tomato soup pairs beautifully with the crunchy garlic bread, creating a comforting, classic combination. Dip warm slices into the soup for a delightful experience!
-
Garden Salad: A fresh, vibrant garden salad brings a crisp and refreshing contrast to the savory flavors of the bread, making it an ideal side dish for a light lunch or dinner. Toss in some vinaigrette for an appealing tang!
-
Roasted Vegetables: The sweet, smoky flavors of roasted vegetables complement the herby notes in the bread, adding another layer of complexity and warmth to your meal. Try zucchini, bell peppers, and carrots for a medley!
-
Grilled Cheese Sandwich: Combining homemade garlic rosemary bread with gooey cheese like sharp cheddar creates a crispy sandwich that oozes comfort food vibes, perfect for cozy nights spent indoors.
-
Olive Oil Dipping Sauce: A simple blend of olive oil, balsamic vinegar, and Italian herbs makes a fantastic dipping sauce to enjoy with warm, crusty bread, highlighting its flavors while enhancing the experience.
-
Herbed Butter: Whip up some herb-infused butter for an irresistible spread on warm bread. A combination of garlic, rosemary, and a hint of lemon zest will complement every bite beautifully!
-
Red Wine: Pair your meal with a glass of full-bodied red wine that harmonizes with the rich flavors of garlic and rosemary, making your dining experience truly exquisite.
With these delightful pairings, your homemade garlic rosemary bread will not only stand out but also bring joy and warmth to your table!
Make Ahead Options
Homemade Garlic Rosemary Bread is perfect for busy home cooks looking to save time during the week! You can prepare the dough up to 24 hours in advance—just follow the instructions up to the first rise, then cover the bowl with plastic wrap and refrigerate. This allows the flavors to develop beautifully! When you’re ready to bake, simply take it out, let it come to room temperature for about 30 minutes, shape it into a loaf, and allow it to rise for 30 minutes before baking as directed. To maintain the quality, make sure to keep it tightly covered to prevent drying out. Enjoy the comfort of freshly baked Garlic Rosemary Bread with minimal last-minute effort!
Garlic Rosemary Bread Recipe Variations
Feel free to explore delightful twists to make this Garlic Rosemary Bread even more personal and enjoyable!
-
Cheesy Delight:
Add grated cheese like parmesan or mozzarella into the dough for a rich, cheesy flavor. Picture the gooey, melted goodness with each slice! -
Herb Infusion:
Substitute fresh rosemary with herbs like thyme or oregano for unique flavor profiles. Each herb brings a different aromatic journey—perfect for the herb lover. -
Mediterranean Touch:
Incorporate chopped sun-dried tomatoes or olives into your dough for a savory Mediterranean flair. The tangy notes complement garlic beautifully, adding depth to your bread. -
Nutty Crunch:
Add a handful of toasted walnuts or sunflower seeds for extra crunch and flavor. The nutty texture provides a lovely contrast to the soft, fluffy bread. -
Spicy Twist:
Mix in a teaspoon of red pepper flakes for a hint of heat. This little kick will awaken your taste buds, making each bite exciting. -
Sweet Surprise:
For a sweeter version, add a tablespoon of honey or maple syrup in the dough. The slight sweetness will contrast wonderfully with the garlic, creating a unique flavor experience. -
Garlic Butter Finish:
After baking, brush the warm loaf with melted garlic butter for an extra garlic hit. Imagine the flavor busting in your mouth with every slice! -
Veggie Infusion:
Fold in finely chopped bell peppers or zucchini into the mixture for a colorful, nutritious touch. Tasty and healthy—what’s not to love?
Elevate your baking experience with these variations and take delight in how each twist can completely change the game! Don’t forget to serve your stunning bread alongside a bowl of comforting Roasted Garlic Tomato soup or paired with a delicious Garlic Butter Steak. Enjoy!
Storage Tips for Garlic Rosemary Bread
Room Temperature: Wrap the bread in a clean kitchen towel and store it at room temperature for up to 2 days. This helps maintain its crispy crust and soft interior.
Freezer: For longer storage, slice the garlic rosemary bread and place it in an airtight container or a resealable freezer bag. It can be frozen for up to 3 months; toast individual slices as needed.
Reheating: To enjoy warm slices, simply toast from frozen or reheat in the oven at 350°F (175°C) for 10-15 minutes. This revitalizes the crispy exterior and fluffy interior of your bread.
Keep Fresh: Avoid refrigerating the bread, as this can dry it out quickly. Instead, store in a cool, dry place to preserve flavor and texture.
Expert Tips for Garlic Rosemary Bread Recipe
-
Fresh Ingredients: Always use fresh garlic and rosemary for the best flavor. Stale or dried herbs can diminish the delicious taste of your Garlic Rosemary Bread.
-
Knead It Right: Knead the dough for at least 10 minutes until smooth and elastic. This step is key to achieving that fluffy texture we love in homemade bread.
-
Perfect Rising: Ensure your yeast mixture is activated properly. If it doesn’t become frothy, the yeast may be inactive, leading to dense bread.
-
Steam for Crispiness: For a crispy crust, always place an oven-safe dish of water on the bottom rack while baking. This technique is a game-changer!
-
Cool Completely: Let your bread cool fully before slicing, as this prevents a gummy texture and enhances the overall bite. Trust me, it’s worth the wait!
Garlic Rosemary Bread Recipe FAQs
What garlic is best to use for this recipe?
Absolutely, use fresh garlic for the best flavor! Fresh garlic yields a robust taste and aroma that will beautifully enhance your Garlic Rosemary Bread. In a pinch, you can use dried garlic, but I always recommend fresh for that extra sensory experience.
How should I store the Garlic Rosemary Bread?
Wrap your cooled bread in a clean kitchen towel and keep it at room temperature for up to 2 days. This method helps maintain its crispy crust and fluffy interior. If you want to store it longer, slice the bread and place it in an airtight container or resealable freezer bag. It can last in the freezer for up to 3 months!
Can I freeze Garlic Rosemary Bread? How?
Yes, you can! Let the bread cool completely, then slice it for easier thawing. Place the slices in a single layer on a baking sheet to freeze for about 1 hour. Once frozen, transfer the slices to a resealable freezer bag, removing as much air as possible. This method ensures you have individual slices ready for toasting whenever you crave that warm, homemade goodness.
What should I do if my bread doesn’t rise?
If your bread doesn’t rise, the yeast likely wasn’t activated properly. Make sure your water is warm (about 110°F or 43°C) but not hot, as hot water can kill the yeast. Also, check the expiration date of your yeast; using fresh yeast is crucial for a good rise. If your dough feels dense after kneading, give it a little extra time to rise in a warm spot to see if it puffs up.
Is there a gluten-free option for this Garlic Rosemary Bread?
Absolutely! You can use a 1:1 gluten-free flour blend as a substitute for all-purpose flour in this Garlic Rosemary Bread Recipe. Ensure the blend you choose includes xanthan gum for a better texture, as it helps to mimic the elasticity of gluten.
Can I use dried rosemary instead of fresh?
Very! If you can’t find fresh rosemary, you can use dried rosemary at about half the amount. This way, you still get that aromatic flavor without losing the essence of your Garlic Rosemary Bread. Just remember that dried herbs are more concentrated than fresh ones!
Garlic Rosemary Bread Recipe That Will Wow Your Guests
Ingredients
Equipment
Method
- In a small bowl, combine warm water and active dry yeast. Let sit for about 5 minutes until frothy.
- In a large mixing bowl, whisk together flour and salt. Make a well and pour in the yeast mixture and olive oil.
- Mix until it forms a cohesive dough, then knead for about 10 minutes until smooth and elastic.
- Place the kneaded dough in a greased bowl, cover with a towel, and let rise in a warm place for about 1 hour.
- After the rise, punch down the dough and shape it into a loaf, placing it seam side down in a greased loaf pan.
- Cover with a towel and let it rise again for 30 minutes. Preheat oven to 375°F.
- Bake the loaf for 30-35 minutes until golden brown and sounds hollow when tapped.
- Cool the bread in the pan for 10 minutes before transferring to a wire rack to cool completely.
Leave a Reply