
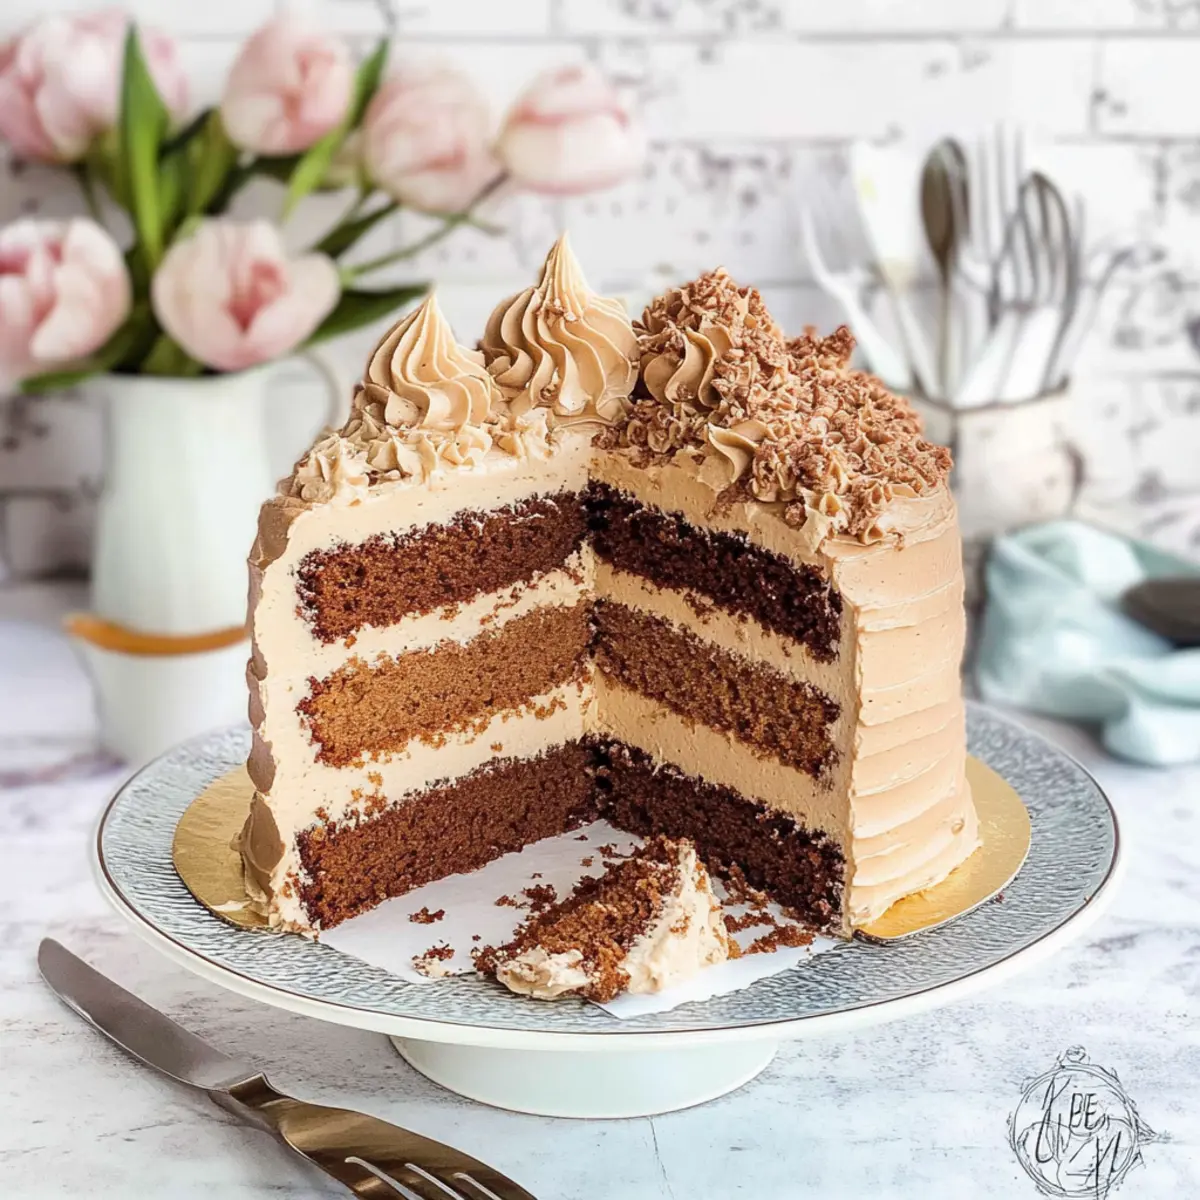
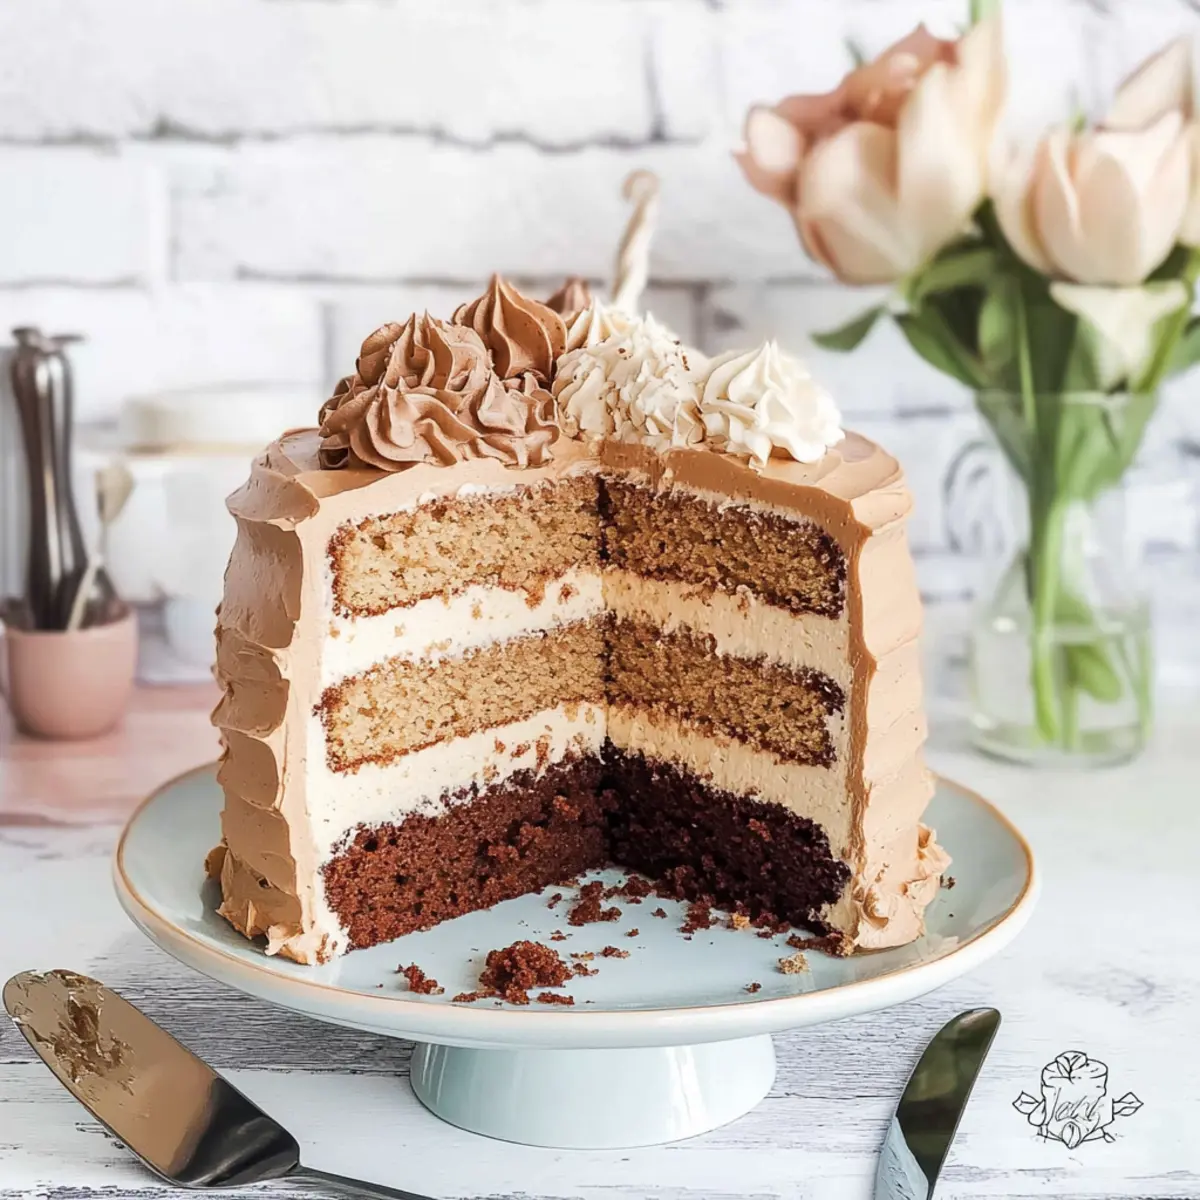
When I took my first bite of this Tri-Flavor Coffee Layer Cake, it felt like stepping into a cozy café, but from the comfort of my own kitchen. This luscious cake intertwines the rich notes of latte, mocha, and Americano into three distinct sponge layers, creating a visually stunning masterpiece destined to impress not just coffee aficionados, but anyone who appreciates a homemade dessert. It’s made with simple ingredients and packed with espresso flavor, making it both an indulgent treat and a fun baking project. Plus, it’s perfect for gatherings, as each slice tells its own tasty story. Ready to elevate your dessert game and bask in the compliments? Let’s get started!
Why is this Coffee Flavoured Cake irresistible?
Decadent, Coffee Bliss: Each layer of this stunning cake brings a different coffee delight, making it a tour de force for your taste buds.
Elevated Baking Experience: With straightforward instructions, even novice bakers will feel like pros in the kitchen.
Versatile Indulgence: Whether it’s for a casual family dinner or a fancy gathering, this cake is sure to impress.
Perfectly Moist: The combination of espresso and quality ingredients guarantees a rich, moist cake that pairs beautifully with your favorite latte.
Beautiful Presentation: Its three delightful layers look as good as they taste, making it a centerpiece at any occasion.
Looking for more delightful baking adventures? Don’t miss out on these treats like Pistachio Coffee Cake and Chai Cake Brown, which also promise to satisfy your sweet cravings!
Coffee Flavoured Cake Ingredients
• Perfect for your next baking adventure!
For the Cake Layers
- Butter: 180 g/6½ oz – Provides richness and moisture; opt for unsalted butter for better control over salt levels.
- Caster Sugar: 180 g/6½ oz – Adds sweetness and contributes to the cake’s structure; can substitute with granulated sugar if unavailable.
- Eggs: 3 large – Binds the ingredients and helps in leavening; choose free-range eggs for the best flavor.
- Plain (All-Purpose) Flour: 180 g/6½ oz – Provides structure; ensure it’s measured accurately for the best results.
- Baking Powder: 1½ tsp – A leavening agent that helps the cake rise; make sure it’s fresh for maximum effectiveness.
- Instant Coffee Granules: 3 tbsp dissolved in water – Infuses the cake with coffee flavor; feel free to use your favorite instant coffee brand.
- Cocoa Powder: 1 tbsp – Enhances the mocha flavor; can be omitted if you prefer a lighter coffee flavor.
- Vanilla Extract: ½ tsp – Adds depth of flavor; use pure extract for a more natural taste.
For the Swiss Meringue Buttercream
- Egg Whites: 6 large – Creates a stable meringue base; ensure no yolk is present for the best whipping results.
- White Sugar: 400 g/2 cups – Sweetens and stabilizes the buttercream; caster or granulated sugar works well.
- Butter: 450 g/2 cups – Contributes to the creamy texture; be sure to soften before use.
Step‑by‑Step Instructions for Coffee Flavoured Cake
Step 1: Preheat the Oven
Begin by preheating your oven to 170°C (325°F). This ensures the temperature is just right for baking the coffee flavoured cake layers, giving them the perfect rise and texture. While the oven heats, gather your ingredients and equipment, including three 6-inch round cake pans for baking.
Step 2: Prepare the Cake Pans
Grease and line your three cake pans with parchment paper, ensuring the bottoms and sides are well-prepped to prevent sticking. Use a little butter or oil to grease the pans before placing the parchment. This is essential for a smooth release of each layer when your delicious coffee flavoured cake is baked to perfection.
Step 3: Cream the Butter and Sugar
In a mixing bowl, cream together 180 grams of softened unsalted butter and 180 grams of caster sugar. Use an electric mixer on medium speed for about 4–5 minutes until the mixture is light and fluffy, turning pale in color. This step incorporates air into the batter, which contributes to the cake’s airy texture.
Step 4: Incorporate the Eggs
Next, beat three large eggs in a separate jug until well mixed. Gradually add the eggs to the creamed butter and sugar mixture, incorporating one egg at a time. Mix well after each addition for about 1 minute. This helps to ensure a smooth batter for your coffee flavoured cake that binds well together.
Step 5: Mix Dry Ingredients
Sift together 180 grams of plain flour and 1½ teaspoons of baking powder into a separate bowl. This step helps to aerate the flour, ensuring the cake layers rise beautifully. Gradually fold this dry mixture into your wet batter using a spatula or wooden spoon, being careful to combine without overmixing, as this can affect the texture.
Step 6: Flavor the Batter
Divide the batter into three bowls, each designated for a different flavor. To the first bowl, add 1½ teaspoons of cooled coffee and ½ teaspoon of vanilla extract. In the second bowl, mix in 1 tablespoon of cocoa powder and 2 teaspoons of cooled coffee. In the third bowl, add just 1 tablespoon of cooled coffee. This gives each layer its unique coffee character.
Step 7: Bake the Layers
Pour each flavored batter into the prepared cake pans, spreading evenly. Place them in the preheated oven and bake for 20–23 minutes, or until a skewer inserted in the center comes out clean. Keep an eye on the cakes; they will turn a lovely golden brown when done, signaling that your coffee flavoured cake layers are ready.
Step 8: Cool the Cake Layers
Once baked, remove the cakes from the oven and let them cool in the pans for about 2 minutes. Gently transfer them to a wire rack and allow them to cool completely. This step is crucial, as it prevents the layers from becoming soggy and helps maintain their fluffy texture.
Step 9: Prepare the Swiss Meringue Buttercream
To make the buttercream, whisk six large egg whites and 400 grams of sugar in a heatproof bowl over simmering water. Stir continuously until the mixture reaches 71°C (160°F) and the sugar dissolves. This step creates a stable meringue base that gives your buttercream its lusciousness.
Step 10: Beat the Meringue
Transfer the egg white and sugar mixture to a stand mixer and beat on high speed until stiff peaks form and the mixture cools to about 25°C (77°F), which takes around 10 minutes. This fluffy meringue is essential for the silky Swiss meringue buttercream that will complement your coffee flavoured cake beautifully.
Step 11: Add Butter to the Meringue
Gradually add 450 grams of soft butter to the stiff meringue while mixing on low speed. Continue mixing until the buttercream is smooth and creamy. If desired, mix in the remaining cooled coffee to taste, enhancing the coffee flavour of your buttercream, which will add the finishing touch to the cake.
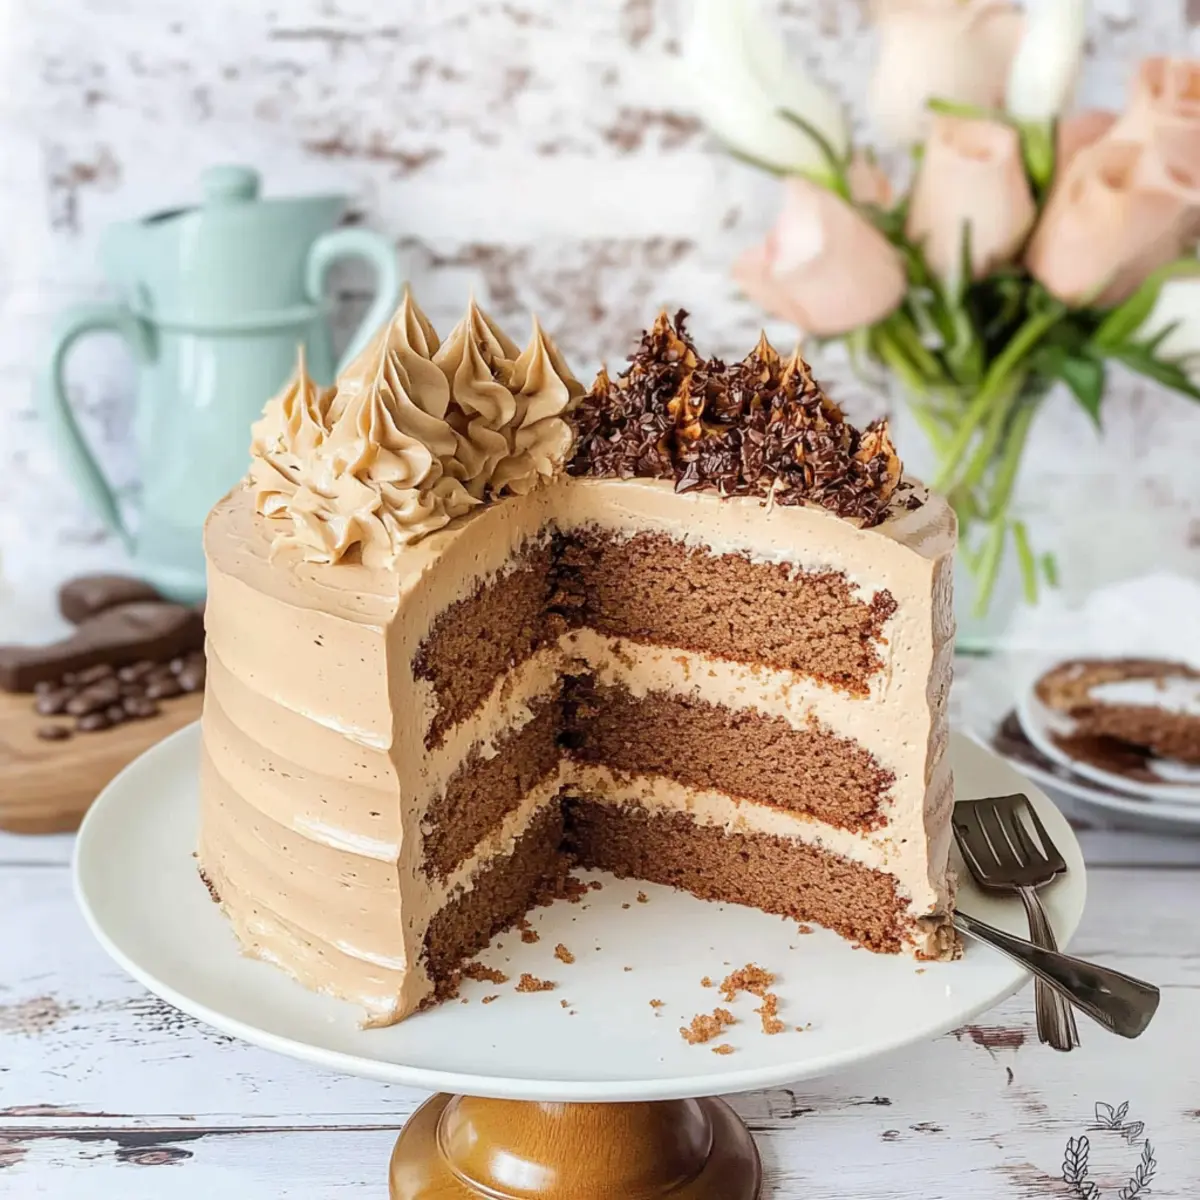
Step 12: Assemble the Cake
Begin assembling your coffee flavoured cake by placing one layer on your serving plate. Spread an even layer of buttercream on top before adding the next layer. Repeat this process with the second layer, creating a tall, beautiful stack of coffee goodness. Reserve some buttercream for the final decoration.
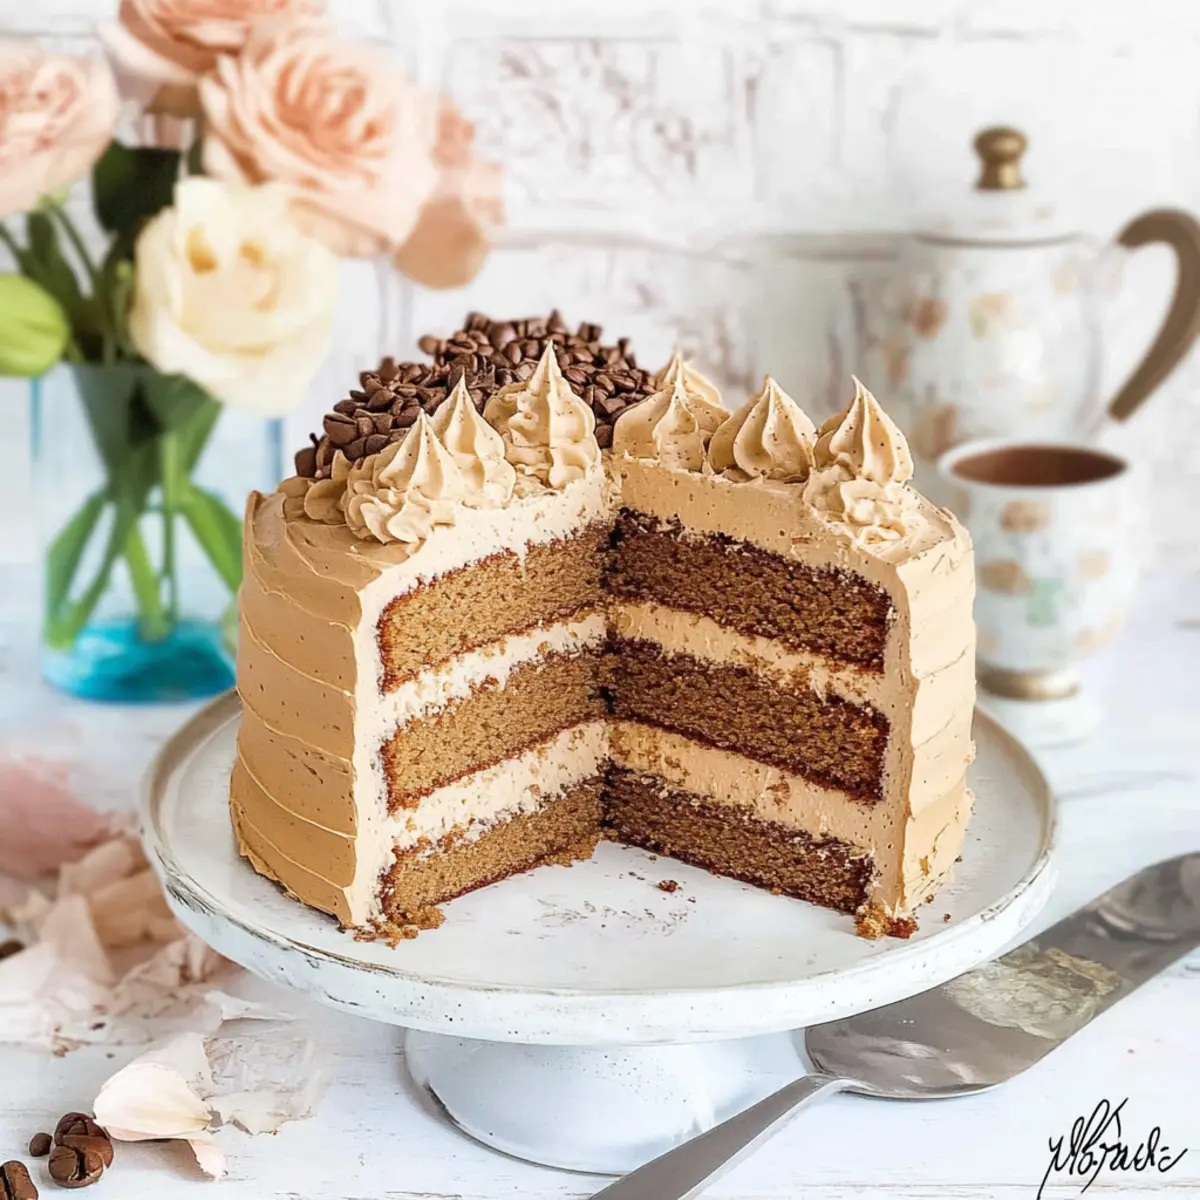
Step 13: Decorate with Buttercream
Once assembled, pipe the remaining buttercream on the top layer of your cake. Feel free to get creative with decorations; some grated chocolate or cocoa powder on top adds a lovely finishing touch. This visually appealing decoration is sure to draw attention to your stunning coffee flavoured cake.
Step 14: Serve and Enjoy
Your Tri-Flavor Coffee Layer Cake is now complete! Serve it within a few hours for the best flavor, or refrigerate it for later. If stored, remember to bring the cake back to room temperature before serving, as this enhances the taste and brings out the luscious flavours of the coffee.
What to Serve with Tri-Flavor Coffee Layer Cake
Pairing delightful sides and drinks with your cake can create a truly memorable dessert experience.
-
Flavored Lattes: A creamy caramel or vanilla latte echoes the coffee notes in the cake, enhancing the flavor journey. Pairing your cake with a latte transforms your treat into a cozy café experience right at home.
-
Chocolate Croissants: These flaky pastries add a rich chocolatey surprise that complements the mocha flavor while offering a delightful contrast in texture.
-
Fresh Fruit Salad: Bright, juicy fruits like berries or citrus add a refreshing burst that balances the richness of the cake with a bright pop of flavor.
-
Whipped Cream: A dollop of lightly sweetened whipped cream gives a luxurious touch to each slice, inviting you to indulge even more in its velvety richness.
-
Mocha Ice Cream: Combining the flavors of coffee and chocolate, a scoop of mocha ice cream alongside your cake delivers an indulgent cooling element with every bite.
-
Hazelnut Biscotti: This crunchy treat not only complements your coffee but also adds delightful texture and nutty flavor, making for a wonderful pairing with your cake.
-
Espresso: For true coffee lovers, a shot of rich espresso serves as the perfect kick of caffeine while enhancing the overall coffee experience of the dessert.
-
Caramel Sauce: Drizzling warm caramel over each slice elevates the flavor while introducing a smooth sweetness that pairs beautifully with the coffee essence.
Expert Tips for Coffee Flavoured Cake
- Measure Accurately: Use digital scales for precise ingredient measurements; this is key in ensuring your coffee flavoured cake turns out perfectly every time.
- Cool Layers Thoroughly: Let the cake layers cool completely on a wire rack to avoid sogginess and maintain their fluffy texture.
- Fresh Ingredients Matter: Ensure your baking powder is fresh and not expired; old ingredients can lead to a cake that doesn’t rise properly.
- Buttercream Consistency: If the Swiss meringue buttercream is too thin, refrigerate it briefly to firm it up before whipping again for a smoother finish.
- Prevent Sticking: Always grease and line your cake pans to prevent any sticking, regardless of non-stick claims; a clean release is crucial for a beautiful presentation.
How to Store and Freeze Coffee Flavoured Cake
Fridge: Store any leftover coffee flavoured cake in an airtight container for up to 3 days to maintain its moisture and flavor.
Freezer: If you wish to freeze the cake, wrap each layer tightly in plastic wrap, then in aluminum foil. It can be frozen for up to 3 months.
Reheating: When ready to enjoy, thaw the cake in the fridge overnight before bringing it to room temperature for the best taste and texture.
Serving: For optimal flavor, serve the cake fresh or after allowing it to return to room temperature. This makes every bite as delicious as the first!
Coffee Flavoured Cake Variations & Substitutions
Feel free to get creative with this delightful cake recipe, adapting it to your taste and preferences.
- Espresso Flavor: Substitute instant coffee with espresso for a bolder coffee taste that will elevate your cake. This swap brings an intense flavor that true coffee lovers will adore!
- Chocolate Layers: Use all-coffee layers instead of cocoa-infused ones for an incredibly rich coffee experience that appeals to purists. Imagine the delightful aroma filling your kitchen as it bakes!
- Buttercream Twist: Swap Swiss meringue buttercream for simple buttercream flavored with coffee for an easier option that still delivers on sweetness and richness, saving you time without sacrificing flavor.
- Dairy-Free Delight: Replace butter with coconut oil or vegan butter for a dairy-free version that doesn’t skimp on taste. The subtle coconut flavor can add a lovely twist to the cake!
- Nutty Addition: Fold in chopped walnuts or pecans into the batter to give your cake a delightful crunch and nutty flavor that pairs beautifully with the espresso notes.
- Cinnamon Infusion: Add a dash of cinnamon to the batter for a warm spiced profile that complements the coffee. The warmth will wrap around you like a cozy hug!
- Fruity Layer: Incorporate a layer of coffee-infused fruit compote, like raspberries or cherries, between the cake layers for a refreshing and indulgent surprise with every slice.
- Goes with Tea: Pair slices of cake with chai or flavored tea, like Earl Grey, for a delightful afternoon pick-me-up that feels like a café retreat right at home.
For more delicious baking inspiration, check out our delightful Christmas Fruit Cake with Brandy or treat yourself to a slice of Lemon Cake Melts! Enjoy your baking adventure!
Make Ahead Options
These Tri-Flavor Coffee Layer Cakes are perfect for meal prep enthusiasts! You can bake the layers up to 24 hours in advance and store them in an airtight container at room temperature to keep them fresh. Additionally, the Swiss meringue buttercream can be made up to 3 days ahead; just refrigerate it in a tightly sealed container and allow it to come to room temperature before whipping it lightly to restore its creamy texture. When you’re ready to serve, simply layer the cooled coffee-flavored cake with the buttercream, decorate as desired, and enjoy effortlessly. This way, you’ll save time on busy days while still delighting your friends and family with a stunning homemade dessert!
Coffee Flavoured Cake Recipe FAQs
How do I choose the right coffee for the cake?
Absolutely! Selecting the right coffee is key for flavor. For the best results, use a high-quality instant coffee brand you love. Experiment with different strengths to find your ideal balance—espresso or dark roast varieties can lend a richer flavor to the cake!
How should I store the coffee flavoured cake?
For sure! Once you’ve enjoyed your coffee flavoured cake, store any leftovers in an airtight container in the refrigerator for up to 3 days. This helps maintain moisture and flavor. Before serving, let it reach room temperature for the best taste experience.
Can I freeze the coffee flavoured cake?
Absolutely! To freeze, wrap each cake layer tightly in plastic wrap, followed by aluminum foil for extra protection against freezer burn. You can store them in the freezer for up to 3 months. When you’re ready to serve, simply thaw the layers in the refrigerator overnight and bring them to room temperature before assembly.
What if my cake layers don’t rise properly?
Very common! Ensure your baking powder is fresh for maximum effectiveness—check the expiration date. Overmixing the batter can also cause the cake to be dense; mix only until combined. If you’re uncertain, do a quick test by dropping a little batter in a glass of water; if it floats, it’s good to go!
Can pets safely eat coffee flavoured cake?
No, it’s essential to keep this cake away from pets. Coffee contains caffeine, which is not safe for animals. If you’re sharing this special dessert with friends and family, ensure it stays out of reach of curious furry companions!
What should I do if my buttercream is too thin?
No worries at all! If your Swiss meringue buttercream turns out too thin, refrigerate it for about 10-15 minutes to firm it up. Once it’s cooled slightly, give it another whip in the mixer until it reaches the desired consistency. This should transform it into the perfect spreadable texture for your cake!
Decadent Coffee Flavoured Cake for Ultimate Indulgence
Ingredients
Equipment
Method
- Preheat your oven to 170°C (325°F).
- Grease and line three cake pans with parchment paper.
- Cream together the unsalted butter and caster sugar until light and fluffy.
- Incorporate the eggs, one at a time, mixing well after each addition.
- Sift together the flour and baking powder, then fold into the wet mixture.
- Divide the batter into three bowls and flavor each bowl uniquely.
- Pour each flavored batter into the prepared cake pans and bake for 20–23 minutes.
- Cool the cakes in their pans for 2 minutes, then transfer to a wire rack to cool completely.
- Whisk the egg whites and sugar over simmering water until it reaches 71°C (160°F).
- Beat the meringue mixture on high speed until stiff peaks form.
- Gradually add soft butter to the meringue, mixing until smooth and creamy.
- Assemble the cake by layering with buttercream in between each layer.
- Decorate with remaining buttercream and optional chocolate or cocoa powder.
- Serve and enjoy your Tri-Flavor Coffee Layer Cake!
Leave a Reply