
As I stood in my kitchen, craving a burst of flavorful comfort, the concept of a Canned Tuna Sushi Bowl suddenly popped into my mind. This isn’t just any dinner—it’s a quick, protein-rich meal that takes just 20 minutes from start to finish, meaning you can satisfy those sushi cravings without the hassle of rolling! Imagine a colorful bowl filled with crispy rice, creamy avocado, and zesty canned tuna, all personalized with your favorite toppings. What’s more, this dish fits perfectly into a busy lifestyle while packing a nutritious punch. Ready to dive into the world of easy, customizable dinners? Let’s whip up this delicious bowl together!
Why is this Canned Tuna Sushi Bowl a winner?
Quick and Convenient: This dish is a lifesaver for those busy weeknights when time is tight! Ready in just 20 minutes, you can whip up a satisfying meal without the fuss of traditional sushi.
Customizable Excellence: With plenty of options for toppings, you can make each bowl reflect your personal taste. Want to mix in veggies like radishes or carrots? Go for it!
Protein-Packed: Canned tuna serves as the perfect protein-rich ingredient, ensuring you feel full and energized.
Flavorful Layers: With a delightful bang bang sauce and a crispy rice base, every spoonful is a burst of flavor and texture, making you want more.
For a lighter option, you could also enjoy this bowl alongside a refreshing Garlic Tomato Soup to complete your meal!
Canned Tuna Sushi Bowl Ingredients
• Let’s gather everything you need for the perfect bowl!
For the Rice Base
- Cooked Sushi Rice – This is the heart, offering a satisfying texture; don’t forget to season it well!
- Olive Oil – Adds flavor when pan-frying the rice; you can omit it for a lighter version if desired.
For the Tuna Mixture
- Canned Tuna – The star of the dish; choose tuna in oil for added richness, or feel free to substitute with canned salmon.
- Bang Bang Sauce – This creamy, spicy blend elevates our tuna mix; store-bought works, but homemade is a delightful touch!
- Sriracha Sauce – For those who crave heat; adjust the amount to reflect your spice tolerance.
For the Toppings
- Avocado – Provides a creamy contrast and healthy fats that enrich the bowl; slice it just before serving to maintain freshness.
- Spring Onions (Scallions) – A fresh crunch that brightens the dish; chop them coarsely for an eye-catching garnish.
- Furikake – This Japanese rice seasoning enhances the flavor profile beautifully; alternatively, use Nori for a fun twist.
Seasoning
- Salt and Black Pepper – Essential for balancing flavors; always adjust according to your taste preferences.
This Canned Tuna Sushi Bowl is designed to be deliciously versatile, meaning you can add your favorite toppings to make it uniquely yours. Ready to cook? Let’s get started!
Step‑by‑Step Instructions for Canned Tuna Sushi Bowl
Step 1: Cook the Sushi Rice
Begin by preparing the sushi rice according to the package instructions, usually taking about 10–15 minutes. Once cooked, transfer the rice to a large bowl while it’s still warm. Season it with rice wine vinegar, sesame oil, and sugar, gently folding the mixture until evenly coated. This step sets the flavorful base for your Canned Tuna Sushi Bowl.
Step 2: Prepare the Tuna Mixture
In a separate bowl, combine the drained canned tuna with the bang bang sauce. Use a fork to gently break up the tuna while ensuring it is well-coated with the sauce. This flavorful mixture will be the star of your Canned Tuna Sushi Bowl. Set it aside for a moment, letting the flavors meld while you prepare the fresh toppings.
Step 3: Slice the Toppings
As the rice cooks and the tuna mixture sits, slice the avocado into thin pieces, ensuring they remain fresh for presentation. Next, chop spring onions coarsely for that crunchy garnish. These fresh toppings will enhance your Canned Tuna Sushi Bowl, adding creaminess and crunch that perfectly complements the other flavors.
Step 4: Pan-Fry the Rice (Optional)
For a delightful texture, heat a tablespoon of olive oil in a large skillet over medium-high heat. Once shimmering, add the seasoned sushi rice in an even layer, pressing it down gently. Cook it for about 3–5 minutes until the bottom is golden brown. Carefully flip the rice to crisp the other side for an additional minute before removing it from the heat.
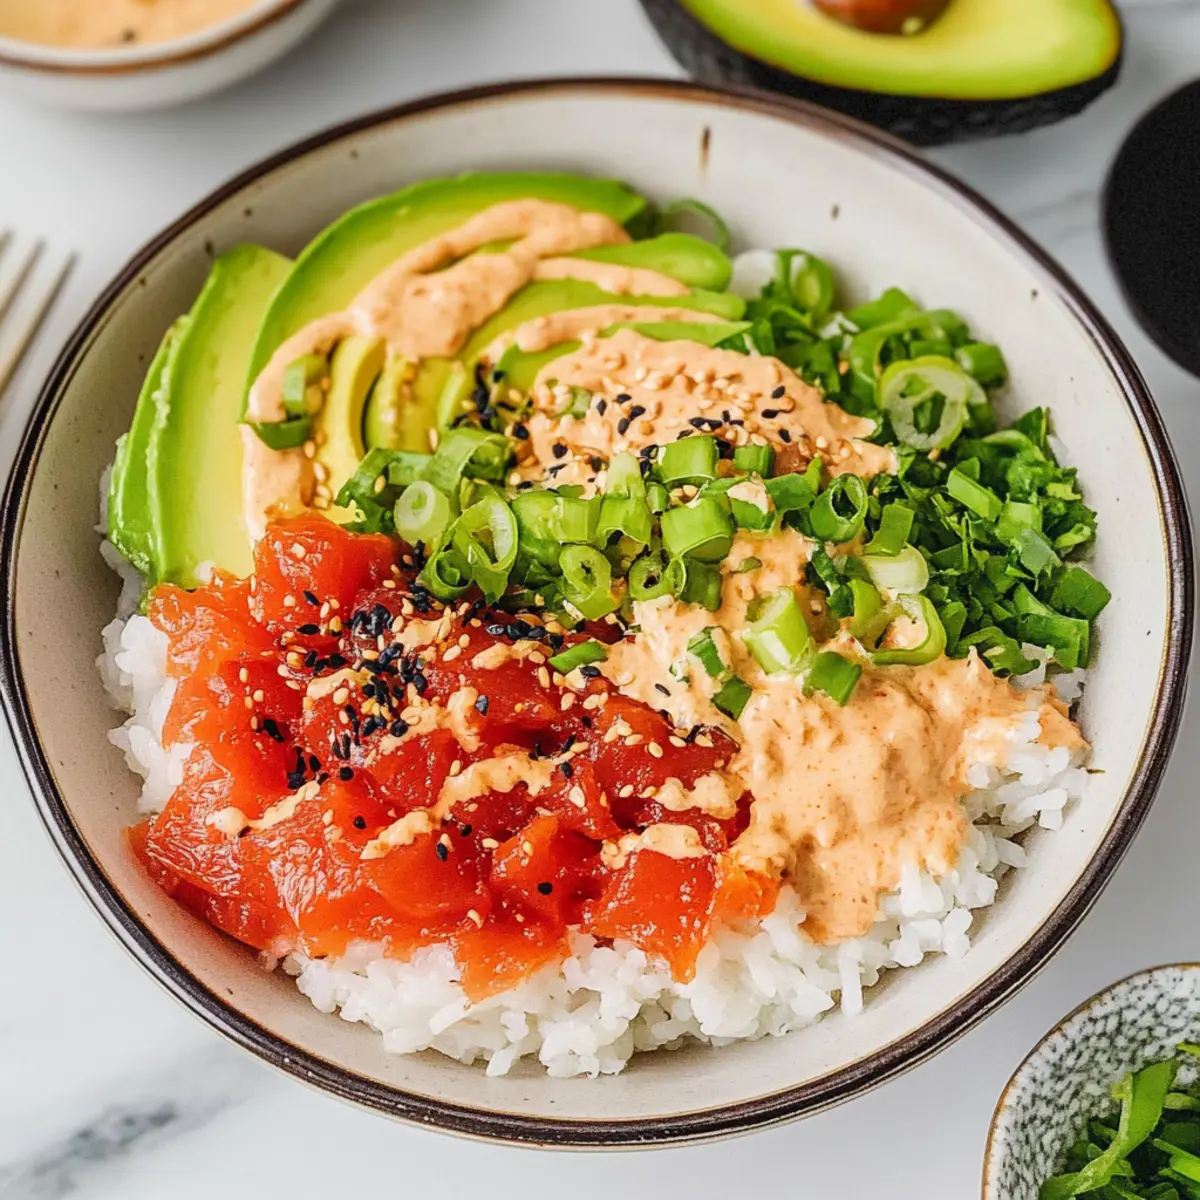
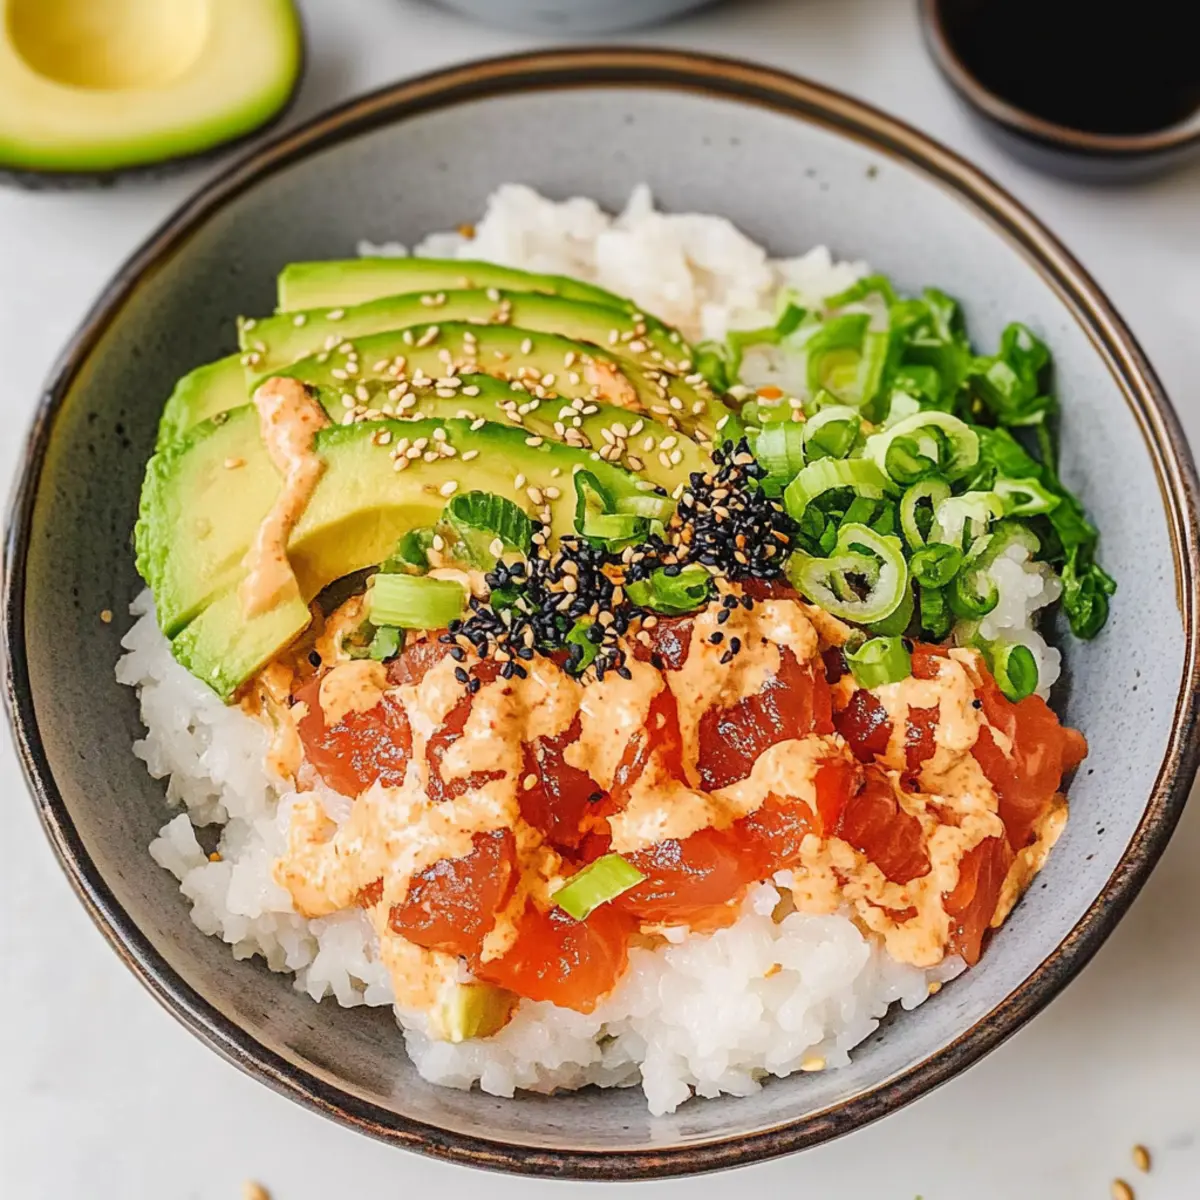
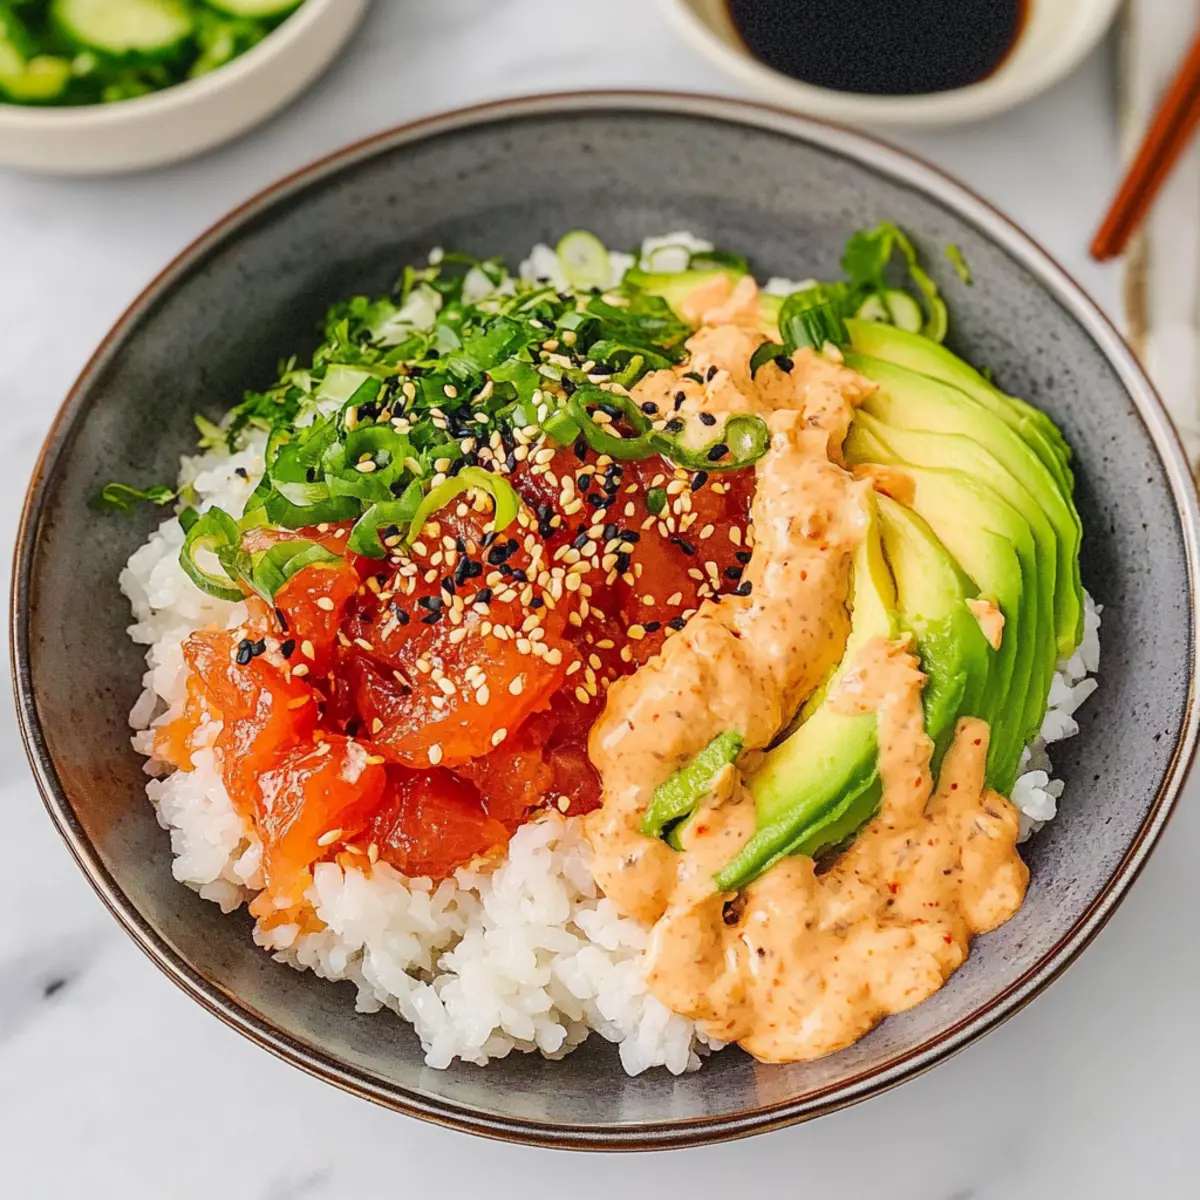
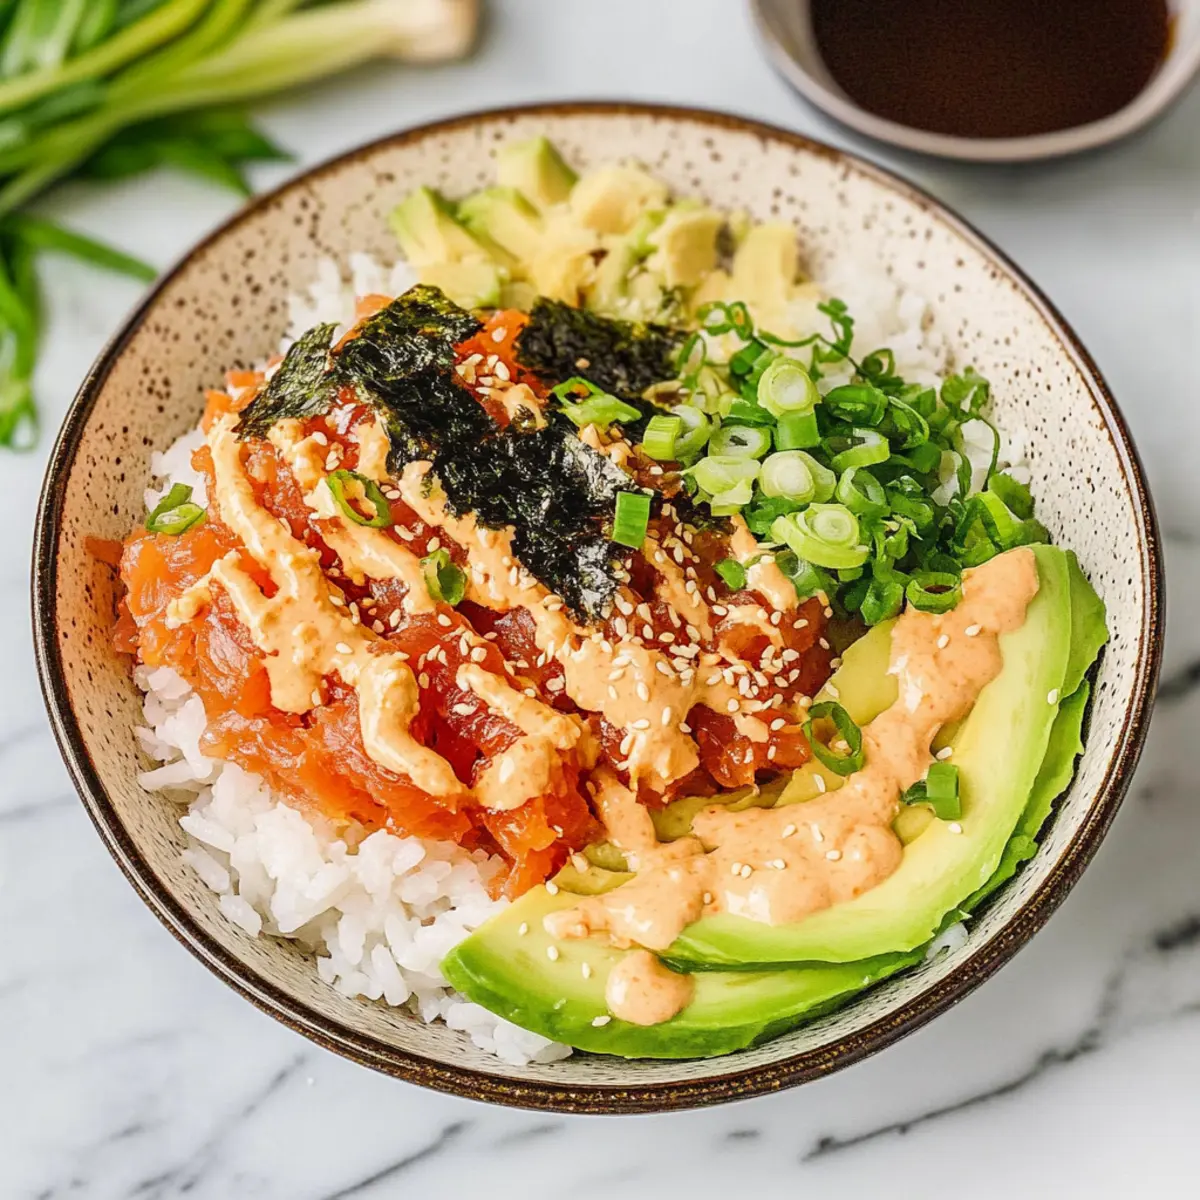
Step 5: Assemble the Canned Tuna Sushi Bowl
In a large serving bowl, place the crispy sushi rice as the base. Generously top it with the prepared bang bang tuna, followed by the fresh avocado slices and chopped spring onions. To finish your Canned Tuna Sushi Bowl, sprinkle furikake over the top and add a drizzle of Sriracha sauce for a spicy kick. Serve immediately and enjoy the burst of flavors!
Make Ahead Options
These Canned Tuna Sushi Bowls are a fantastic choice for meal prep! You can prepare the sushi rice and bang bang sauce up to 24 hours in advance, storing them in airtight containers in the refrigerator to maintain freshness. The rice is best reheated in a microwave or on the stove before serving, ensuring it regains its delightful texture. Additionally, slice the avocado just before serving to prevent browning; consider adding a squeeze of lemon juice if you want to prep it slightly earlier. By prepping these components ahead of time, you can whip up a nutritious meal with minimal effort, making busy weeknights much more manageable!
Storage Tips for Canned Tuna Sushi Bowl
- Fridge: Store leftover components separately in airtight containers for up to 2 days. This keeps the rice fluffy and toppings fresh.
- Freezer: It’s best not to freeze assembled bowls, as the texture can become mushy. However, leftover sushi rice can be frozen for up to 1 month—reheat before serving.
- Reheating: For the best results, reheat the sushi rice in a skillet or microwave with a splash of water to restore moisture. Add toppings fresh to maintain their crunch and flavor.
- Freshness Tip: Always add avocado and other delicate toppings right before serving to ensure they stay vibrant and tasty in your Canned Tuna Sushi Bowl.
What to Serve with Canned Tuna Sushi Bowl
Looking to elevate your Canned Tuna Sushi Bowl experience? These delightful pairings will perfectly complement your meal while adding flavor and variety!
-
Miso Soup: A warm, savory companion that enhances the umami flavors in your bowl, making for a comforting meal.
-
Edamame: These protein-packed soybeans offer a delightful crunch and make a perfect finger food to accompany your sushi bowl.
-
Seaweed Salad: Light and refreshing, this salad adds a briny, crispy texture that beautifully contrasts with the creamy avocado.
-
Ginger Carrot Slaw: A zesty and crunchy slaw adds a lovely sweetness and refreshing crunch, balancing the spice from the Sriracha.
-
Pickled Ginger: A classic sushi condiment, its tangy flavor cleanses the palate between bites, enhancing your overall dining experience.
-
Sparkling Water with Lime: This effervescent drink adds a refreshing fizz that complements the dish without overwhelming its flavors.
-
Crispy Tempura Vegetables: The golden, crispy exterior of tempura vegetables adds texture while the light batter keeps the focus on the sushi bowl’s fresh ingredients.
These pairings will not only enhance your meal but also make your dining experience more enjoyable and memorable!
Expert Tips for Canned Tuna Sushi Bowl
-
Perfect Rice: Use day-old sushi rice for best texture; it holds together better than freshly cooked rice, preventing a mushy bowl.
-
Bang Bang Sauce: If making homemade bang bang sauce, adjust the mayo and Sriracha ratio to taste, ensuring it complements the canned tuna without overpowering it.
-
Avocado Freshness: To keep avocado from browning, slice it just before serving. A squeeze of lemon can also help maintain its vibrant color.
-
Layer Flavors: For enhanced taste, let the tuna mixture sit for a few minutes after combining it with bang bang sauce, allowing the flavors to meld beautifully in your Canned Tuna Sushi Bowl.
-
Mind the Heat: If you’re sensitive to spice, start with a small amount of Sriracha, tasting as you mix. You can always add more for that perfect kick!
-
Add Variety: Don’t hesitate to mix in other toppings like cooked shrimp or pickled vegetables for a unique twist on the Canned Tuna Sushi Bowl.
Canned Tuna Sushi Bowl Variations
Feel free to get creative with your Canned Tuna Sushi Bowl and make it truly your own!
-
Canned Salmon: Swap canned tuna for flavorful canned salmon for a new taste experience. Its rich profile pairs wonderfully with the other ingredients.
-
Brown Rice: Use brown rice instead of sushi rice for a nutty flavor and added fiber. This optional switch elevates the health factor of your bowl without compromising taste.
-
Veggie Boost: Add fresh ingredients like shredded carrots, sliced bell peppers, or crispy cucumber for extra crunch and nutrients. The more colors, the more inviting your bowl will be!
-
Spicy Tuna: Mix in some extra Sriracha or a bit of wasabi for a spicy kick that elevates every bite. Let your taste buds decide how much heat you want!
-
Creamy Alternatives: Replace the bang bang sauce with a homemade yogurt sauce for a lighter, tangy alternative that still adds zest to your Canned Tuna Sushi Bowl.
-
Pickled Delights: Top your bowl with pickled ginger or seaweed salad to bring a tangy twist and depth of flavor. These additions will make each bite a delicious surprise.
-
Themed Toppings: Create a Mediterranean version with olives, feta cheese, and cherry tomatoes—a delightful fusion that brings a new vibe to this classic dish.
For effortless meal ideas, try this next to a hearty bowl of Garlic Tomato Soup or enhance your dinner experience by pairing it with Mediterranean Chicken Bowls!
Canned Tuna Sushi Bowl Recipe FAQs
What type of canned tuna should I use for the best flavor?
Absolutely, for the best taste, I recommend using canned tuna packed in oil. It enhances the moisture and richness of the dish. If you prefer a lighter option, you can use tuna packed in water, but do keep in mind the flavor will be milder.
How should I store leftovers from my Canned Tuna Sushi Bowl?
For the best results, store leftover components separately in airtight containers in the fridge for up to 2 days. This keeps the sushi rice fluffy and fresh, while also ensuring that toppings stay crisp and delicious.
Can I freeze the sushi rice, and how should I do it?
Yes, you can freeze leftover sushi rice! To do this, allow it to cool completely, then portion it into freezer-safe bags or containers. Make sure to label them with the date. The sushi rice can be frozen for up to 1 month. When you’re ready to use it, thaw it in the fridge overnight and reheat with a splash of water in the microwave or skillet to restore its moisture.
How do I prevent the avocado in my Canned Tuna Sushi Bowl from browning?
Great question! To keep your avocado fresh and vibrant, slice it just before serving. You can also squeeze a bit of lemon juice over it right after cutting, which will help maintain its beautiful green color while adding a nice tangy flavor.
What should I do if my rice turns out mushy?
If your sushi rice is mushy, it’s likely due to excess moisture. For a better texture next time, ensure you’re using the right water-to-rice ratio (check package instructions) and avoid overcooking. If you’re using freshly cooked rice, let it cool a bit before assembling your Canned Tuna Sushi Bowl, which helps it firm up. You can also use day-old sushi rice for the best texture!
Are there any dietary considerations I should be aware of with this recipe?
Yes! This bowl is versatile and can be made gluten-free by checking the labels on sauces such as Sriracha and bang bang sauce. If you or anyone in your household has seafood allergies, consider substituting canned tuna with canned chickpeas or cooked tofu for a plant-based protein alternative.
Delicious Canned Tuna Sushi Bowl Ready in Just 20 Minutes
Ingredients
Equipment
Method
- Cook the sushi rice according to package instructions (10-15 minutes). Season with rice vinegar, sesame oil, and sugar.
- In a separate bowl, combine canned tuna with bang bang sauce and gently mix.
- Slice avocado and chop scallions.
- Optional: Heat olive oil in a skillet, add seasoned rice, cook until golden brown (3-5 minutes).
- Assemble the bowl with crispy rice, tuna mixture, avocado, scallions, and sprinkle furikake. Drizzle with Sriracha and serve.
Leave a Reply