
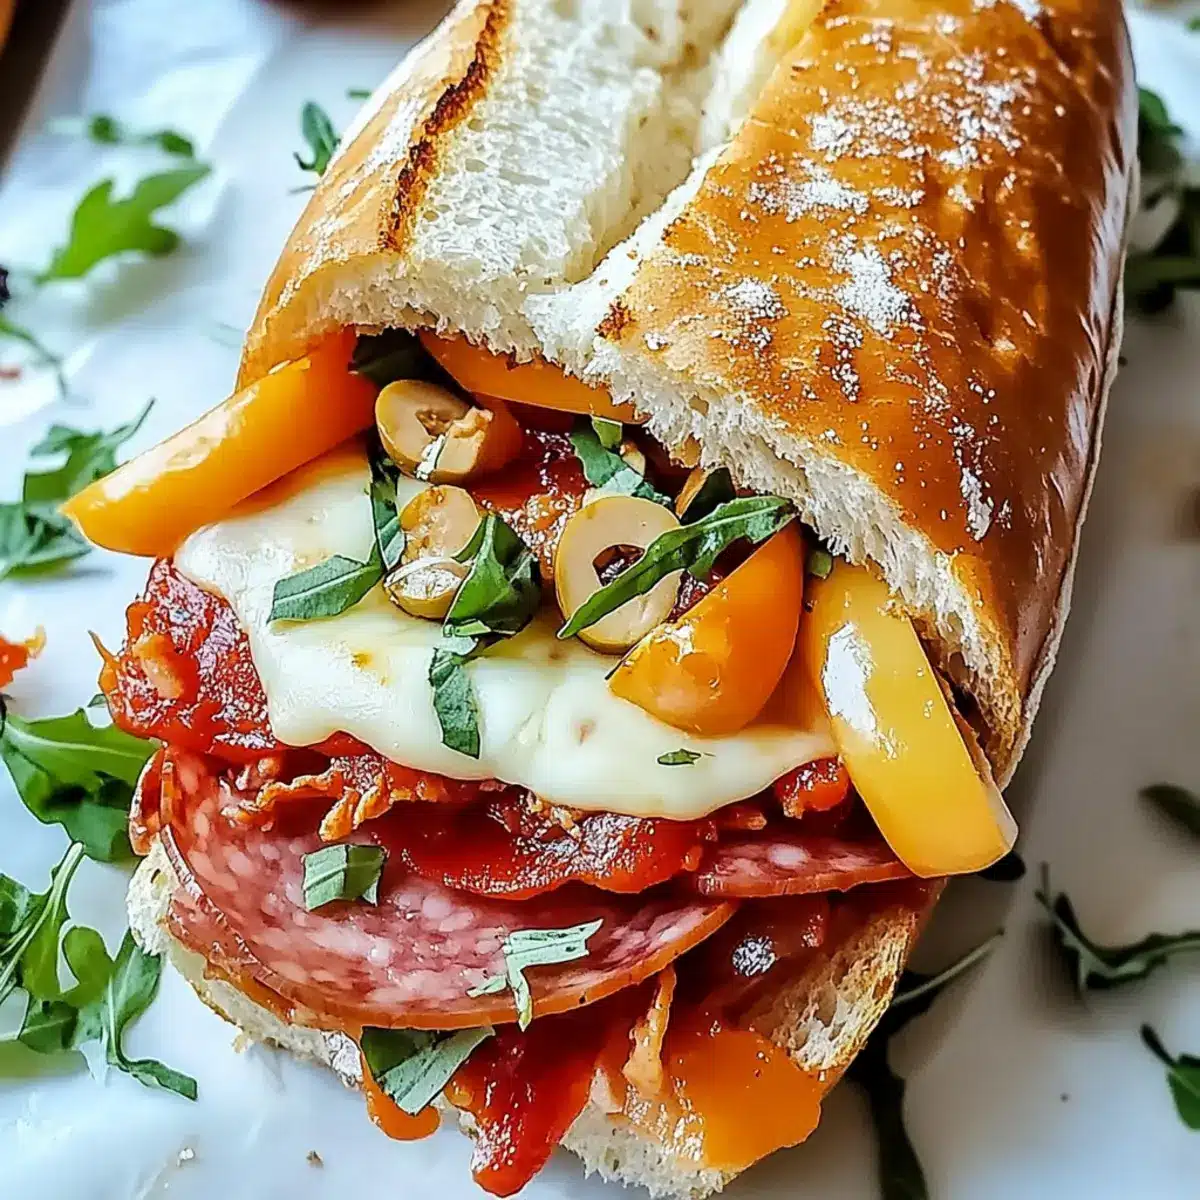
With the aroma of Italian spices filling the kitchen and a golden, crispy crust awaiting your first bite, I can’t help but get excited about Baked Italian Grinder Sandwiches. These hearty creations promise to elevate your mealtime from mundane to magnificent, featuring savory Italian meats and ooey-gooey cheese nestled in a soft sub roll. Not only are they a major crowd-pleaser, but they also come together effortlessly, making them perfect for quick weeknight dinners or game day gatherings. Trust me, once you experience the delectable layers of melted mozzarella, zesty marinara, and the crunch of colorful toppings, you’ll never want a boring sandwich again. Are you ready to dive into this comforting feast? Let’s get cooking!

Why are Baked Italian Grinder Sandwiches irresistible?
Savory Satisfaction: The harmonious blend of Italian meats and melted cheeses creates a flavor explosion that is simply unforgettable.
Easy Assembly: Even novice cooks will find these sandwiches quick and straightforward to prepare, requiring minimal effort for maximum taste.
Crowd-Pleasing Delight: Perfect for family dinners or gatherings, they’re a surefire hit that satisfies every palate. Pair them with a light salad or crispy fries for a complete meal!
Textures to Love: The crispy crust, gooey cheese, and crunchy toppings provide a delightful mix of textures that will keep everyone coming back for more.
Versatility: Feel free to customize with your preferred ingredients, like substituting deli meats with grilled veggies for a vegetarian twist. Want more delicious options? Check out these Savory Baked French or Cannoli Cookies to complement your meal perfectly!
Baked Italian Grinder Sandwiches Ingredients
For the Sandwich Assembly
• Italian Sub Rolls – Serve as the sturdy base for the sandwich; you can substitute with hoagie rolls, baguettes, or ciabatta.
• Deli-Sliced Salami – Rich and slightly spicy, it creates a savory bite; substitute with turkey for a lighter option.
• Deli-Sliced Ham – Adds sweetness and smokiness; can be replaced with roasted turkey or chicken.
• Deli-Sliced Pepperoni – Provides bold flavor; optional for a vegetarian version.
• Deli-Sliced Mozzarella Cheese – Melts into gooey goodness, pivotal for texture.
• Deli-Sliced Provolone Cheese – Offers slightly sharp flavor; critical for balance.
• Grated Parmesan Cheese – Adds salty, nutty notes and contributes to a crispy topping.
• Roasted Red Peppers (sliced) – Brings sweetness and color; substitute with fresh bell peppers if preferred.
• Sliced Black Olives – Adds briny contrast; omit for a non-olive version.
• Banana Peppers (sliced) – Provides tangy crunch and zest; optional for less spice.
• Fresh Basil Leaves – Enhance flavor and presentation; can be omitted if not available.
For the Seasoned Butter
• Unsalted Butter – Adds richness and a golden crunch; essential for flavor enhancement.
• Garlic Powder – Provides a savory aroma; important for depth, can use fresh garlic if preferred.
• Onion Powder – Adds mild, savory depth; substitute with finely chopped onions if desired.
• Dried Oregano – Imparts classic Italian flavor; essential for authentic taste.
• Dried Basil – Contributes herbal freshness; can substitute with fresh basil if available.
• Red Pepper Flakes – Adds heat and spice; omit for a milder sandwich or add jalapeños for more kick.
• Salt – Enhances all flavors; use to taste.
• Black Pepper – Offers subtle sharpness; adjust based on preference.
Feel free to explore this delightful recipe for Baked Italian Grinder Sandwiches, where beautifully melded flavors come together, creating an unforgettable dining experience!
Step‑by‑Step Instructions for Baked Italian Grinder Sandwiches
Step 1: Preheat the Oven
Begin by preheating your oven to 375°F (190°C). This ensures that when you place your Baked Italian Grinder Sandwiches in the oven, they’ll start cooking evenly right away, allowing for that perfect crispy crust. While the oven warms up, gather all your ingredients and prepare your baking sheet for the next steps.
Step 2: Prepare the Rolls
Take the Italian sub rolls and slice them in half lengthwise, making sure to keep the hinge intact. This keeps the rolls stable when filled. Place the cut rolls, cut side up, on a large baking sheet, ensuring there’s enough space for them to breathe while they bake.
Step 3: Create the Seasoned Butter
Melt the unsalted butter in a small saucepan over low heat, bringing out its luscious richness. Once melted, mix in garlic powder, onion powder, dried oregano, dried basil, red pepper flakes, salt, and black pepper until well combined. This flavorful mixture will add depth to the bread, so it’s crucial to ensure it’s thoroughly blended.
Step 4: Brush the Rolls
Using a pastry brush, generously apply the seasoned butter over the cut sides of each roll. Be sure to cover them evenly so that each bite of your Baked Italian Grinder Sandwich tastes just as delightful as the last. The butter will help create a crispy, golden crust when baked.
Step 5: Layer the Meats
Start layering salami, ham, and optional pepperoni on the bottom halves of the rolls. Make sure to distribute the meats evenly, getting a little bit of each delicious flavor in every sandwich bite. This savory foundation is what makes your Baked Italian Grinder Sandwiches truly irresistible.
Step 6: Add the Cheeses
Next, add a generous layer of slices of mozzarella and provolone cheese over the meats. The combination of these cheeses will melt beautifully and create a gooey texture that is absolutely heavenly. Lifting some of the meats slightly while adding cheese will help ensure everything holds together nicely.
Step 7: Sprinkle Parmesan
Sprinkle a good handful of grated Parmesan cheese over the provolone layer. This final touch not only enhances the flavor but also contributes to a crispy, golden topping that perfectly complements the melted cheeses beneath.
Step 8: Layer the Vegetables
Evenly distribute sliced roasted red peppers, black olives, and banana peppers over the cheese. These colorful toppings add texture and brightness to your Baked Italian Grinder Sandwiches, ensuring a balanced bite with every mouthful. Feel free to adjust the amount based on your preference for extra crunch or zest.
Step 9: Top with Fresh Basil
To finish assembling, add fresh basil leaves on top of the vegetables for an added explosion of flavor. These fragrant leaves will bring a fresh, herbaceous note that elevates your sandwiches, making them all the more delectable.
Step 10: Bake the Sandwiches
Place the prepared baking sheet in the oven and bake for 10-12 minutes. Keep a close eye on the rolls—the bread should become crispy and golden, while the cheeses will melt into a delicious gooey layer. This is when the heavenly aroma fills your kitchen.
Step 11: Cool and Serve
Once baked, remove the Baked Italian Grinder Sandwiches from the oven and let them cool for a few moments. This short resting time helps the cheese set slightly and makes them easier to handle. After cooling, cut the sandwiches into manageable pieces and serve them warm, ready to enjoy!

Baked Italian Grinder Sandwiches Variations
Dive into delicious creativity with these tasty twists to make your baked Italian grinder sandwiches even more special!
-
Cheese Alternatives: Try using gouda or fontina for different flavor profiles; each cheese brings its unique richness to your sandwich.
-
Vegetarian Option: Substitute deli meats with extra cheese and grilled vegetables like zucchini or mushrooms. This hearty alternative will delight veggie lovers without compromising on flavor.
-
Herb Variations: Experiment with fresh herbs such as thyme or rosemary for unique tastes. They add an aromatic twist that enhances every bite.
-
Spicy Kick: Add jalapeños or switch red pepper flakes for a hotter alternative. The extra heat will make your sandwiches truly unforgettable!
-
Whole Grain Rolls: Swap out your traditional rolls for whole grain versions for added fiber and a delightful nutty taste. It’s a healthy swap that doesn’t skimp on flavor.
-
Sweet Peppers: Use caramelized onions or sautéed bell peppers instead of roasted red peppers. Their sweetness will complement the savory meats beautifully.
-
Nutty Topping: For an extra crunch, sprinkle toasted pine nuts or sunflower seeds on top just before baking. This little addition introduces delightful texture while elevating flavor.
If you’re looking for something sweeter to balance your savory meal, check out this Italian Berry Mascarpone for dessert! You can also enhance your sandwich experience with a side of Savory Baked French. Enjoy creating your own delicious versions!
What to Serve with Baked Italian Grinder Sandwiches?
Elevate your mealtime with these delightful accompaniments that enhance the comforting flavors of your baked sandwiches.
-
Crispy French Fries: The perfect side for a classic touch, these golden fries add a satisfying crunch that pairs deliciously with the savory sandwiches. Dip them in marinara for an extra layer of flavor!
-
Garden Salad: A refreshing mix of greens, tomatoes, and cucumbers offers a light and crisp counterbalance to the richness of the grinders. Toss in a tangy vinaigrette to brighten up every bite.
-
Roasted Vegetables: Earthy, caramelized veggies like bell peppers and zucchini add a wholesome touch and will complement the Italian flavors beautifully. Their natural sweetness will contrast nicely with the savory sandwich filling.
-
Garlic Bread: When you crave more carb goodness, serve warm garlic bread on the side. Its buttery, garlicky flavor melds perfectly with the sandwich, making each bite more indulgent.
-
Antipasto Platter: For a party spread, create a vibrant platter with marinated olives, pepperoncini, cheese, and cured meats. This delightful assortment echoes the core ingredients of your sandwiches, enhancing the Italian theme.
-
Homemade Potato Chips: Crunchy, lightly salted chips make for a fun side. Their texture and flavor add another dimension to your meal, complementing the soft, gooey sandwich beautifully.
-
Marinara Sauce: Set out a bowl of warm marinara for dipping! This classic Italian accompaniment is a must-have, allowing everyone to indulge in the rich, tangy tomato flavor with every bite of the sandwich.
-
Iced Tea: A refreshing drink option, iced tea complements the savory notes of the sandwiches while keeping the meal light and hydrating. Consider adding a slice of lemon for a pop of flavor!
Indulge in these selections and create a satisfying meal that brings warmth and joy to your table!
Expert Tips for Baked Italian Grinder Sandwiches
-
Layer Wisely: Ensure even layering of meats and toppings to avoid sogginess. Overloading can lead to a messy sandwich.
-
Cut with Care: Use a serrated knife to slice through the sandwich easily without squishing the ingredients.
-
Monitor Baking: Keep an eye on your sandwiches while they bake; remove them when the cheese is melty and the rolls are crispy, but not burnt.
-
Customize Ingredients: Don’t hesitate to play with ingredients! Try different cheeses or add veggies for a personal touch to your Baked Italian Grinder Sandwiches.
-
Perfect Butter Blend: Mix your seasoned butter thoroughly to enrich the flavor of every bite while ensuring a beautifully crispy crust.
How to Store and Freeze Baked Italian Grinder Sandwiches
Fridge: Keep any leftover Baked Italian Grinder Sandwiches wrapped tightly in foil or plastic wrap for up to 3 days. They will retain their flavor and moisture better this way.
Freezer: For long-term storage, freeze unbaked sandwiches wrapped in plastic wrap and placed in an airtight container for up to 3 months. Bake directly from frozen, adding a few extra minutes to the baking time.
Reheating: To reheat leftovers, preheat your oven to 350°F (175°C) and warm the sandwiches for about 10-15 minutes until heated through and crisp. Avoid using a microwave to keep that delightful crispy crust.
Make-Ahead: Assemble your Baked Italian Grinder Sandwiches and refrigerate them unbaked for up to 24 hours before baking, ensuring your meal is ready to go when you need it!
Make Ahead Options
These Baked Italian Grinder Sandwiches are a fantastic choice for meal prep! You can assemble the sandwiches up to 24 hours in advance. Simply prepare the Italian sub rolls, layer the meats, cheeses, and veggies, then cover tightly with foil and refrigerate. This not only saves you time but also allows the flavors to meld, making them even more delicious! When you’re ready to enjoy, bake them directly from the fridge for about 12-15 minutes until golden and crispy. To maintain quality, be sure not to overload the fillings, allowing for even cooking. With these make ahead tips, you’ll have comforting sandwiches ready in no time—perfect for busy weeknights!
Baked Italian Grinder Sandwiches Recipe FAQs
What kind of rolls should I use for Baked Italian Grinder Sandwiches?
For the best taste and texture, I recommend using Italian sub rolls as they hold up well to the fillings. You can also substitute them with hoagie rolls, baguettes, or ciabatta if you prefer a different style.
How long can I store leftovers of Baked Italian Grinder Sandwiches?
You can keep any leftover Baked Italian Grinder Sandwiches tightly wrapped in foil or plastic wrap in the refrigerator for about 3 days. For the best reheating results, warm them in the oven to maintain that crispy texture.
Can I freeze Baked Italian Grinder Sandwiches?
Absolutely! For freezing, assemble the unbaked sandwiches, wrap them tightly in plastic wrap, and place them in an airtight container. They can be frozen for up to 3 months. When you’re ready to enjoy, bake them directly from frozen, adding a few extra minutes to the baking time.
What should I do if my sandwiches turn out soggy?
If you find your sandwiches are soggy, it could be due to overloading the fillings. Make sure to layer your ingredients evenly and not to overload them. If you notice excess moisture from veggies, consider patting them dry before adding. You can also toast the bread lightly before assembling to give it an extra crunch that can hold up better during baking.
Are there any dietary considerations I need to keep in mind?
Yes! If you’re making these sandwiches for someone with dietary restrictions, consider substituting deli meats with grilled vegetables for a vegetarian option, and check the ingredient labels for any allergies, especially with cheeses and condiments. Additionally, if you or your guests have allergies to gluten, you can use gluten-free rolls as an alternative.

Baked Italian Grinder Sandwiches for Ultimate Comfort Food
Ingredients
Equipment
Method
- Preheat your oven to 375°F (190°C). Gather all your ingredients and prepare your baking sheet.
- Slice the Italian sub rolls in half lengthwise keeping the hinge intact. Place cut side up on a baking sheet.
- Melt the unsalted butter in a saucepan over low heat, then mix in garlic powder, onion powder, oregano, dried basil, red pepper flakes, salt, and black pepper until well combined.
- Using a pastry brush, apply the seasoned butter over the cut sides of each roll evenly.
- Layer salami, ham, and optional pepperoni on the bottom halves of the rolls.
- Add a layer of mozzarella and provolone cheese over the meats.
- Sprinkle grated Parmesan cheese over the provolone layer.
- Distribute sliced roasted red peppers, black olives, and banana peppers over the cheese.
- Add fresh basil leaves on top of the vegetables.
- Place the baking sheet in the oven and bake for 10-12 minutes until the rolls are crispy and the cheeses melt.
- Remove from the oven and let cool for a few moments before cutting into pieces to serve warm.
Leave a Reply