
“Have you ever found yourself rummaging through the fridge, dreaming of a meal that’s both delicious and quick to prepare? That’s where my Green Goddess Tuna Salad comes to the rescue! This dish takes the classic tuna salad and elevates it with a creamy herby dressing that’s reminiscent of the beloved dip—perfect for when you crave something fresh and flavorful without spending hours in the kitchen. Packed with protein and customizable to your taste, you can whip this up in minutes, whether you prefer it on a bed of greens, inside a sandwich, or as a delightful tuna melt. So, what variations will you try first to make this recipe your own?”
Why is Goddess Tuna Salad a Must-Try?
Quick and Easy: This recipe comes together in just minutes, perfect for those busy days when you crave something wholesome without the hassle.
Flavor Explosion: The herby mayonnaise, bursting with fresh basil, chives, and dill, takes the classic tuna salad to a whole new level of deliciousness.
Customizable Delight: Whether you prefer mayonnaise or Greek yogurt, this salad adapts to your dietary needs and preferences, making it versatile for everyone!
Texture Contrast: Experience the creamy richness of the dressing paired with the firm texture of tuna—each bite is satisfying and refreshing.
Meal Prep Friendly: Make this salad ahead of time for easy lunches throughout the week; it stores well in the fridge for 2 days!
So, if you’re looking for a nutritious meal that’s packed with flavor, try this Goddess Tuna Salad! It’s perfect on its own, or get creative like with my fresh Avocado Tuna Salad for a twist!
Goddess Tuna Salad Ingredients
For the Salad
• Tuna – Rinsed and drained well to ensure a clean texture.
• Mayonnaise – Acts as the creamy base; substitute Greek yogurt for a lighter, tangy twist.
• Chives – Finely chopped for a mild onion flavor and fresh addition.
• Basil Leaves – Fresh basil enhances the dish with a fragrant herbaceous note.
• Fresh Dill – Adds unique herbal quality, but can be omitted if unavailable.
• Garlic – Use fresh minced garlic for rich aromatic depth.
• Lemon Juice – Brightens the dressing, cutting through the creaminess for a balanced flavor.
• Black Pepper – Adjust to taste for mild heat and flavor enhancement.
• Sea Salt – Enhances overall taste; start with a pinch and increase to your preference.
This Goddess Tuna Salad is packed with freshness and versatility, making it a delightful addition to your meal repertoire!
Step‑by‑Step Instructions for Goddess Tuna Salad
Step 1: Rinse the Tuna
Begin by rinsing the tuna thoroughly in a fine mesh sieve. Press firmly to drain out excess water, ensuring your Goddess Tuna Salad has a clean, firm texture. This should take about 1-2 minutes. Once drained, transfer the tuna to a mixing bowl and use a fork to flake it apart gently.
Step 2: Blend the Dressing
In a high-speed blender, combine mayonnaise (or Greek yogurt), finely chopped chives, fresh basil leaves, dill, minced garlic, and lemon juice. Blend on high until the mixture is smooth and boasts a vibrant green color. This step should take around 1-2 minutes, creating a creamy herby dressing that will elevate your Goddess Tuna Salad.
Step 3: Combine the Ingredients
Pour the blended herby dressing into the bowl with the flaked tuna. Using a spatula, gently fold the dressing into the tuna until every bit is evenly coated. This process should take about 2-3 minutes. Aim for a smooth, cohesive mixture that showcases the creamy texture of the dressing along with the protein-rich tuna.
Step 4: Taste and Adjust Seasoning
Take a moment to taste your Goddess Tuna Salad mixture. Add a pinch of sea salt and black pepper to enhance the flavors. Stir gently to incorporate the seasoning, adjusting to your liking. This step only needs about 1 minute, but it ensures your salad is perfectly seasoned and ready to shine as a refreshing meal.
Step 5: Serve or Store
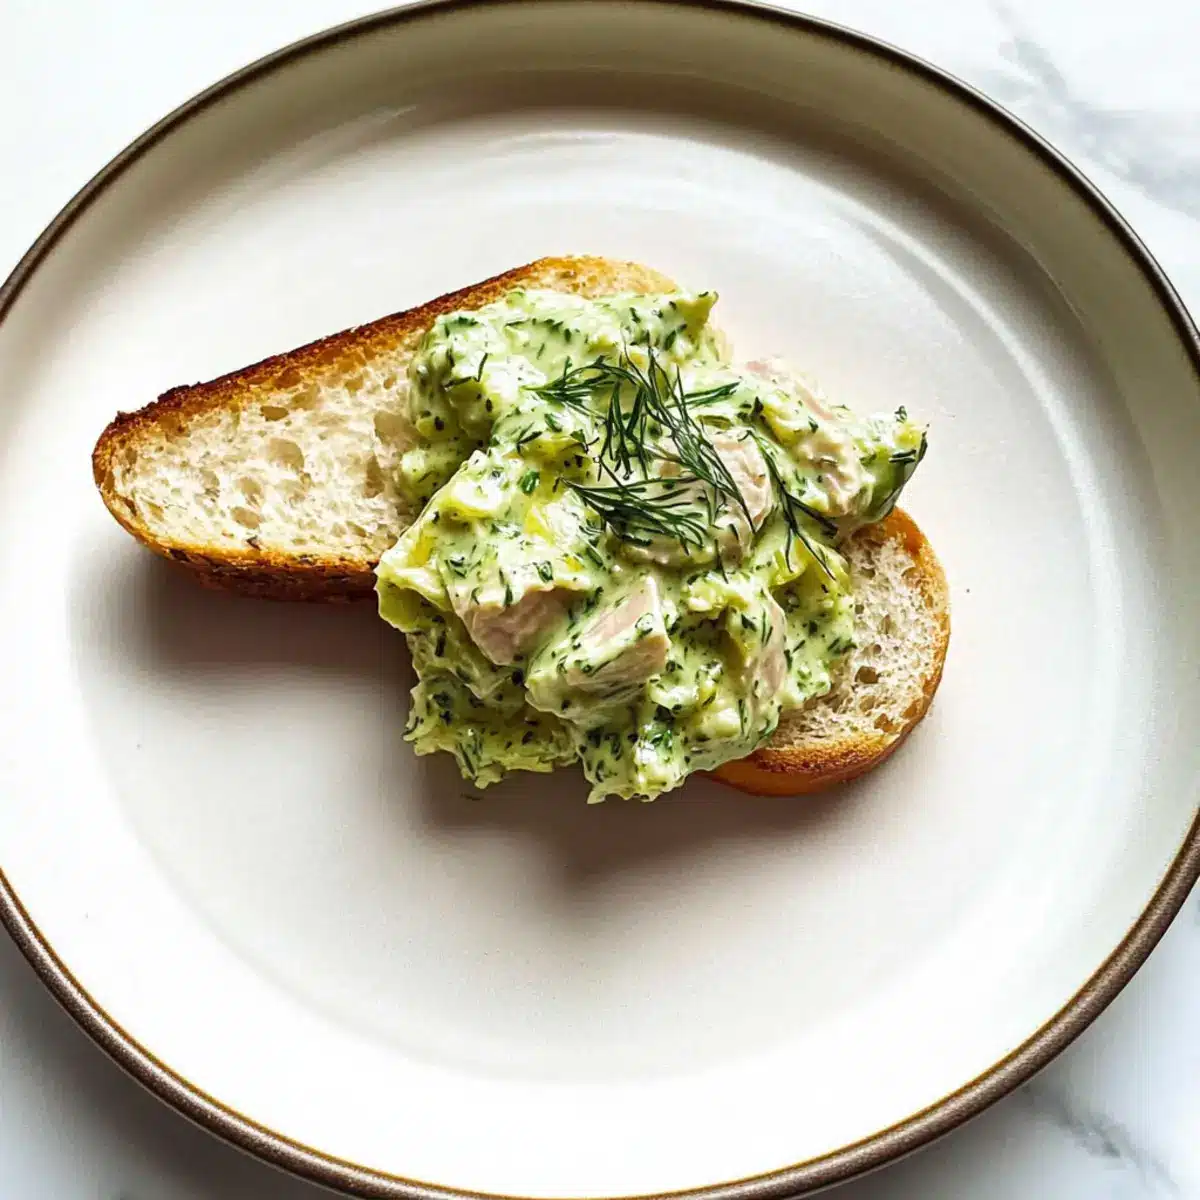
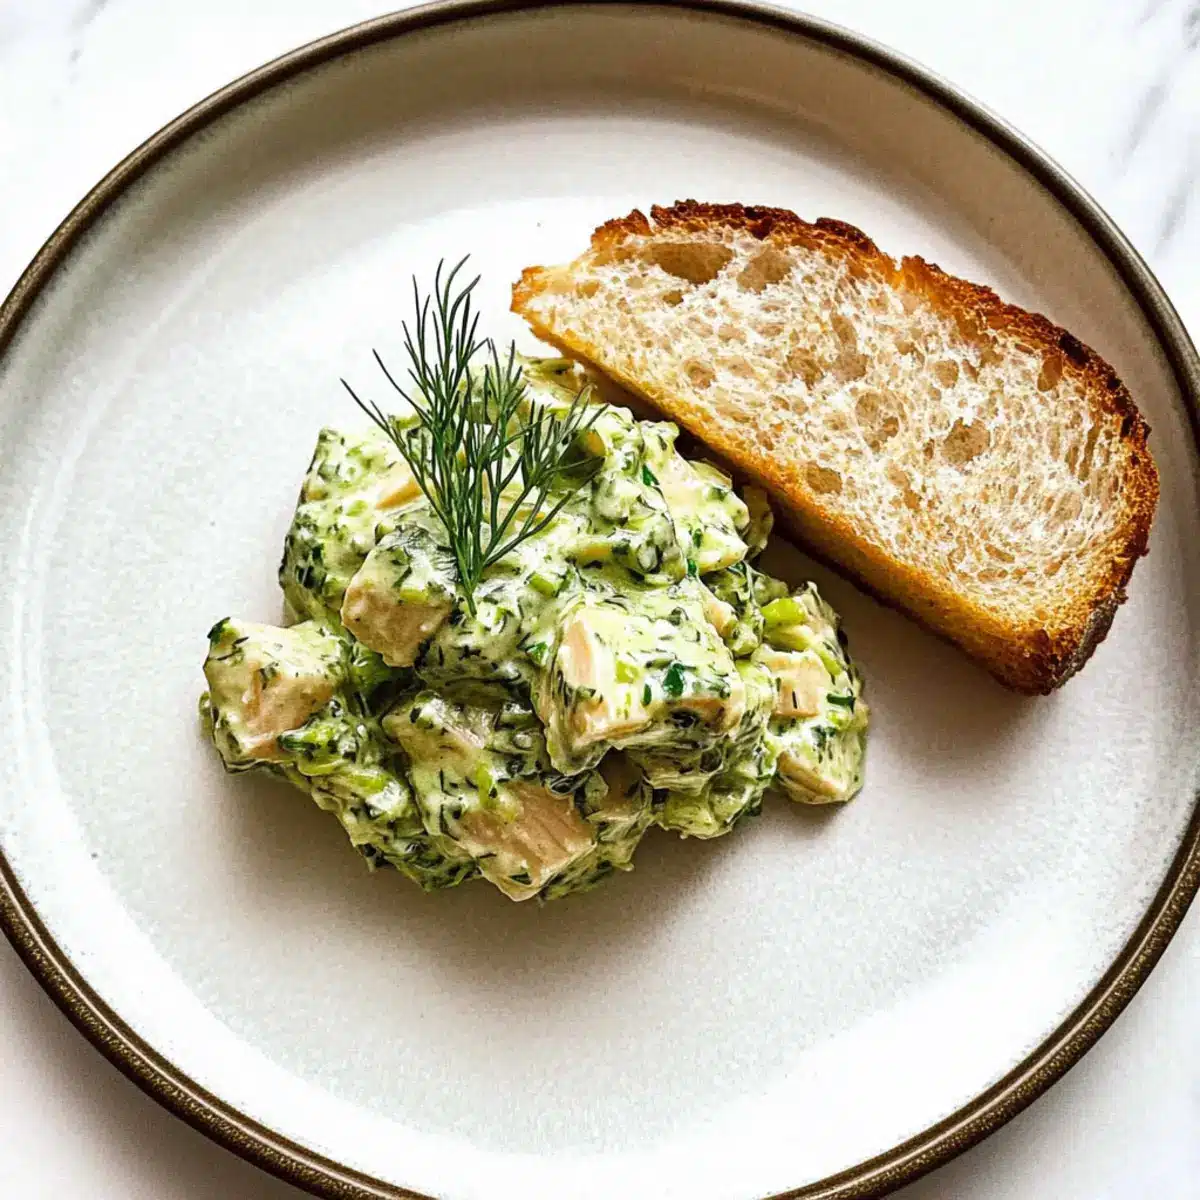
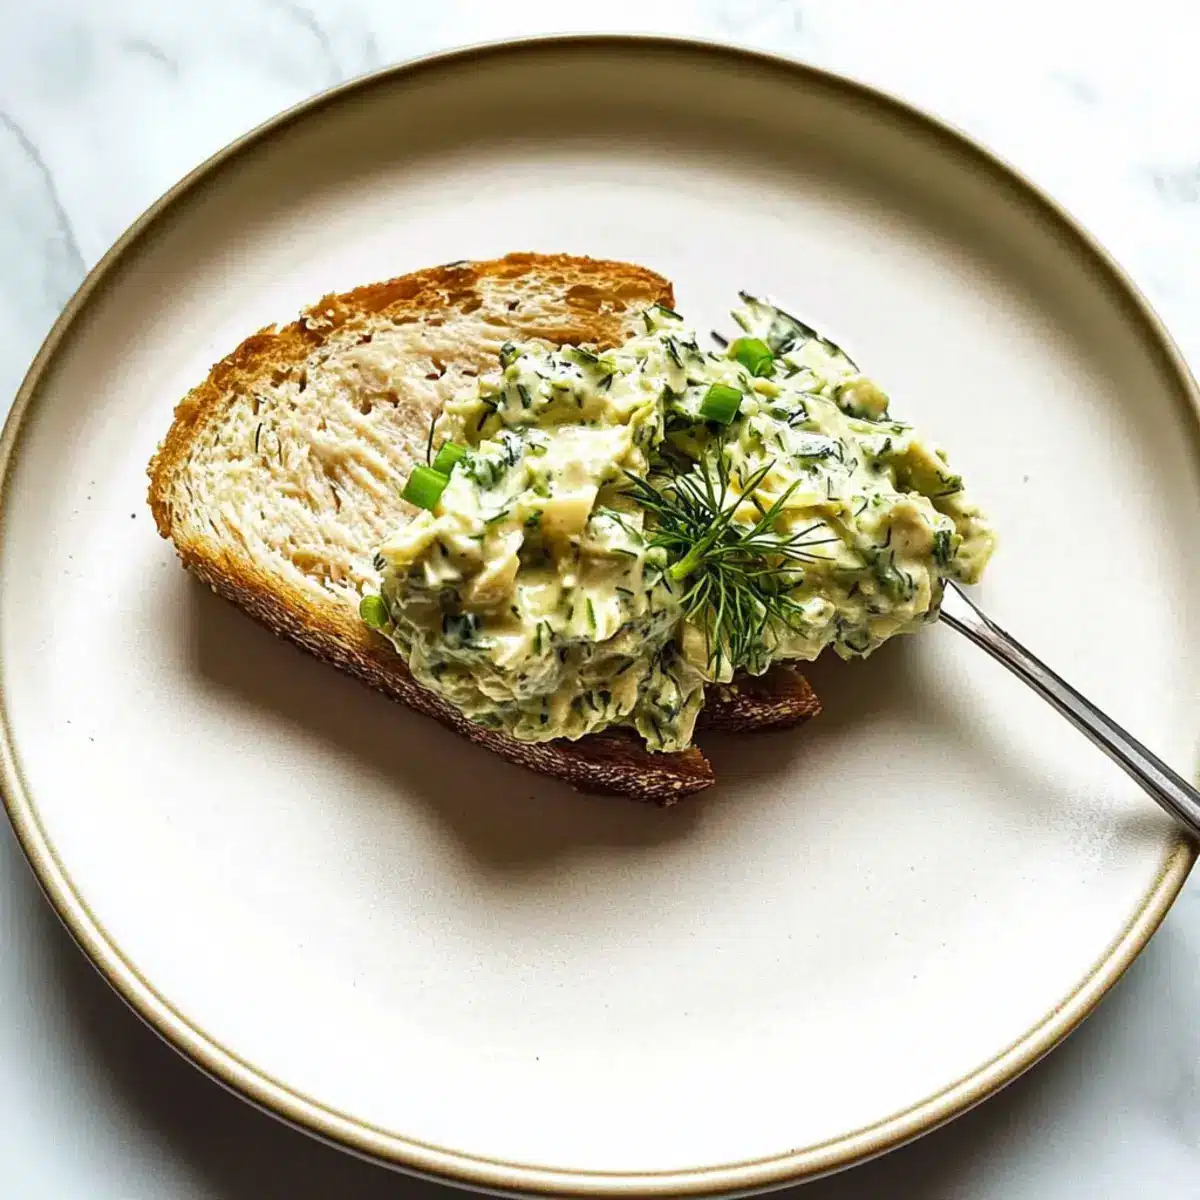
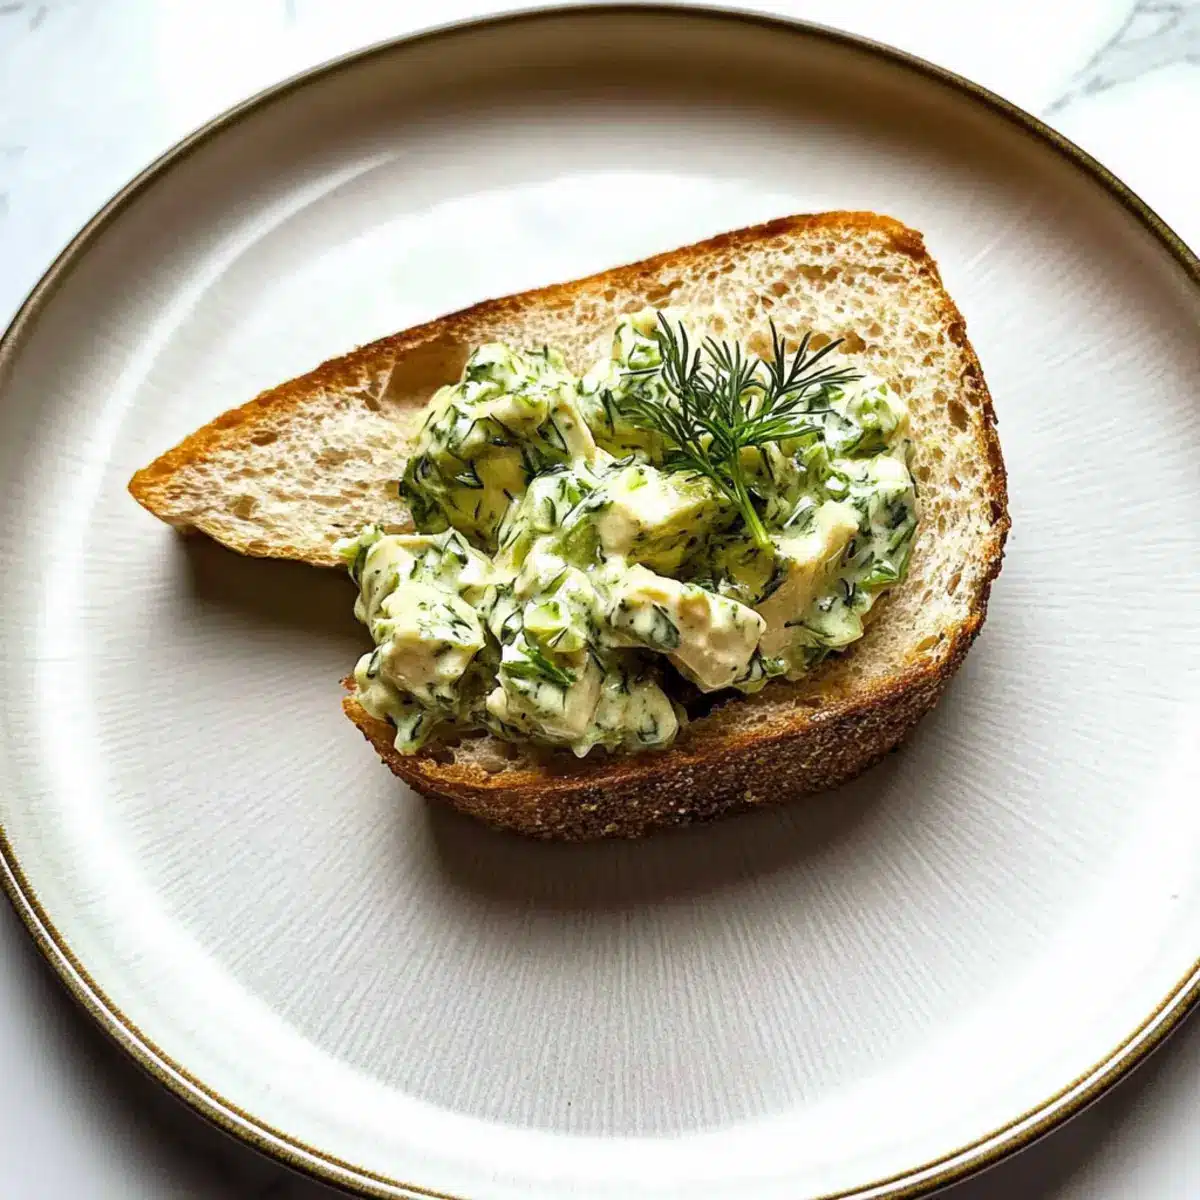
You can either serve your Goddess Tuna Salad immediately over toasted bread, crackers, or on a bed of greens. Alternatively, refrigerate it in an airtight container for later enjoyment, where it can stay fresh for up to 2 days. If serving as a tuna melt, preheat your air fryer or oven, load the mixture onto bread with cheese, and heat until bubbly (about 5 minutes).
Expert Tips for Goddess Tuna Salad
• Blend Smoothly: Use a high-speed blender for the dressing. This ensures a creamy, unified texture in your Goddess Tuna Salad. A basic blender may leave chunks.
• Customize Your Greens: Feel free to swap mayonnaise for Greek yogurt for a tangy twist. This not only lightens the salad but also enhances creaminess.
• Chop Herbs Finely: Finely chop chives, basil, and dill before blending. This helps integrate their flavors smoothly into the dressing without any rough bits.
• Taste and Adjust: Don’t skip the seasoning step! Taste your salad and adjust salt and pepper gradually to avoid over-salting.
• Mix-In Extras: Get creative! Add chopped celery or bell peppers for a crunchy texture, or throw in avocado for a richer flavor. Each variation gives your Goddess Tuna Salad a unique spin.
Make Ahead Options
These Green Goddess Tuna Salad preparations are a lifesaver for busy home cooks looking to streamline meal prep! You can mix the creamy herby dressing (mayonnaise or Greek yogurt) and store it in the refrigerator up to 3 days in advance. Simply combine the blended dressing with the drained tuna when you’re ready to serve, ensuring it’s just as fresh and delicious. To maintain quality, keep the dressing and tuna separate until it’s time to enjoy the salad. This way, you prevent the tuna from becoming soggy while ensuring your meal is packed with vibrant flavor. Enjoy effortless, nutritious meals throughout your week!
How to Store and Freeze Goddess Tuna Salad
Fridge: Keep your Goddess Tuna Salad in an airtight container for up to 2 days. This ensures it stays fresh and maintains its creamy texture.
Freezer: While not ideal for freezing due to potential texture changes, you can freeze it for up to 1 month. Thaw in the fridge before serving, although the creaminess might be affected.
Reheating: If using for a tuna melt, load the mixture onto bread with cheese and heat in an air fryer or oven until bubbly (about 5 minutes).
Notes: Always taste your salad before serving after storage; you may want to adjust seasoning to rekindle that fresh flavor.
Goddess Tuna Salad Variations
Feel free to customize this salad with delightful twists that suit your taste and dietary needs!
- Greek Yogurt Swap: Replace mayonnaise with Greek yogurt for a lighter, tangy version that still packs flavor.
- Avocado Addition: Mash in ripe avocado for extra creaminess and a nutrition boost—perfect for a luscious, satisfying texture.
- Chicken Twist: Swap out tuna for canned chicken for a different protein option that’s equally delicious and filling.
- Crunchy Veggies: Stir in diced vegetables like celery or bell peppers for a refreshing crunch that enhances the overall texture.
- Herb Medley: Experiment with herbs like tarragon or parsley in lieu of dill for intriguing flavor variations—each herb brings its own unique charm!
- Spicy Kick: Add a pinch of cayenne pepper or diced jalapeños for a zesty heat that will elevate your salad to new taste heights.
- Cheesy Delight: Incorporate shredded cheese, like cheddar or feta, into your salad for an extra layer of creamy goodness and a delightful tang.
- Nutty Crunch: Top with toasted nuts or seeds for a delightful contrast in texture; almonds or sunflower seeds work splendidly!
These variations can keep your Goddess Tuna Salad exciting and fresh, just like my colorful Cobb Salad Bliss or the vibrant flavors in the fresh Spring Roll Salad. Enjoy experimenting!
What to Serve with Healthy Green Goddess Tuna Salad
Elevate your meal experience with delightful sides that complement the creamy, herby goodness of this tuna salad.
-
Crunchy Leafy Greens: Fresh arugula or mixed greens provide a vibrant, peppery contrast that enhances the creamy salad experience.
-
Toasted Whole Grain Bread: The nutty flavor and hearty texture of whole grain bread bring a satisfying crunch that pairs perfectly with the rich salad. Spread a little extra green goddess dressing on top for an added layer of flavor!
-
Crispy Veggie Chips: Light and crispy veggie chips lend a comforting crunch that complements the rich creaminess of the tuna salad, making every bite an adventure in texture.
-
Sliced Avocado: Creamy avocado adds richness and healthy fats, enhancing the dish’s flavor profile and delivering an extra boost of nutrients.
-
Zesty Pickles: The tangy crunch of pickles brightens up your plate while cutting through the richness of the tuna salad, creating a well-rounded taste experience.
-
Refreshing Citrus Salad: A salad of mixed citrus fruits provides a bright and refreshing contrast, with bursts of sweetness and acidity that balance the savory flavors.
-
Sparkling Water with Lemon: A bright, refreshing beverage that cleanses the palate and elevates the flavor experience when enjoying your Goddess Tuna Salad.
-
Decadent Chocolate Mousse: For dessert, why not indulge in a luscious chocolate mousse? Its rich creaminess will satisfy your sweet tooth after a flavorful meal.
-
Herbed Quinoa: This nutty, fluffy side can soak up the flavors of the tuna salad and introduces an extra dose of nutrition, making your meal feel complete.
Goddess Tuna Salad Recipe FAQs
How do I select the best tuna for my Goddess Tuna Salad?
Absolutely! Look for tuna that’s packed in water, as it tends to have a better texture and flavor. If you opt for canned tuna, choose one that’s labeled “chunk light” or “solid white” for a richer bite. Always check the expiration date to ensure freshness, and give it a good rinse to remove excess salt before mixing it into your salad.
How should I store leftover Goddess Tuna Salad?
To keep your Goddess Tuna Salad fresh, transfer it into an airtight container and store it in the refrigerator. It will stay good for up to 2 days. If you notice any changes in color or odor, it’s best to discard it to be safe. Always give it a quick taste before serving again, and adjust the seasoning if needed!
Can I freeze Goddess Tuna Salad?
Great question! While freezing isn’t recommended due to the potential change in texture, you can freeze your salad for up to 1 month if needed. To do this, spoon the salad into an airtight container or freezer-safe bag. When you’re ready to enjoy it again, simply thaw it in the fridge overnight. Keep in mind that the creaminess may be affected, so it’s best to serve it fresh.
What if I have dietary allergies?
Very important! If you’re catering to allergies, you can easily adapt this recipe. For a gluten-free option, simply skip bread and serve it over greens or with gluten-free crackers. If you’re avoiding dairy, substitute the mayonnaise with avocado or a dairy-free yogurt. Always ensure to read labels if you’re buying pre-made mayo or yogurt to avoid allergens.
How can I enhance the flavors of my Goddess Tuna Salad if it seems bland?
If your Goddess Tuna Salad is lacking pizzazz, don’t worry! Start by adding a pinch more sea salt or a squeeze of lemon juice for brightness. You can also introduce a dash of hot sauce for heat or some capers for a briny, salty kick. Additionally, fresh herbs bring vibrancy—consider adding more chopped dill or basil to invigorate the flavors. Just remember to taste as you add, so you achieve the perfect balance!
Creamy Goddess Tuna Salad with Fresh Herbs for Wellness
Ingredients
Equipment
Method
- Rinse the tuna thoroughly in a fine mesh sieve. Press to drain out excess water, flake into a mixing bowl.
- Combine mayonnaise, chives, basil, dill, minced garlic, and lemon juice in a blender. Blend until smooth.
- Pour the dressing into the bowl with the tuna and fold gently until well coated.
- Taste the mixture, adjusting salt and pepper as needed for flavor.
- Serve immediately over toasted bread or crackers, or refrigerate in an airtight container.
Leave a Reply