
Tension rises in the kitchen as I fumble with my latest culinary endeavor—sweet, indulgent Chocolate Tiramisu Cupcakes! Just when I thought my dessert dreams were lost to the chaos of busy weekdays, I unearthed this recipe that merges rich tiramisu flavors with the charm of a cupcake, all in under 30 minutes. These treats aren’t just quick to make; they also come with a gluten-free option, ensuring that everyone at your gathering can indulge without worry. Whether you’re hosting a party or simply satisfying a sweet craving, these cupcakes are bound to please and impress. Curious about how to whip up this delightful fusion of flavors? Let’s dive into making your new favorite dessert!
Why Are These Cupcakes So Special?
Decadence: Each bite of these Chocolate Tiramisu Cupcakes brings a heavenly combination of chocolate and coffee flavors, making them an indulgent treat for any dessert lover.
Quick Prep: You can whip up a dozen of these beauties in under 30 minutes, saving you precious time without sacrificing flavor.
Gluten-Free Option: Everyone deserves to indulge! With a gluten-free alternative available, your cupcake-loving friends won’t miss out.
Crowd-Pleaser: Perfect for parties or family gatherings, these cupcakes are sure to impress and leave everyone asking for seconds.
Customizable: Feel free to experiment with flavored liqueurs in the filling for a personal twist, just like in our delightful Vegan Gingerbread Chocolate Tart.
Once baked, they perfectly capture the classic tiramisu experience in a fun and portable cupcake format.
Chocolate Tiramisu Cupcakes Ingredients
For the Cupcakes
- All-Purpose Flour – Provides structure; substitute with gluten-free all-purpose blend for a gluten-friendly version.
- Cocoa Powder – Adds rich chocolate flavor; use dark cocoa for a deeper taste.
- Baking Powder – Acts as a leavening agent; ensure freshness for best results.
- Granulated Sugar – Sweetens the cupcakes; coconut sugar serves as an alternative for a different flavor profile.
- Eggs – Contributes to the moisture and structure; flax eggs can be used for a plant-based option.
- Milk – Adds moisture and richness; can be substituted with almond milk for a dairy-free option.
- Vegetable Oil – Keeps the cupcakes moist; melted butter can be used as an alternative.
- Espresso – Enhances the coffee flavor; instant coffee is a suitable substitute.
For the Filling
- Mascarpone Cheese – Offers creaminess for the filling; ricotta serves as a dairy-free alternative.
- Cocoa Powder – For dusting; adds a touch of elegance and enhances the chocolate experience.
Step‑by‑Step Instructions for Chocolate Tiramisu Cupcakes
Step 1: Preheat the Oven and Prepare the Tin
Begin by preheating your oven to 350°F (175°C). While the oven warms up, line a muffin tin with cupcake liners to ensure easy removal after baking. This step sets the stage for your Chocolate Tiramisu Cupcakes, making sure they bake evenly and come out perfectly shaped.
Step 2: Whisk Together Dry Ingredients
In a large mixing bowl, combine the all-purpose flour, cocoa powder, baking powder, and granulated sugar. Use a whisk to blend these dry ingredients thoroughly, ensuring there are no lumps. This step helps to aerate the mixture and prepares the foundation for your cupcakes, adding depth to their chocolate flavor.
Step 3: Mix Wet Ingredients
In a separate bowl, whisk together the eggs, milk, and vegetable oil until the mixture is smooth and well combined. The creaminess of the wet ingredients will create a perfect batter for your Chocolate Tiramisu Cupcakes, contributing to their moistness and flavor.
Step 4: Combine Wet and Dry Mixtures
Gradually add the wet ingredients to the dry ingredients, mixing gently with a spatula until just combined. Be careful not to overmix, as this can lead to dense cupcakes. The batter should remain slightly lumpy, which is key for achieving light and airy cupcakes.
Step 5: Fill Cupcake Liners and Bake
Scoop the batter into the prepared cupcake liners, filling each about two-thirds full. Place the tin in the preheated oven and bake for 18-20 minutes, or until a toothpick inserted into the center comes out clean. This baking time ensures your Chocolate Tiramisu Cupcakes are fluffy and perfectly baked.
Step 6: Prepare the Mascarpone Filling
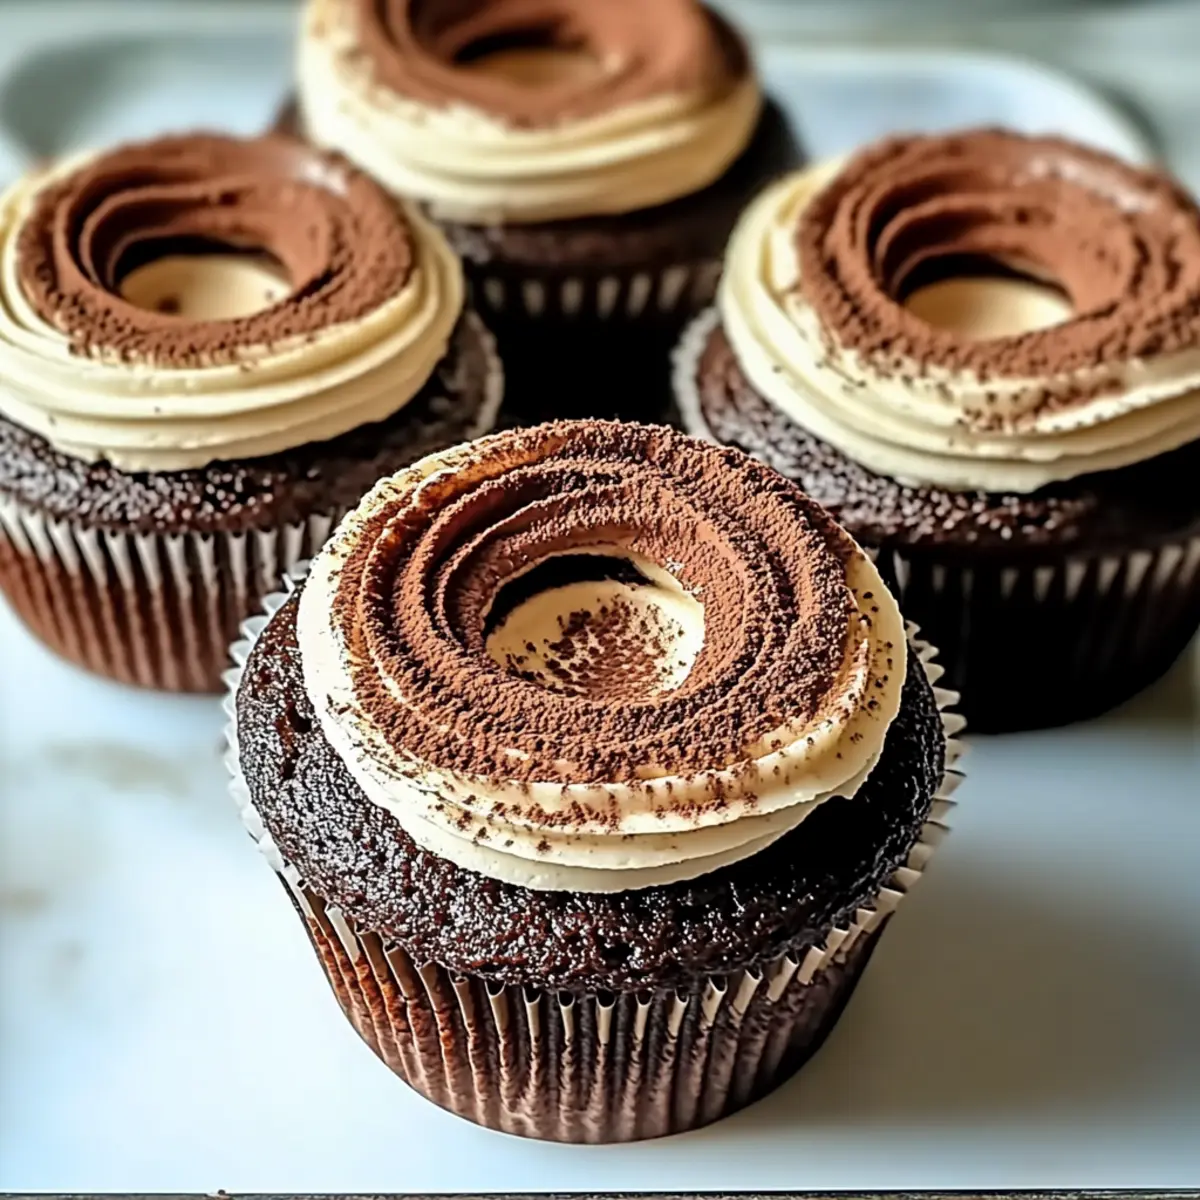
While the cupcakes cool, whip together the mascarpone cheese and espresso in a bowl until the mixture becomes fluffy and creamy. This delightful mascarpone filling captures the essence of traditional tiramisu and will provide a luscious surprise in each cupcake.
Step 7: Hollow Out the Cupcakes
Once the cupcakes have completely cooled, gently cut off the tops and scoop out a bit of the center with a spoon. This creates space for your delicious mascarpone filling, allowing the rich flavors to meld beautifully. Remember to save the tops for later as they can be placed back on after filling.
Step 8: Fill and Dust the Cupcakes
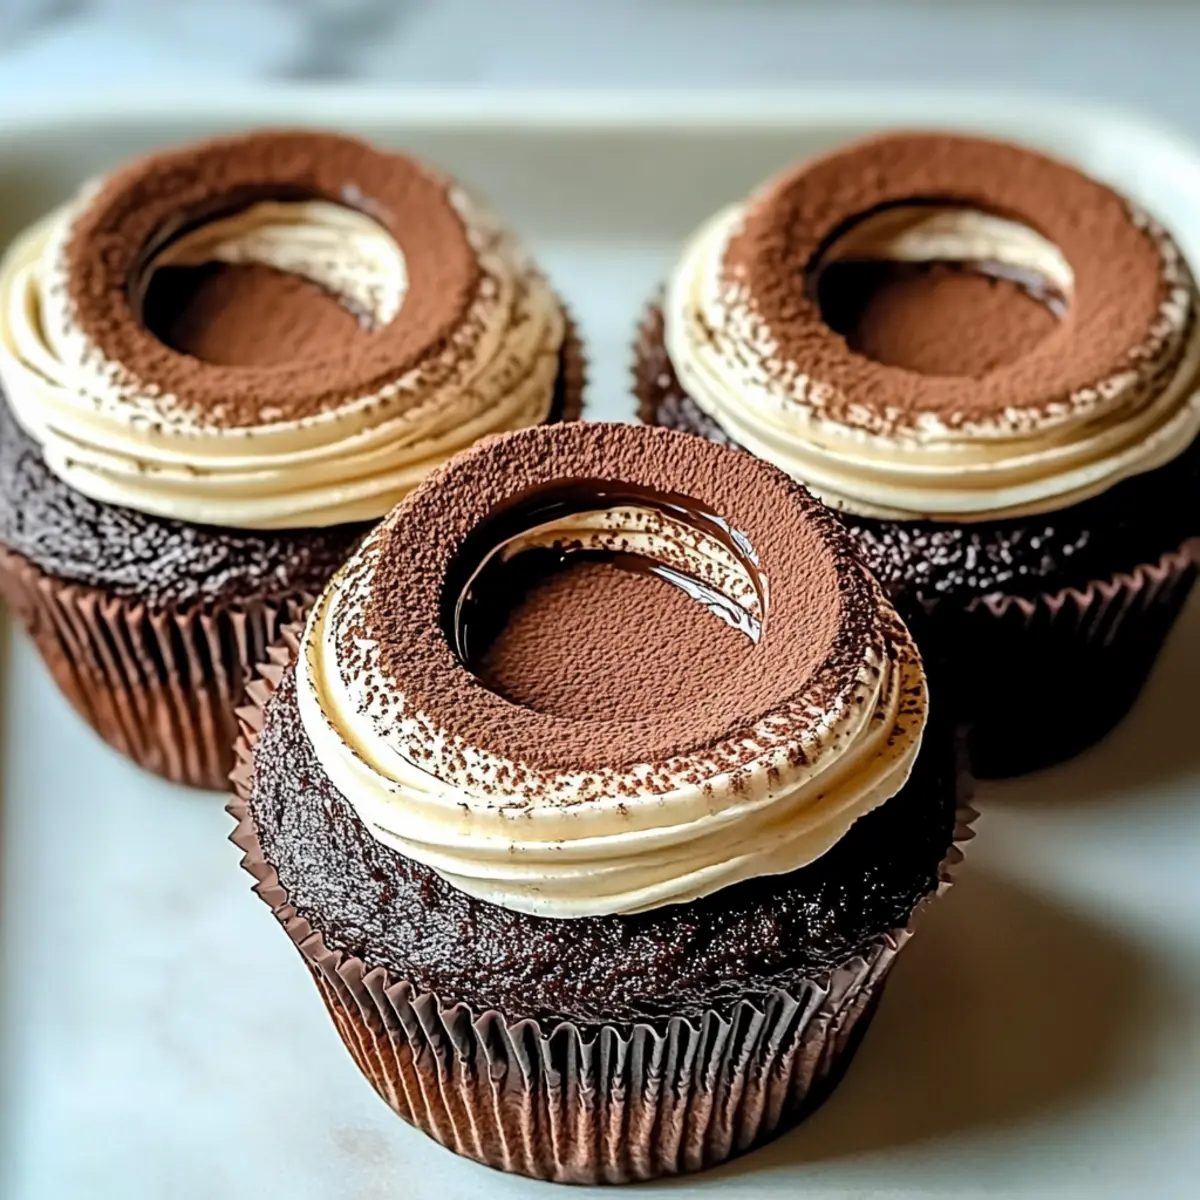
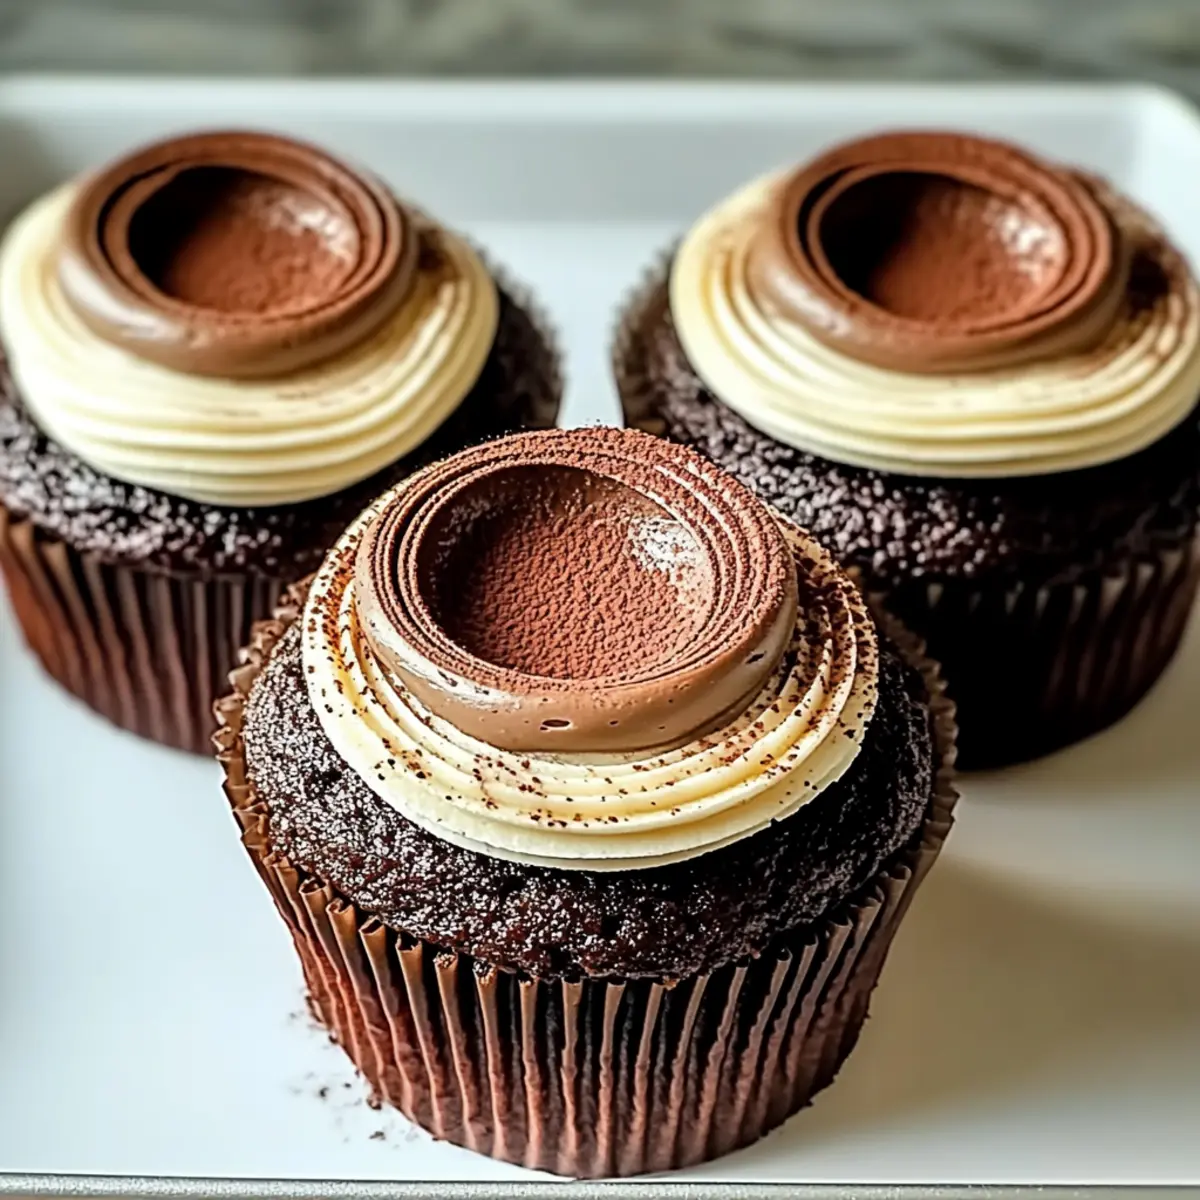
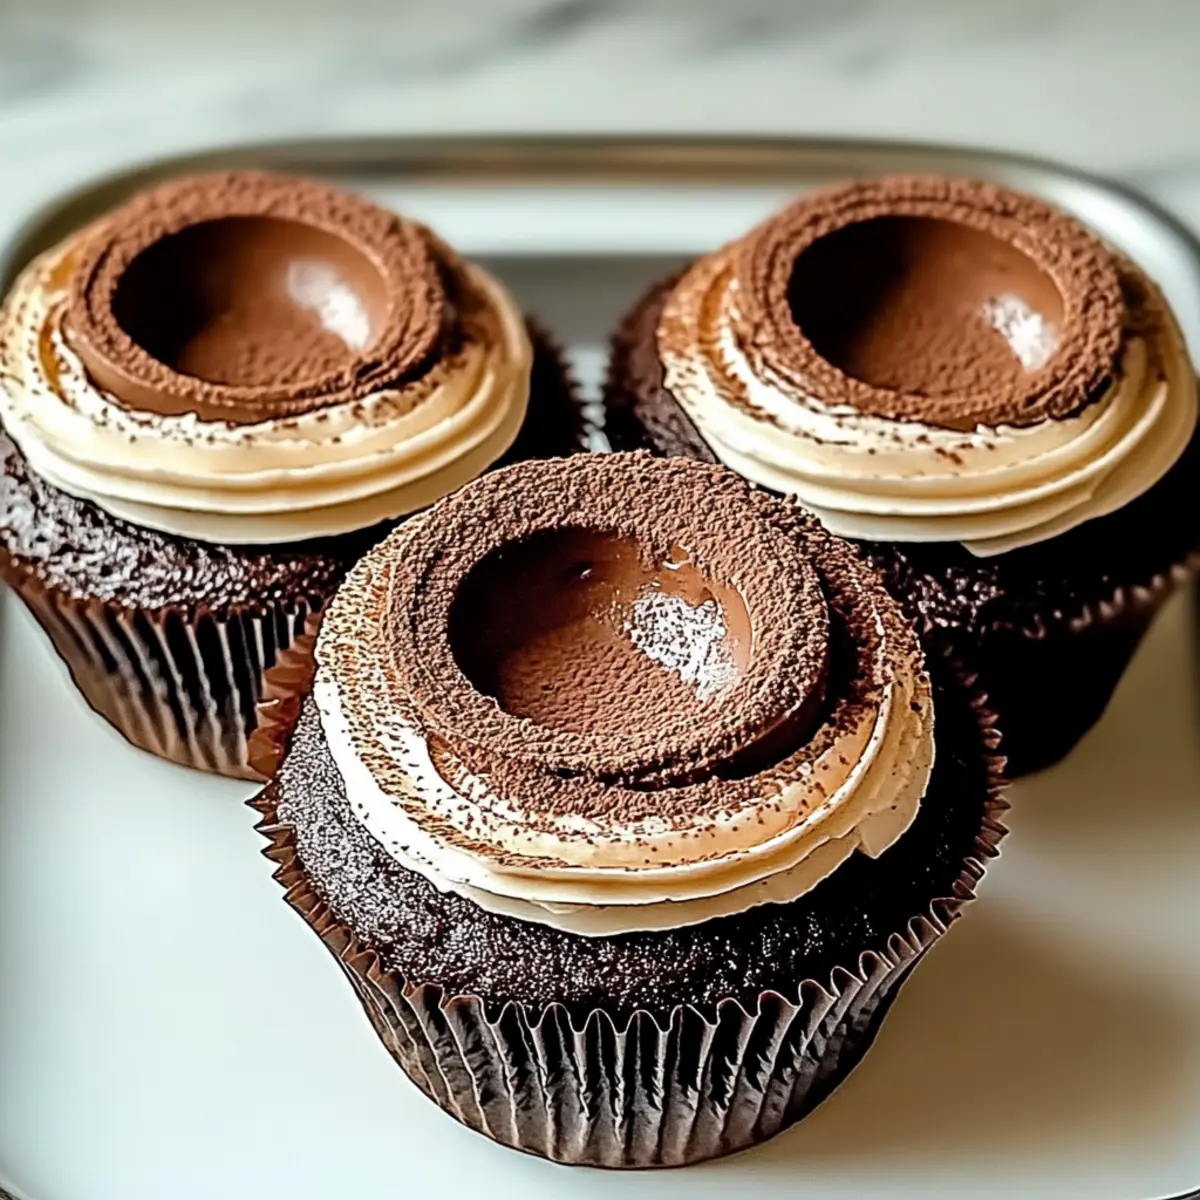
Fill each hollowed cupcake with the mascarpone mixture, ensuring a generous scoop for a creamy bite. After filling, dust the tops of the cupcakes with cocoa powder for a classic tiramisu touch. This final step adds elegance and enhances the rich chocolate flavor that makes these cupcakes so special.
Chocolate Tiramisu Cupcakes Variations
Feel free to jazz up your Chocolate Tiramisu Cupcakes to suit your taste and dietary needs!
- Dairy-Free: Substitute mascarpone with a dairy-free cream cheese or coconut whipped cream for a luscious filling.
- Gluten-Free: Use a gluten-free flour blend in place of all-purpose flour for a delicious, crowd-pleasing option.
- Extra Coffee Flavor: Add instant coffee granules to the batter for an intense coffee kick—perfect for those who love that extra depth.
- Nutty Twist: Incorporate finely chopped hazelnuts into the batter for a delightful crunch and nutty flavor, reminiscent of a classic tiramisu.
- Chocolate Drizzle: Drizzle melted dark chocolate on top after dusting with cocoa for an extra indulgent touch, elevating your presentation and taste.
- Flavor Variations: Experiment with flavored liqueurs like rum or vanilla extract in the filling to create a uniquely flavored cupcake experience!
- Ice Cream Pairing: Serve alongside a scoop of gelato or rich vanilla ice cream for a decadent treat, especially wonderful paired with fresh berries.
- Mini Cupcakes: Bake the batter as mini cupcakes for bite-sized delights that are perfect for parties; just reduce the baking time slightly.
These little twists can make your dessert experience even more delightful, so don’t hesitate to explore various options to make them your own! For even more dessert ideas, check out our Disneylands Hot Chocolate Recipe or indulge in a slice of our Triple Chocolate Mousse Cake.
Expert Tips for Chocolate Tiramisu Cupcakes
-
Measure Accurately: Ensure precise measurements to avoid any imbalance in texture and flavors; too much flour can lead to dry cupcakes.
-
Avoid Overmixing: Mix gently until just combined to preserve the light, fluffy texture that makes Chocolate Tiramisu Cupcakes delightful.
-
Cool Completely: Allow the cupcakes to cool thoroughly before adding the filling; this ensures the mascarpone doesn’t melt and lose its creamy goodness.
-
Storage Matters: Store unused cupcakes in an airtight container in the fridge for up to three days, keeping them fresh and ready for sweet cravings.
-
Customize Filling: Feel free to enhance your cupcake experience by adding a splash of flavored liqueur to the mascarpone; explore different tastes for an exciting twist.
How to Store and Freeze Chocolate Tiramisu Cupcakes
Room Temperature: Store uneaten cupcakes at room temperature in an airtight container for up to 1 day, ensuring they retain their delightful moisture and flavor.
Fridge: Keep Chocolate Tiramisu Cupcakes in the fridge for up to 3 days, covered tightly to maintain freshness and prevent them from drying out.
Freezer: For longer storage, freeze the filled cupcakes for up to 3 months. Wrap them individually in plastic wrap and then in aluminum foil to preserve their taste and texture.
Reheating: Thaw frozen cupcakes in the refrigerator overnight before serving. Enjoy them chilled, or place gently in a warm oven for a few minutes to bring back their fresh-baked warmth.
What to Serve with Chocolate Tiramisu Cupcakes
Elevate your dessert experience with a delightful spread of flavors and textures that will leave everyone asking for more.
-
Rich Vanilla Ice Cream: A scoop of creamy vanilla ice cream adds a delightful contrast to the rich chocolate and coffee flavors of the cupcakes.
-
Fresh Berries: Strawberries, raspberries, or blueberries add a burst of freshness, balancing the sweetness while enhancing the overall presentation.
-
Mint Chocolate Chip Cookies: Who can resist this combination? The mint refreshes the palate, making each bite of cupcake feel even more indulgent.
-
Espresso Martinis: Serve these elegant cocktails alongside for a playful pairing, complementing the espresso in the filling with a touch of sophistication.
-
Whipped Cream: A dollop of fresh whipped cream brings airy lightness, pairing perfectly with the rich mascarpone filling while offering a lovely visual appeal.
-
Chocolate Shavings: Create a lavish finish by garnishing cupcakes with rich chocolate shavings, amplifying the cocoa experience and sweetening the deal.
Remember, each pairing not only enhances the flavor but also adds a new element of texture, elevating your dessert gathering to something truly unforgettable!
Make Ahead Options
These Chocolate Tiramisu Cupcakes are perfect for busy home cooks looking to save time without compromising on flavor! You can bake the cupcakes up to 24 hours in advance; just store them at room temperature in an airtight container to maintain their moisture. The mascarpone filling can be prepared up to 3 days ahead and refrigerated, ensuring that the flavors meld beautifully. When you’re ready to serve, simply hollow the cooled cupcakes, fill them with the whipped mascarpone mixture, and dust with cocoa powder. This make-ahead preparation allows you to have a delightful dessert ready to impress, all while minimizing your time in the kitchen!
Chocolate Tiramisu Cupcakes Recipe FAQs
How do I choose the right ingredients for Chocolate Tiramisu Cupcakes?
Absolutely! For the best results, opt for high-quality cocoa powder and fresh ingredients. When selecting eggs, choose ones with bright yellow yolks, as they tend to have better flavor. If making gluten-free cupcakes, look for a reliable gluten-free all-purpose flour blend that contains xanthan gum for the best texture.
How should I store leftover Chocolate Tiramisu Cupcakes?
To keep your cupcakes fresh, store them in an airtight container in the fridge for up to 3 days. This helps maintain their moisture and flavor. If you live in a particularly humid area, consider placing a paper towel in the container to absorb excess moisture that could affect the cupcakes’ texture.
Can I freeze Chocolate Tiramisu Cupcakes?
Absolutely! To freeze your filled cupcakes, wrap each one individually in plastic wrap to keep them protected against freezer burn. After wrapping, place them in a freezer-safe bag or container. They can be frozen for up to 3 months. When you’re ready to enjoy, simply thaw in the refrigerator overnight.
What should I do if my cupcakes are too dry?
Not to worry! If your cupcakes turn out dry, next time ensure to measure your flour accurately and avoid overmixing the batter. If they are already baked, you can brush them lightly with simple syrup (a mix of equal parts water and sugar boiled until dissolved) to help moisten them. Another option is to serve them with a dollop of whipped cream or a scoop of ice cream to add moisture back into each bite!
Are there any dietary considerations for Chocolate Tiramisu Cupcakes?
Very! If you have gluten sensitivities, you can easily use a gluten-free flour blend. For dairy allergies, substitute the mascarpone with a dairy-free cream cheese or silken tofu blended until smooth. Additionally, if serving to children or avoiding alcohol, skip the espresso or replace it with decaffeinated coffee for the flavor without the jitters.
What’s the best way to present my Chocolate Tiramisu Cupcakes?
Presentation makes a big difference! Dust the cupcakes with cocoa powder just before serving to keep it looking fresh. You can also add chocolate shavings, fresh mint leaves, or even a drizzle of chocolate syrup on the plate to create a stunning visual. Your guests will be impressed before they even take a bite!
Decadent Chocolate Tiramisu Cupcakes in Under 30 Minutes
Ingredients
Equipment
Method
- Preheat your oven to 350°F (175°C) and line a muffin tin with cupcake liners.
- In a large mixing bowl, combine the all-purpose flour, cocoa powder, baking powder, and granulated sugar using a whisk.
- In a separate bowl, whisk the eggs, milk, and vegetable oil until smooth.
- Gradually add the wet ingredients to the dry ingredients, mixing gently until just combined.
- Scoop the batter into the cupcake liners, filling each about two-thirds full. Bake for 18-20 minutes.
- While cooling, whip together the mascarpone cheese and espresso until fluffy.
- Once cooled, hollow out the tops of the cupcakes and scoop a bit of the center out.
- Fill each hollowed cupcake with mascarpone mixture and dust with cocoa powder.
Leave a Reply