
As I rummaged through my pantry one afternoon, I stumbled upon an unexpected treasure: a roll of pre-made pie crust staring back at me. That’s when the idea for Mini Cannoli Bites sparked—an easy twist on a classic Italian dessert! These delightful, bite-sized treats pack all the rich, creamy goodness of traditional cannoli into just a few quick minutes of prep. Not only are they a crowd-pleaser for gatherings, but they also offer a fun, no-bake solution to satisfy those sweet cravings without breaking a sweat. With just six simple ingredients, you’ll have a decadent dessert that’s perfect for any occasion. Curious how to transform that crust into irresistible mini delights? Let’s dive in!
Why Are Mini Cannoli Bites So Irresistible?
Simplicity: With only six ingredients and minimal prep time, these bites are perfect even for novice bakers.
Rich, Creamy Filling: The combination of ricotta and mascarpone creates a luxurious, melt-in-your-mouth experience.
Versatile Options: Customize your bites with fun variations—swap in pistachios or add a hint of cinnamon for extra flair!
Crowd-Pleaser: Whether at holidays or casual get-togethers, these treats are sure to impress. For more delightful additions, consider serving them alongside Brie Cranberry Bites or Mini Lemon Cheesecakes for an extra special dessert spread!
No-Bake Joy: With a quick bake of the shells, the rest is straight assembly, keeping things both fun and easy.
Mini Cannoli Bites Ingredients
Prepare to whip up a delectable treat with just six ingredients!
For the Cannoli Shells
- Premade pie crust – A convenient base for your bites; homemade crust works too if you’re feeling adventurous!
For the Creamy Filling
- Whole milk ricotta cheese – Must be strained to ensure a rich, creamy filling that won’t be watery.
- Mascarpone cheese – Adds lusciousness and smoothness; substitute with cream cheese if needed.
- Vanilla extract – Pure vanilla enhances the overall flavor for a delightful sweetness.
- Powdered sugar – Adjust for your desired level of sweetness in the filling; feel free to reduce for a less sugary bite!
- Mini chocolate chips – Adds a delightful chocolate flavor and texture; swap for chopped dark or semi-sweet chocolate for variation.
These Mini Cannoli Bites are not just easy to make; they are a delicious way to indulge in dessert without any hassle!
Step‑by‑Step Instructions for Mini Cannoli Bites
Step 1: Preheat the Oven
Begin by preheating your oven to 400°F (200°C). This ensures that when you place your cannoli shells in, they get the perfect golden-brown color. As the oven warms, gather your materials: a rolling pin, a floured surface, and a 2½-inch round cutter for shaping the pie crust.
Step 2: Prepare the Crusts
On the floured surface, roll out the premade pie crust until it’s about 1/8 inch thick. Use the round cutter to cut out 12 circles, ensuring they’re evenly shaped for a uniform look. As you cut, you can feel the soft texture of the dough, making it easy to manipulate for your Mini Cannoli Bites.
Step 3: Shape the Shells
Gently press each round into an ungreased mini muffin tin, forming little cups that will hold the filling. Make sure to press down firmly enough to prevent them from puffing up too much. This shaping will create the perfect shell for your upcoming delicious cannoli filling.
Step 4: Bake the Shells
Place the muffin tin in the preheated oven and bake for 10-12 minutes, or until the edges of the pie crust are beautifully golden. You’ll know they’re done when you can see a slight puff and hear a light crisping sound. Once baked, let them cool for about 15 minutes before removing from the tin.
Step 5: Mix the Filling
In a mixing bowl, combine the well-strained whole milk ricotta cheese, mascarpone cheese, powdered sugar, and vanilla extract. Use a hand mixer to blend everything until the mixture is creamy and smooth, which should take about 2-3 minutes. Gently fold in the mini chocolate chips, adding delightful texture to your filling.
Step 6: Fill the Cannoli Shells
Transfer the creamy filling into a piping bag for an elegant touch. Carefully pipe the mixture into the cooled pie crusts, filling them generously but leaving a bit of the shell visible. This not only enhances the look but also gives your Mini Cannoli Bites that irresistibly creamy center.
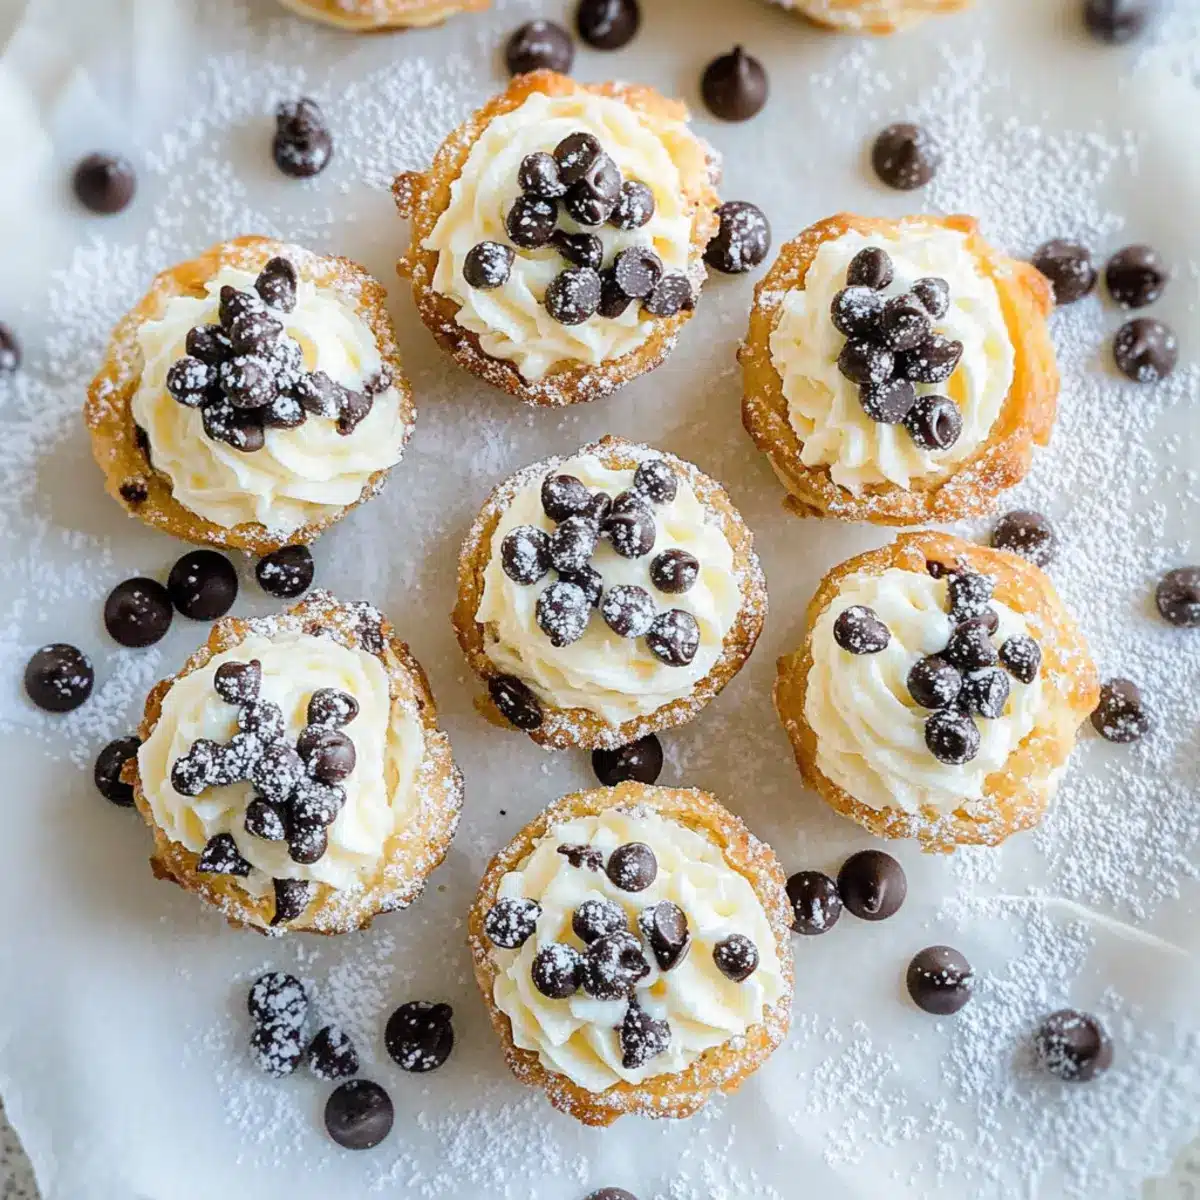
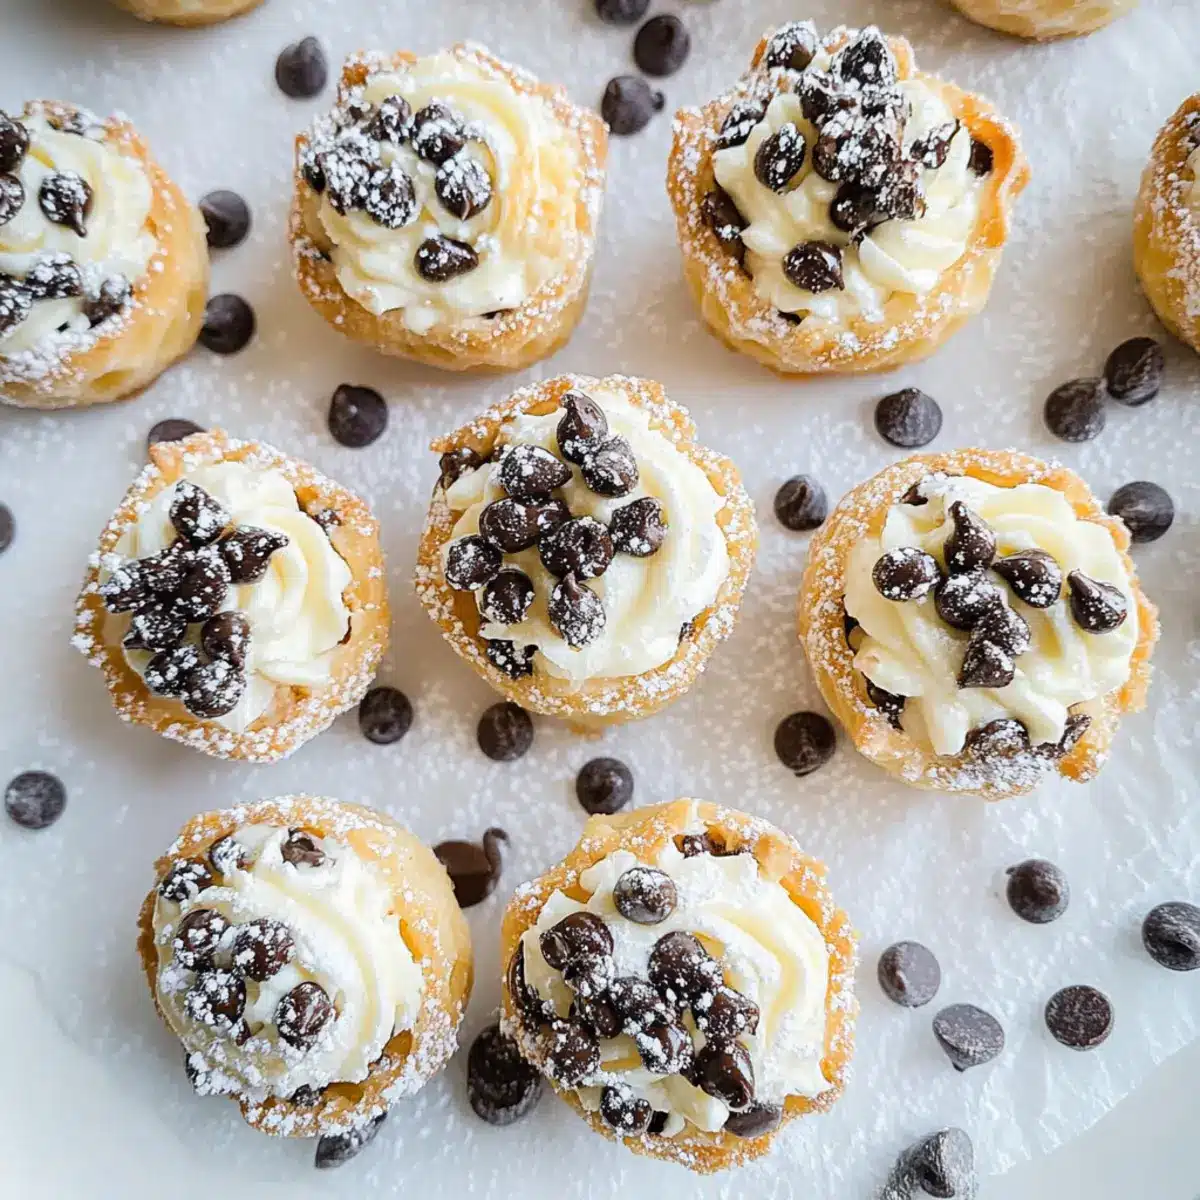
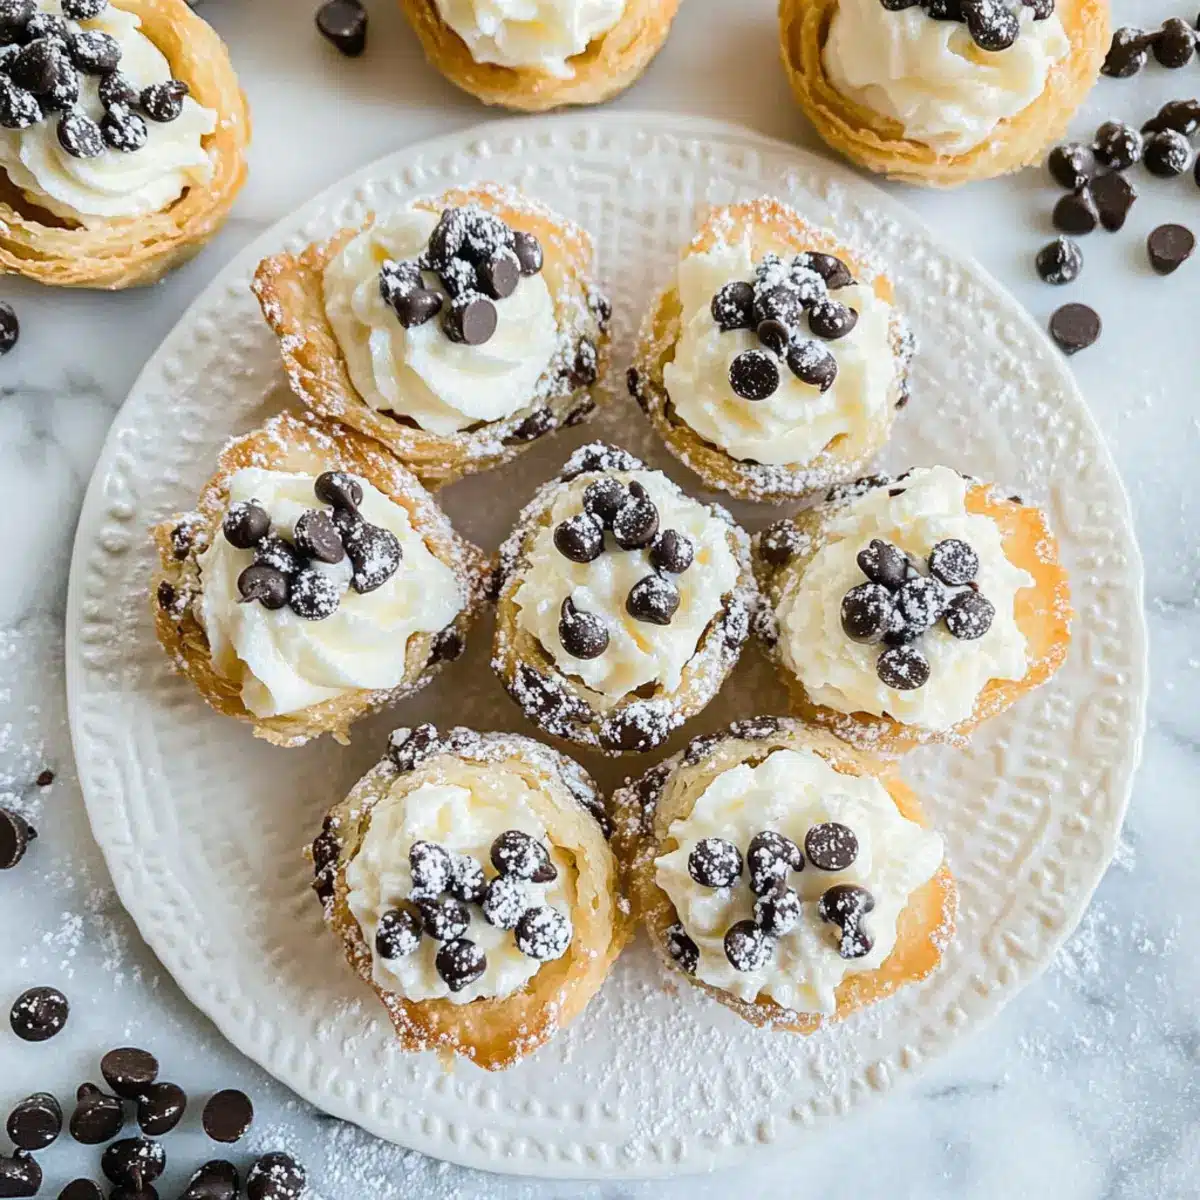
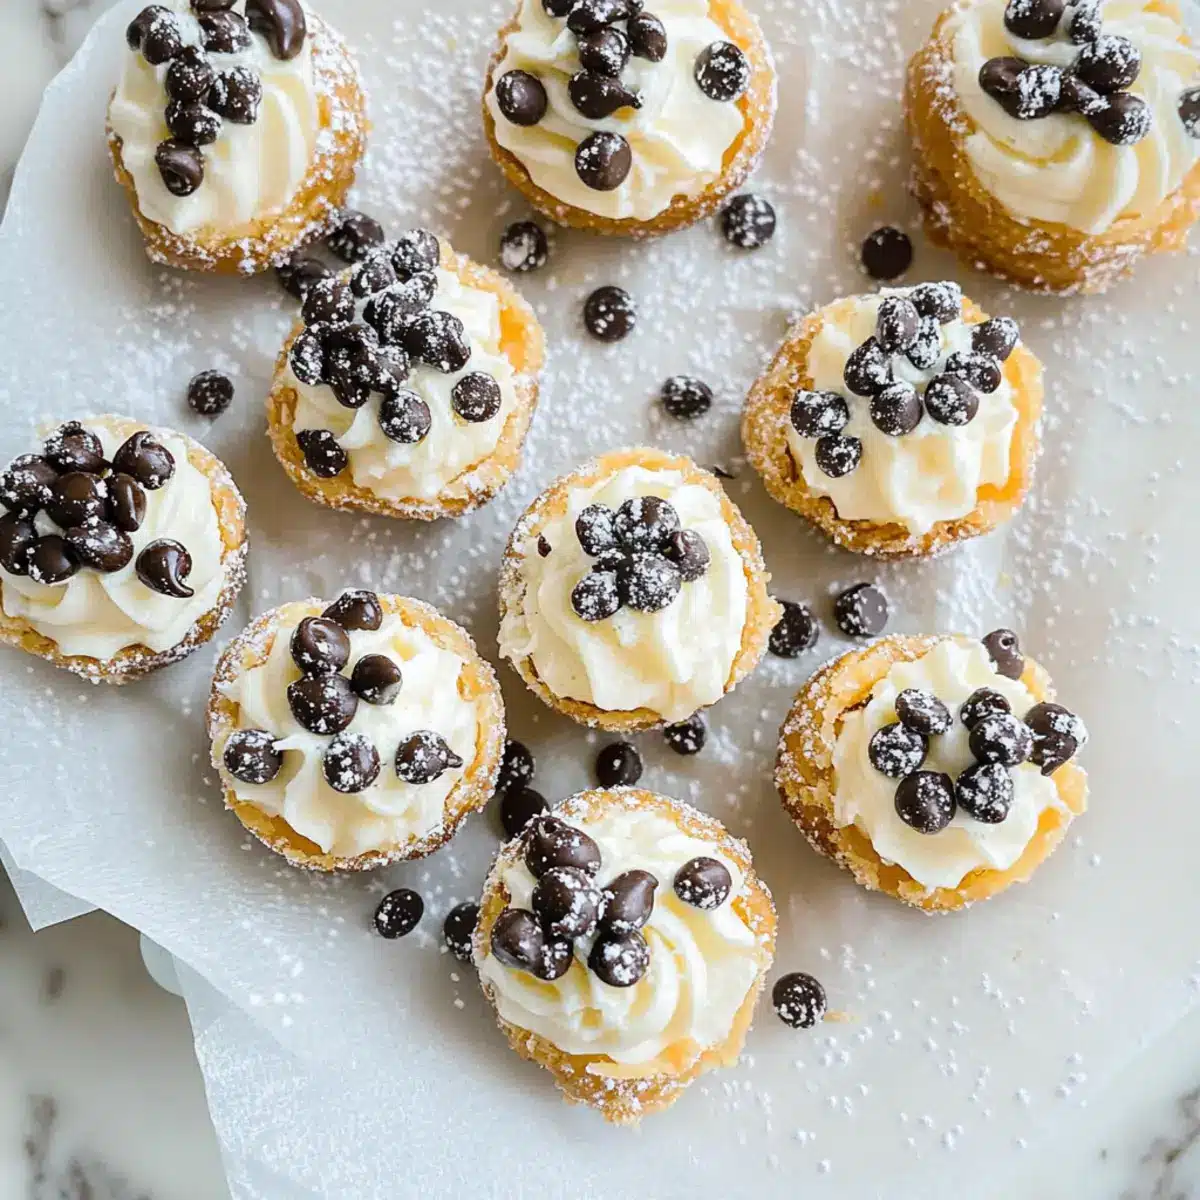
Step 7: Garnish and Serve
To finish off your Mini Cannoli Bites, sprinkle extra mini chocolate chips over the filling and dust them with powdered sugar for a lovely presentation. These garnishes will add a pop of color and sweetness, making your treats ready for a gathering or a delightful afternoon snack!
Make Ahead Options
These Mini Cannoli Bites are perfect for busy home cooks looking to save time while still serving a delectable dessert! You can prepare the cannoli filling up to 3 days in advance; simply store it in an airtight container in the refrigerator. For best results, keep the baked pie crust shells separate until just before serving to ensure they stay crispy. When you’re ready to enjoy, fill the shells with the creamy filling and garnish with chocolate chips and powdered sugar. This way, you’ll have a delightful dessert ready in no time, and they’ll be just as delicious as if made fresh!
Storage Tips for Mini Cannoli Bites
Room Temperature: Enjoy Mini Cannoli Bites fresh for the best texture, ideally the same day they are made.
Fridge: Store any leftover bites loosely covered in the refrigerator for up to 3 days. This will help maintain their flavor, although the shells may soften slightly.
Make-Ahead: Prepare the filling in advance and keep it in an airtight container in the fridge for up to 2 days. Assemble just before serving to ensure crispy shells.
Freezer: For longer storage, freeze the unfilled shell for up to 1 month. Thaw and fill them just before serving for the best results.
What to Serve with Mini Cannoli Bites?
Imagine a dessert spread that captures all the flavors of Italy, ready to delight your guests!
- Espresso or Cappuccino: A rich cup of espresso or frothy cappuccino complements the sweetness of the cannoli bites, adding warmth and depth to the dining experience.
- Fresh Berries: Bright strawberries or raspberries add a refreshing contrast to the creamy filling, enhancing the overall flavor profile with a bit of tartness.
- Pistachio Cookies: The nutty flavor of pistachio cookies echoes the unique touch of chopped pistachios in your cannoli, creating a delightful texture balance.
- Chocolate Martini: A luxurious chocolate martini is the perfect indulgent drink pairing, emphasizing the chocolate chips in your cannoli bites while making dessert feel like a celebration!
- Italian Ricotta Pie: This creamy pie shares a similar flavor profile with your Mini Cannoli Bites, allowing guests to explore the richness of Italian desserts in different forms.
- Vanilla Ice Cream: A scoop of creamy vanilla ice cream brings a classic sweet touch that contrasts the crunchy shells while enhancing the indulgence of your dessert offering.
- Amaretto Liqueur: This almond-flavored liqueur accentuates the flavors of the filling, making for a delightful dessert drink to sip alongside your treats.
- Coconut Macaroons: These chewy delights offer a different texture and flavor note that beautifully complements the richness of cannoli bites, adding variety to your dessert table.
- Fruit Tart: A fruit tart introduces lightness and a burst of freshness that balances the richness of the Mini Cannoli Bites, ensuring a harmonious dessert experience.
Expert Tips for Mini Cannoli Bites
Well-Strain Ricotta: Ensure your ricotta is well-strained; excess moisture can lead to a soggy filling and affect the overall texture of your Mini Cannoli Bites.
Piping Tips: Use a star piping tip for a lovely and elegant presentation when filling the shells, creating that delightful restaurant-style touch.
Make-Ahead Genius: If preparing ahead, store the filling separately in the fridge to keep the shells crisp. Assemble just before serving to maintain their texture.
Flavor Adjustments: Taste the filling before piping; adjust sweetness by adding more powdered sugar for a sweeter bite or reducing it for a less sugary experience.
Variations Welcome: Don’t hesitate to experiment! Swap mini chocolate chips for chopped pistachios or add a sprinkle of cinnamon to personalize your Mini Cannoli Bites.
Mini Cannoli Bites Variations
Feel free to get creative and customize these Mini Cannoli Bites to suit your family’s tastebuds—let your imagination run wild!
-
Nutty Twist: Substitute mini chocolate chips with chopped pistachios for an extra crunch and a hint of nuttiness. This delightful change adds a new flavor profile while keeping it authentically Italian.
-
Zesty Orange: Add orange zest to the ricotta filling for a burst of citrus flavor. It’s a simple way to elevate the sweetness and introduce a refreshing twist to your cannoli.
-
Lower-Carb Option: Ditch the pie crust for a low-carb delight by simply enjoying the creamy filling on its own. You can even serve it in individual cups for a sweet, guilt-free treat.
-
Phyllo Perfection: Use phyllo dough cups instead of pie crust for a light and flaky texture. The delicate crunch perfectly complements the rich filling—it’s a fantastic alternative worth trying!
-
Almond Flavor: Swap the vanilla extract for almond extract to give the filling a distinct, nutty aroma. This variation captures the essence of traditional Italian desserts and adds a beautiful depth of flavor.
-
Cinnamon Spice: Sprinkle a dash of cinnamon into the filling for a warm, spicy kick. This comforting addition can be delightful, especially during cooler months or festive gatherings.
-
Sizzling Heat: For those who like a bit of spice, add a pinch of cayenne pepper to the ricotta mixture. It might sound unusual, but the heat pairs surprisingly well with the sweetness!
-
Pack a Punch: If you’re feeling adventurous, mix in espresso powder into the filling for a coffee-flavored twist. This variation pays homage to the classic Italian café culture and adds a robust flavor.
These variations and substitutions are just the beginning! Don’t forget to enjoy your Mini Cannoli Bites with other sweet treats, like Mini Lemon Cheesecakes for an exciting dessert spread or pair them with Cannoli Cookies Bring out your Italian dessert fare. Let your taste buds lead the way!
Mini Cannoli Bites Recipe FAQs
What type of ricotta cheese should I use for the filling?
Absolutely! For the best results, use whole milk ricotta cheese that has been well-strained to eliminate any excess moisture. This prevents a watery filling and ensures a rich, creamy consistency that perfectly mirrors the traditional cannoli experience.
How should I store leftover Mini Cannoli Bites?
You can keep them in the refrigerator, loosely covered, for up to 3 days. While they’ll still be flavorful, the shells may soften a bit over time, so it’s best to enjoy them the same day they’re made for that delightful crunch!
Can I prepare the filling in advance?
Yes, you can! I often make the filling a day ahead and store it in an airtight container in the fridge for up to 2 days. Just remember to assemble the Mini Cannoli Bites just before serving to maintain the crispiness of the shells.
How do I freeze Mini Cannoli Bites?
For freezing, I suggest storing the unfilled shells. Place them in a freezer-safe bag or container and freeze for up to 1 month. When you’re ready to enjoy, simply thaw them in the fridge, then fill them with the cream mixture and serve!
What if my cannoli shells puff up too much while baking?
Don’t worry, it happens! If your shells puff too much, gently press them back down with the back of a spoon once they’re out of the oven while they’re still warm. This will create the perfect little cups for your filling.
Are Mini Cannoli Bites safe for those with allergies?
Great question! If you’re making them for someone with allergies, be cautious with the ingredients. The filling contains dairy, so those who are lactose intolerant should avoid them or use lactose-free alternatives. Always check for any other potential allergens in your ingredients to ensure everyone can enjoy these delicious bites!
Delicious Mini Cannoli Bites Ready in Under 30 Minutes
Ingredients
Equipment
Method
- Preheat your oven to 400°F (200°C). Gather materials: a rolling pin, a floured surface, and a 2½-inch round cutter.
- Roll out the premade pie crust until it’s about 1/8 inch thick. Cut out 12 circles.
- Press each round into an ungreased mini muffin tin to form little cups.
- Bake for 10-12 minutes, until edges are golden. Cool for 15 minutes before removing.
- In a mixing bowl, combine ricotta, mascarpone, powdered sugar, and vanilla. Blend until creamy. Fold in mini chocolate chips.
- Transfer filling into a piping bag. Pipe the mixture into the cooled pie crusts.
- Sprinkle extra mini chocolate chips and dust with powdered sugar before serving.
Leave a Reply