
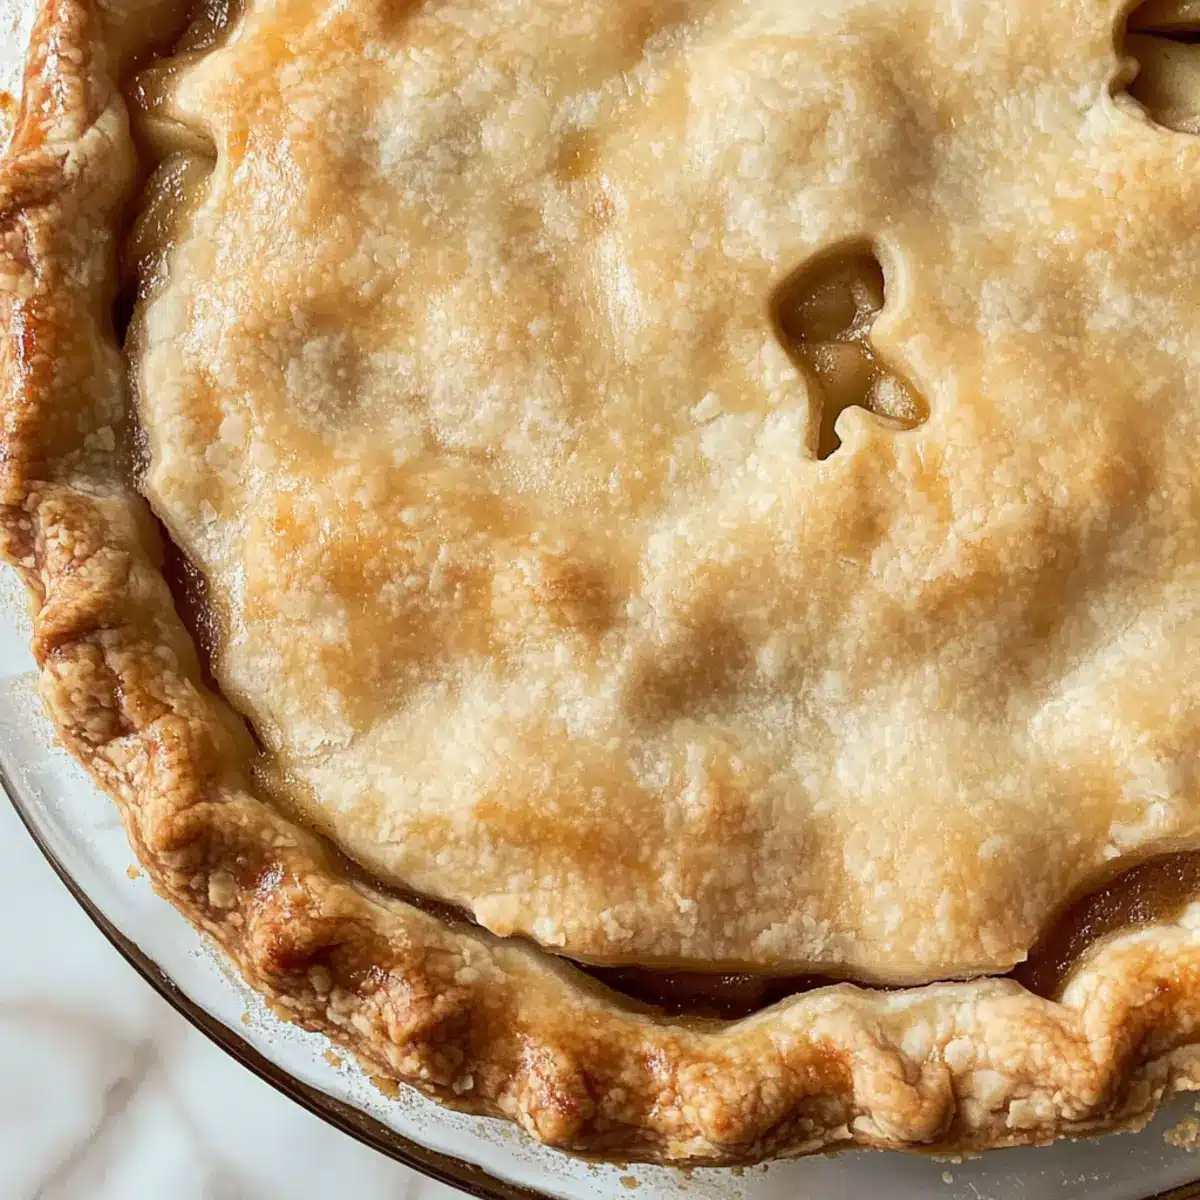
There’s something magical about the moment you roll out dough, and it transforms into the promise of a perfect pie. This Never Fail Pie Crust recipe creates a delightful base that’s incredibly versatile for any occasion—whether you’re whipping up a sweet apple pie for dessert or a savory quiche for brunch. With simple ingredients like all-purpose flour, lard, and a touch of vinegar, this crust is as easy to make as it is satisfying to eat. Plus, it has a wonderful flakiness that ensures it won’t let you down when it’s time to impress your family and friends. Ready to dive into pie-making bliss? Let’s get started on crafting this flaky masterpiece that will make your kitchen the talk of the town.
What makes this pie crust truly special?
Simplicity is key: With just a handful of ingredients, this flaky pie crust is incredibly easy to whip up, perfect for both novice and seasoned bakers alike.
Versatile options: Seamlessly switch between sweet or savory by choosing between lard, butter, or shortening based on your mood or dietary needs.
Foolproof results: Enhanced with vinegar and egg, this crust guarantees a delightful flakiness every time, so you can impress friends with your baking skills!
Make-ahead friendly: Prepare and store the dough in advance, allowing you to enjoy more quality time with loved ones when it’s time to bake. For a creative twist, check out these Mini Mushroom Pies that pair beautifully with this perfect crust!
Indulge yourself in the joy of baking and the satisfaction of presenting a homemade pie that’s irresistibly delicious.
Pie Crust Ingredients
• A flaky pie crust starts with the right ingredients for optimal texture.
For the Dough
- All-Purpose Flour – A necessary foundation for your crust; use standard all-purpose flour for best results.
- Salt – Enhances flavor; can be reduced if using salted butter as a substitute.
- Lard – Provides that coveted flakiness; can be swapped with butter or shortening for different tastes.
- Large Egg – Aids in binding and adds tenderness to the crust.
- Vinegar – Improves tenderness and controls gluten; white vinegar is ideal.
- Cold Water – Brings the dough together; add it slowly to achieve the right consistency.
Step‑by‑Step Instructions for Never Fail Pie Crust
Step 1: Mix Dry Ingredients
In a large mixing bowl, whisk together 2 cups of all-purpose flour and ½ teaspoon of salt until well combined, ensuring the flour is light and airy. This forms the base for your Never Fail Pie Crust. Take a moment to admire the quiet beauty of the flour before moving on to the next stage.
Step 2: Incorporate Fat
Add ¾ cup of cold lard to the flour mixture. Using a pastry cutter or your fingertips, cut in the lard until the mixture resembles small, pea-sized crumbs. This step is crucial, as it helps create the flakiness that makes your pie crust irresistible. Make sure the lumps are consistent before proceeding.
Step 3: Prepare Wet Ingredients
In a separate bowl, whisk together 1 large egg, 1 tablespoon of white vinegar, and about 4–5 tablespoons of cold water until well blended. The egg and vinegar will contribute to a tender crust while helping to bind the ingredients smoothly. It’s time to merge the dry and wet components for the next step.
Step 4: Combine Mixtures
Slowly pour the wet mixture into the dry ingredients while gently stirring with a fork. Keep mixing just until a soft dough starts to form; be careful not to overwork it. You want your dough to be cohesive but still tender, so avoid heavy mixing to ensure your pie crust is wonderfully flaky.
Step 5: Divide and Shape
Turn the dough out onto a lightly floured surface and gently knead it just until it comes together. Divide the dough into two equal disks, pressing each into a flat shape. Wrap each disk tightly in plastic wrap, then refrigerate for at least 1 hour to chill, allowing the flavors to meld beautifully for your pie crust.
Step 6: Roll Out
Once chilled, take one disk out of the refrigerator and let it sit for about 5 minutes at room temperature to soften slightly. On a floured surface, roll the dough into a 12-inch circle, ensuring an even thickness throughout. Visualize that perfect flaky crust; this is what will cradle your delicious pie filling!
Step 7: Transfer to Pie Dish
Gently lift the rolled dough and transfer it to a 9-inch pie dish, allowing it to drape over the edges without stretching. Use your fingers to press the dough firmly into the bottom and sides of the dish, creating a snug fit. This crust is about to hold your sweet or savory creations, so make it as pretty as possible!
Step 8: Finish and Chill
Trim any excess dough hanging over the edges, leaving about half an inch. Fold this overhang under itself to create a thicker border, then crimp the edges for a decorative touch. Chill the pie crust in the refrigerator for an additional 30 minutes before filling and baking, ensuring that your Never Fail Pie Crust maintains its shape during the baking process.
Make Ahead Options
These Never Fail Pie Crusts are perfect for busy home cooks looking to save time during meal prep! You can prepare the dough up to 3 days in advance by wrapping the formed disks tightly in plastic wrap and refrigerating them. If you prefer to make them even further ahead, they can be frozen for up to 2 months—just ensure they are well-wrapped to prevent freezer burn. When you’re ready to bake, simply thaw the dough overnight in the refrigerator (or at room temperature for a few hours). This way, you’ll have a flaky pie crust ready to go without the last-minute rush, maintaining quality and ensuring a delicious pie every time!
What to Serve with Never Fail Flaky Pie Crust?
Transform your pie creation into a complete meal with these delightful pairings that satisfy both sweet and savory cravings.
- Savory Quiche Filling: Whip up a rich quiche, loaded with seasonal vegetables and cheese, perfect for brunch or dinner.
- Fruit Compote: Serve a warm fruit compote over your sweet pie, adding a luscious, syrupy layer of flavor that complements the crust’s flakiness.
- Rich Chocolate Ganache: Drizzle a velvety chocolate ganache over a chocolate pie for a decadent finish that melts in your mouth.
- Light Salad: Pair your savory pie with a fresh green salad featuring a tangy vinaigrette to balance the richness of the crust.
- Vanilla Ice Cream: Enjoy a slice of fruit pie with a scoop of creamy vanilla ice cream, creating a delightful contrast in temperatures and textures.
- Berry Coulis: Enhance your dessert pie with a vibrant berry coulis for a splash of color and fruity brightness that dances on the palate.
Let each of these accompaniments inspire and elevate your pie-making experience, making every slice the highlight of your gathering!
Expert Tips for Perfect Pie Crust
-
Don’t Overmix: Gently combine the dough to avoid toughness; overworking leads to a dense, chewy pie crust rather than a flaky one.
-
Chill is Key: Always refrigerate your dough after shaping. This helps it maintain its structure and achieve that beautiful flaky texture when baked.
-
Egg Wash for Shine: For a lovely golden color, brush the crust with an egg wash (beaten egg mixed with milk) before baking.
-
Keep Ingredients Cold: Use cold lard and water to maintain flakiness. If your dough becomes warm, refrigerate it briefly to enhance the crust’s texture.
-
Watch for Stickiness: If your dough is too sticky as you roll it out, lightly dust your surface and rolling pin with flour to prevent sticking while ensuring a perfect pie crust.
Pie Crust Variations & Substitutions
Feel free to unleash your creativity and tweak this pie crust recipe to suit your tastes and dietary preferences!
- Dairy-Free: Substitute lard with vegetable shortening or coconut oil for a vegan-friendly crust without sacrificing flakiness.
- Gluten-Free: Use a gluten-free all-purpose flour blend to create a delightful crust that everyone can enjoy.
- Sweetened Crust: Add 1 tablespoon of granulated sugar for a hint of sweetness, perfect for your favorite dessert pies.
- Flavor Twist: Mix in 1 teaspoon of vanilla extract or almond extract for a unique flavor profile in your sweet pies.
- Herbed Crust: Incorporate finely chopped fresh herbs, such as thyme or rosemary, directly into the dough for a savory flair in your quiches.
- Nutty Crust: Replace half the flour with finely ground nuts, like almonds or hazelnuts, to introduce a rich twist in flavor and texture.
- Spicy Kick: Sprinkle a pinch of cayenne pepper or smoked paprika into the flour for a subtle spice boost that complements savory fillings beautifully.
- Miniatures: Use this pie crust recipe to create individual-sized portions by wrapping small disks of dough around your favorite fillings, just like in these tasty Mini Mushroom Pies.
With these variations, your pie crust can transform to match any occasion or crave!
How to Store and Freeze Pie Crust
Room Temperature: Store baked pie crust at room temperature for up to 2 days. Cover it loosely with aluminum foil or a clean towel to keep it fresh.
Fridge: Unbaked pie crust can be stored in the fridge for up to 3 days. Wrap tightly in plastic wrap to prevent drying out and maintain its ideal texture.
Freezer: For longer storage, freeze unbaked pie crust for up to 2 months. Make sure it’s well wrapped in plastic wrap and then in aluminum foil to avoid freezer burn.
Reheating: When ready to use a frozen pie crust, thaw it overnight in the refrigerator. Bake as directed for a fresh, flaky crust that will impress with your delicious fillings!
Never Fail Pie Crust Recipe FAQs
What type of flour should I use for this pie crust?
Absolutely, regular all-purpose flour is the best choice for your Never Fail Pie Crust. It provides the right structure and texture. Avoid using specialty flours; they may alter the flakiness you desire.
How do I know if my lard is fresh enough?
When selecting lard, look for one that is creamy white with no dark spots or off smells. Fresh lard has a clean, neutral scent. If stored properly in the fridge, it should be good for up to 3 months.
Can I freeze my unbaked pie crust?
Very! To freeze your unbaked pie crust, wrap it tightly in plastic wrap followed by aluminum foil to prevent freezer burn. It can be stored this way for up to 2 months. When you’re ready to use it, simply thaw it overnight in the refrigerator before rolling it out.
What can I do if my dough is too crumbly?
If your dough feels too crumbly and is not holding together, don’t worry! Add a teaspoon of cold water at a time and mix gently until the dough comes together. Remember, overworking the dough can cause it to become tough, so aim for a light hand.
Is this pie crust suitable for diabetics or people with gluten sensitivities?
While this classic pie crust isn’t specifically designed for gluten-free diets, you can use a gluten-free all-purpose flour blend to make it more inclusive. As for diabetics, consider using a low-carb flour alternative like almond or coconut flour, but be aware that the texture will differ and adjustments in liquid may be needed.
How long can I store my baked pie crust?
Baked pie crusts can be stored at room temperature for about 2 days. Cover them lightly with aluminum foil or a clean kitchen towel to keep them fresh. For longer storage, place it in the fridge for up to 5 days. Just remember to allow it to come to room temperature before using it in your delicious pie creations!
Flaky Pie Crust Recipe: Your Go-To for Perfect Pies Every Time
Ingredients
Equipment
Method
- In a large mixing bowl, whisk together 2 cups of all-purpose flour and ½ teaspoon of salt until well combined.
- Add ¾ cup of cold lard to the flour mixture. Cut in the lard until the mixture resembles small, pea-sized crumbs.
- In a separate bowl, whisk together 1 large egg, 1 tablespoon of white vinegar, and about 4–5 tablespoons of cold water until well blended.
- Slowly pour the wet mixture into the dry ingredients while gently stirring with a fork, mixing until a soft dough starts to form.
- Turn the dough out onto a lightly floured surface and gently knead it just until it comes together. Divide into two disks.
- Wrap each disk tightly in plastic wrap and refrigerate for at least 1 hour.
- Roll the dough into a 12-inch circle on a floured surface, maintaining even thickness.
- Transfer the rolled dough to a 9-inch pie dish and press it firmly into the base and sides.
- Trim excess dough, fold overhang under itself, and crimp edges. Chill for an additional 30 minutes.
Leave a Reply