
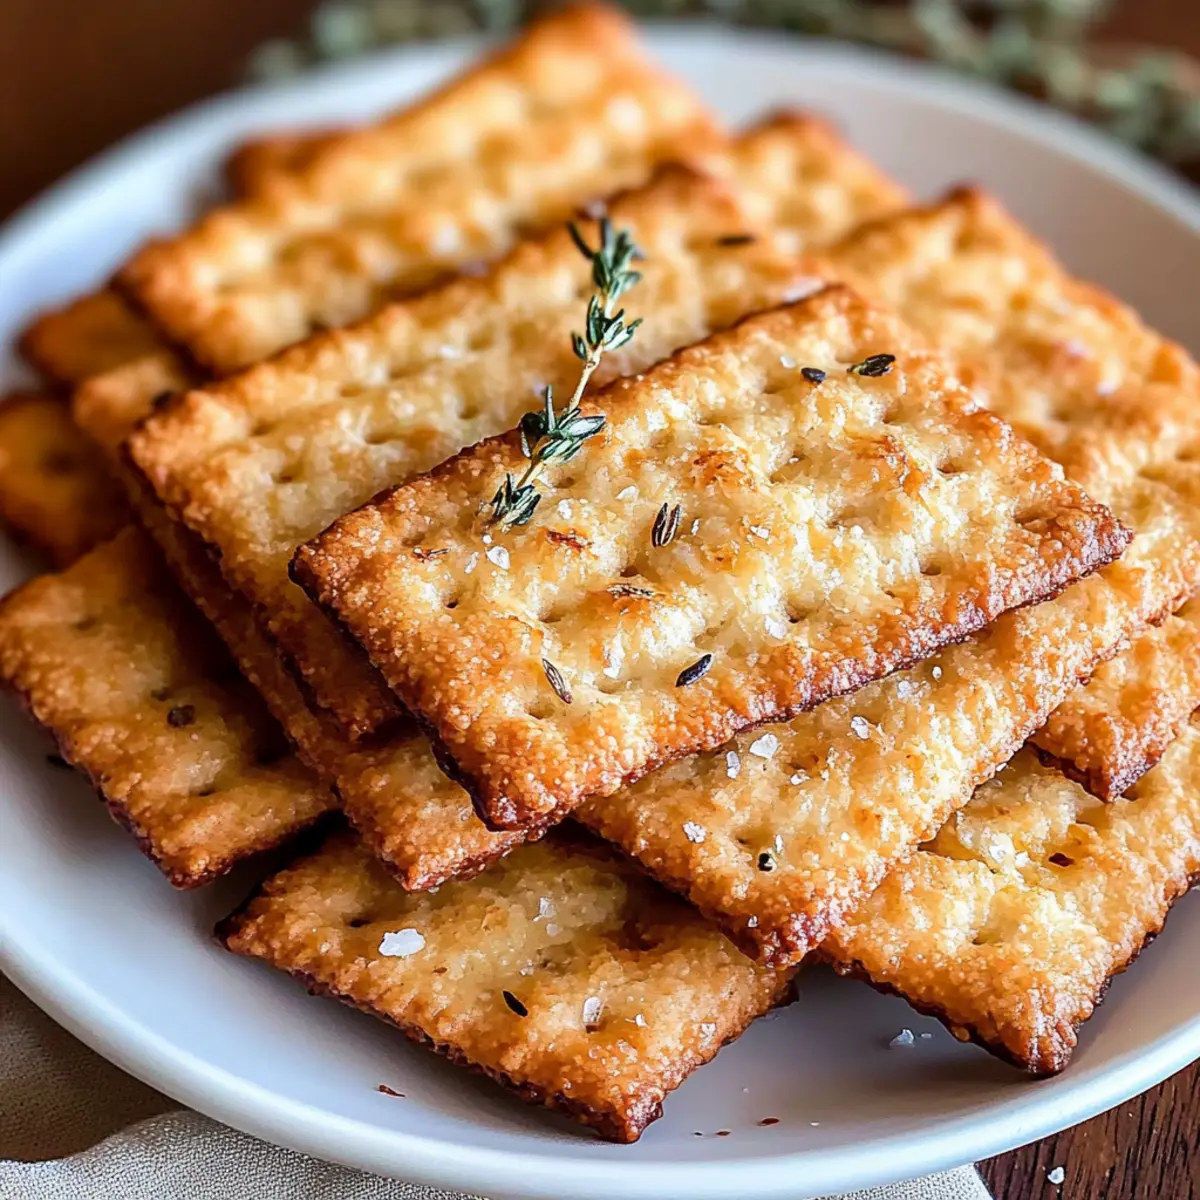
As I stood in my kitchen, the heavenly aroma of melting cheese began to fill the air, instantly lifting my spirits. If you’re a fan of crunchy snacks, then these Homemade Cheese Crackers are about to become your new obsession. Not only are they incredibly easy to make, but they also offer a delightful alternative to store-bought varieties. Imagine whipping up a batch for game night or a cozy movie marathon that everyone will rave about—talk about a win-win! With options to make them gluten-free and the ability to customize flavors with different cheeses and herbs, you’re in for a treat that’s both versatile and satisfying. Ready to explore how to elevate your snacking game with these irresistible crackers? Let’s dive in!
Why are Homemade Cheese Crackers a Must-Try?
Irresistible Crunch: These cheese crackers deliver a satisfying crispness that store-bought snacks simply can’t match.
Customizable flavor: Feel free to swap cheddar for gouda, pepper jack, or even sprinkle in your favorite herbs.
Gluten-free option: Cater to different dietary needs by using a gluten-free flour blend without compromising taste.
Quick and Easy: Ready in less than 30 minutes, they’re perfect for spontaneous gatherings. Plus, paired with dips or charcuterie, they make any occasion special!
Make sure to try out Mini Lemon Cheesecakes for a sweet contrast to your savory treats!
Homemade Cheese Crackers Ingredients
For the Dough
- All-Purpose Flour – Provides structure; for gluten-free options, substitute with a gluten-free all-purpose flour blend.
- Salt – Enhances flavor; adjust the amount based on the saltiness of the cheese used.
- Grated Sharp Cheddar Cheese – Adds rich, cheesy flavor; feel free to switch it for gouda, parmesan, or any preferred cheese.
- Cold Unsalted Butter – Contributes to flakiness; make sure the butter is very cold for the best texture.
- Cold Water – Binds the ingredients into a cohesive dough; add gradually until the dough holds together.
Optional Seasoning
- Coarse Sea Salt – Consider sprinkling on top before baking for an extra flavor boost; it complements the Homemade Cheese Crackers beautifully.
- Dried Herbs (e.g., rosemary, thyme) – Add for an aromatic touch to elevate the taste profile of the crackers.
- Spices (e.g., garlic powder, smoked paprika) – Incorporate for added depth of flavor, perfect for those who love a zing!
Step‑by‑Step Instructions for Homemade Cheese Crackers
Step 1: Preheat Oven
Begin by preheating your oven to 350°F (175°C). This crucial step allows the Homemade Cheese Crackers to bake evenly and develop that golden, crispy texture we all crave. While the oven heats, make sure to gather your baking sheets and line them with parchment paper for easy cleanup.
Step 2: Mix Dry Ingredients
In a large mixing bowl, whisk together the all-purpose flour and salt until well combined. This step ensures that the salt is evenly distributed throughout the flour, providing the best flavor to your Homemade Cheese Crackers. Take a moment to enjoy the simple act of preparing these basic ingredients as they will transform into something delicious!
Step 3: Add Cheese and Butter
Next, add the grated sharp cheddar cheese and cold unsalted butter to the flour mixture. Using a pastry cutter, blend them together until the mixture resembles coarse crumbs, with visible bits of butter and cheese. This process is essential for achieving that delightful flakiness in your crackers, so take your time and ensure everything is mixed thoroughly.
Step 4: Incorporate Water
Slowly mix in cold water, adding just enough until the dough comes together into a cohesive ball. It’s important to add the water gradually, so check the texture; it should be moist but not sticky. This step will bring the Homemade Cheese Crackers dough together, preparing it for rolling.
Step 5: Roll Dough
On a lightly floured surface, roll out the dough to about 1/8 inch thick. As you roll, be sure to keep the surface and rolling pin lightly floured to prevent sticking. The thickness is key here, as it affects the crispiness of the Homemade Cheese Crackers; aim for a uniform layer to ensure even baking.
Step 6: Cut Shapes
Use cookie cutters or a sharp knife to cut the rolled dough into squares or any desired shapes. Try to keep the shapes consistent in size for uniform baking. Gather any scraps and re-roll to cut additional crackers. Lay the cut shapes on the prepared baking sheets, leaving some space in between for expansion.
Step 7: Bake
Carefully place the baking sheets in the preheated oven. Bake the Homemade Cheese Crackers for 15-20 minutes, or until they are golden brown and fragrant. Keep an eye on them during the last few minutes to prevent over-baking, as the color change can happen quickly and impact the final texture.
Step 8: Cool and Store
Once baked, remove the crackers from the oven and allow them to cool on the baking sheet for a few minutes. Then, transfer them to a plate to cool completely. Once cooled, store your Homemade Cheese Crackers in an airtight container at room temperature for up to one week, ensuring they remain just as delicious as when they were fresh out of the oven.
Expert Tips for Homemade Cheese Crackers
-
Watch the Bake Time: Monitor your Homemade Cheese Crackers closely in the oven; even a minute too long can lead to burning. Aim for that golden hue!
-
Texture Matters: Ensure your butter is icy cold before incorporating it. This helps create the flaky texture that makes these crackers irresistible.
-
Uniform Thickness: Use a rolling pin with guides or a ruler to achieve an even thickness. This guarantees a consistent bake and crunch across all crackers.
-
Experiment with Flavors: Don’t shy away from mixing different cheeses or adding herbs and spices. Each variation transforms the flavor profile completely, keeping things exciting!
-
Proper Storage: For optimal freshness, let the crackers cool completely before storing them in an airtight container. They’ll stay crisp and delicious!
Homemade Cheese Crackers Variations & Substitutions
Feel free to get creative and customize your cracker experience with these delightful twists!
- Gluten-Free: Use a gluten-free all-purpose flour blend instead of regular flour to cater to gluten-sensitive friends and family.
- Cheese Swap: Experiment with gouda, parmesan, or pepper jack for a unique flavor twist that can ignite your taste buds! Each cheese will bring its own character, so don’t hesitate to mix it up.
- Herb-Infused: Add dried herbs like rosemary or thyme to the dough for a fragrant touch that elevates the overall flavor. The aroma of these tiny additions will transport you straight to a cozy herb garden.
- Spicy Kick: Stir in some crushed red pepper or cayenne for heat. These spicy cheese crackers will add a delightful zing, perfect for those who like their snacks with a bit of a bite.
- Smoky Flavor: Incorporate smoked paprika or liquid smoke for a bold, smoky flavor. Imagine enjoying these alongside a charcuterie board; they complement meats and cheeses beautifully.
- Nutty Crunch: Toss in some finely chopped nuts, like almonds or pecans, for added texture and a nutty flavor explosion. This twist creates an appealing crunch that contrasts wonderfully with the crispy cracker.
- Seasoned Topping: Sprinkle coarse sea salt or everything bagel seasoning on top before baking for an extra flavor boost. These little seeds and spices bring a pop of flavor that’s simply irresistible!
- Sweet Surprise: For a fun dessert take, add a touch of sugar to the dough and serve these with a sweet dip or cheese spread! Lightly dusting with powdered sugar can be a delightful surprise at a gathering.
As you whip up these delectable treats, why not try serving them alongside a stunning Holiday Cream Cheese Antipasto Log or some irresistibly creamy Brie Filo Crackers? They’ll create the perfect snacking experience!
How to Store and Freeze Homemade Cheese Crackers
Room Temperature: Keep your Homemade Cheese Crackers in an airtight container at room temperature for up to one week to maintain their crispness and flavor.
Fridge: If you prefer, the crackers can also be stored in the refrigerator for up to 10 days. Just make sure they are sealed tightly to prevent moisture.
Freezer: For longer storage, freeze your fully cooled Homemade Cheese Crackers in a freezer-safe bag for up to 3 months. Thaw them at room temperature for the best texture upon serving.
Reheating: To re-crisp any leftover crackers, pop them in a 350°F (175°C) oven for about 5-7 minutes. This will restore their delightful crunch!
Make Ahead Options
Homemade Cheese Crackers are a fantastic option for meal prep, saving you time during busy weeknights or gatherings. You can prepare the dough up to 24 hours in advance, simply wrap it tightly in plastic wrap and refrigerate it to keep it fresh and prevent drying out. If you want an even more convenient option, roll out the dough and cut the shapes ahead of time, then store the uncooked crackers on a parchment-lined baking sheet in the fridge for up to 3 days. When you’re ready to enjoy, just bake them straight from the refrigerator, adding a few extra minutes to the baking time for perfectly crispy results. This way, you’ll have delicious, homemade cheese crackers with minimal effort when you need them!
What to Serve with Irresistible Homemade Cheese Crackers
Imagine a cozy gathering, where the aroma of fresh-baked cheese crackers fills the air, inviting everyone to indulge in a delightful snacking experience.
-
Creamy Hummus: This smooth dip complements the crispiness of the crackers, offering a nutty flavor that creates a great balance.
Pair it with roasted garlic or sun-dried tomatoes for an extra layer of deliciousness. -
Fresh Veggie Platter: A colorful array of crisp vegetables like cucumbers, carrots, and bell peppers adds refreshing crunch and nutrition to your snack spread.
Dip them in a zesty ranch dressing for a fun and engaging combination. -
Artisan Cheese Board: Combine different cheeses like gouda or blue cheese to elevate your snacking experience.
This variety pairs beautifully with the flavors in the homemade cheese crackers! -
Savory Chicken Dip: A warm, cheesy chicken dip packed with spices is a fantastic complement to your crackers, adding a hearty touch.
Serve it with a sprinkle of green onions for added freshness. -
Charcuterie Selection: Slices of cured meats, such as salami and prosciutto, enhance the flavors while providing satisfying umami.
Combine these with olives and nuts for a true gourmet touch. -
Craft Beer Pairing: A light ale or a rich stout can enhance the tasting experience, matching the savory notes of the cheese crackers perfectly.
Consider a fruity beer for a delightful contrast that will surprise your palate. -
Mini Lemon Cheesecakes: For a touch of sweetness, finish off with a light dessert that balances the savory flavors you’ve enjoyed.
Their creamy texture and tartness make for a delightful conclusion!
Homemade Cheese Crackers Recipe FAQs
How do I select the right cheese for Homemade Cheese Crackers?
Absolutely! When choosing cheese, opt for sharp cheddar for a robust flavor. You can also use gouda for a creamier texture or pepper jack for an exciting kick. If you’re looking for a gluten-free option, make sure that your cheese is free from additives that might contain gluten.
What is the best way to store my Homemade Cheese Crackers?
To keep your crackers fresh, store them in an airtight container at room temperature for up to one week. If you live in a humid environment, consider placing a piece of parchment paper inside to absorb moisture, ensuring your crackers stay crispy.
Can I freeze Homemade Cheese Crackers? How?
Yes, you can! Once the Homemade Cheese Crackers have fully cooled, place them in a freezer-safe bag, removing as much air as possible. They can be frozen for up to 3 months. When ready to serve, let them thaw at room temperature for the best taste and texture. If you want them crunchy again, just pop them in a preheated oven at 350°F (175°C) for about 5-7 minutes.
What should I do if my cracker dough is too dry or crumbly?
Very! If you find your dough is crumbly, it’s likely that you didn’t add enough water. Gradually sprinkle in more cold water, a tablespoon at a time, and knead gently until the dough holds together without being sticky. Remember, the dough should come together into a cohesive ball.
Can I make these Homemade Cheese Crackers dairy-free?
Absolutely! To create a dairy-free version, substitute the cheese with nutritional yeast for a cheesy flavor and use a vegan butter alternative. Be sure to check that all other ingredients, such as your flour and seasonings, are also dairy-free.
Are there any allergy considerations for Homemade Cheese Crackers?
Yes! If you’re serving them to others, be aware of common allergens. The main ingredients (flour, cheese, butter) can cause issues for individuals with gluten or dairy sensitivities. Be sure to label your Homemade Cheese Crackers if attending gatherings, especially if you’ve customized your recipe.

Delicious Homemade Cheese Crackers Everyone Will Love
Ingredients
Equipment
Method
- Preheat your oven to 350°F (175°C) and line baking sheets with parchment paper.
- In a large mixing bowl, whisk together the all-purpose flour and salt.
- Add grated sharp cheddar cheese and cold unsalted butter to the flour mixture. Blend until it resembles coarse crumbs.
- Gradually mix in cold water until the dough forms a cohesive ball.
- Roll out the dough on a floured surface to about 1/8 inch thick.
- Cut the rolled dough into squares or desired shapes and place on prepared baking sheets.
- Bake the crackers for 15-20 minutes or until golden brown.
- Allow to cool on sheets for a few minutes before transferring to a plate.
Leave a Reply