
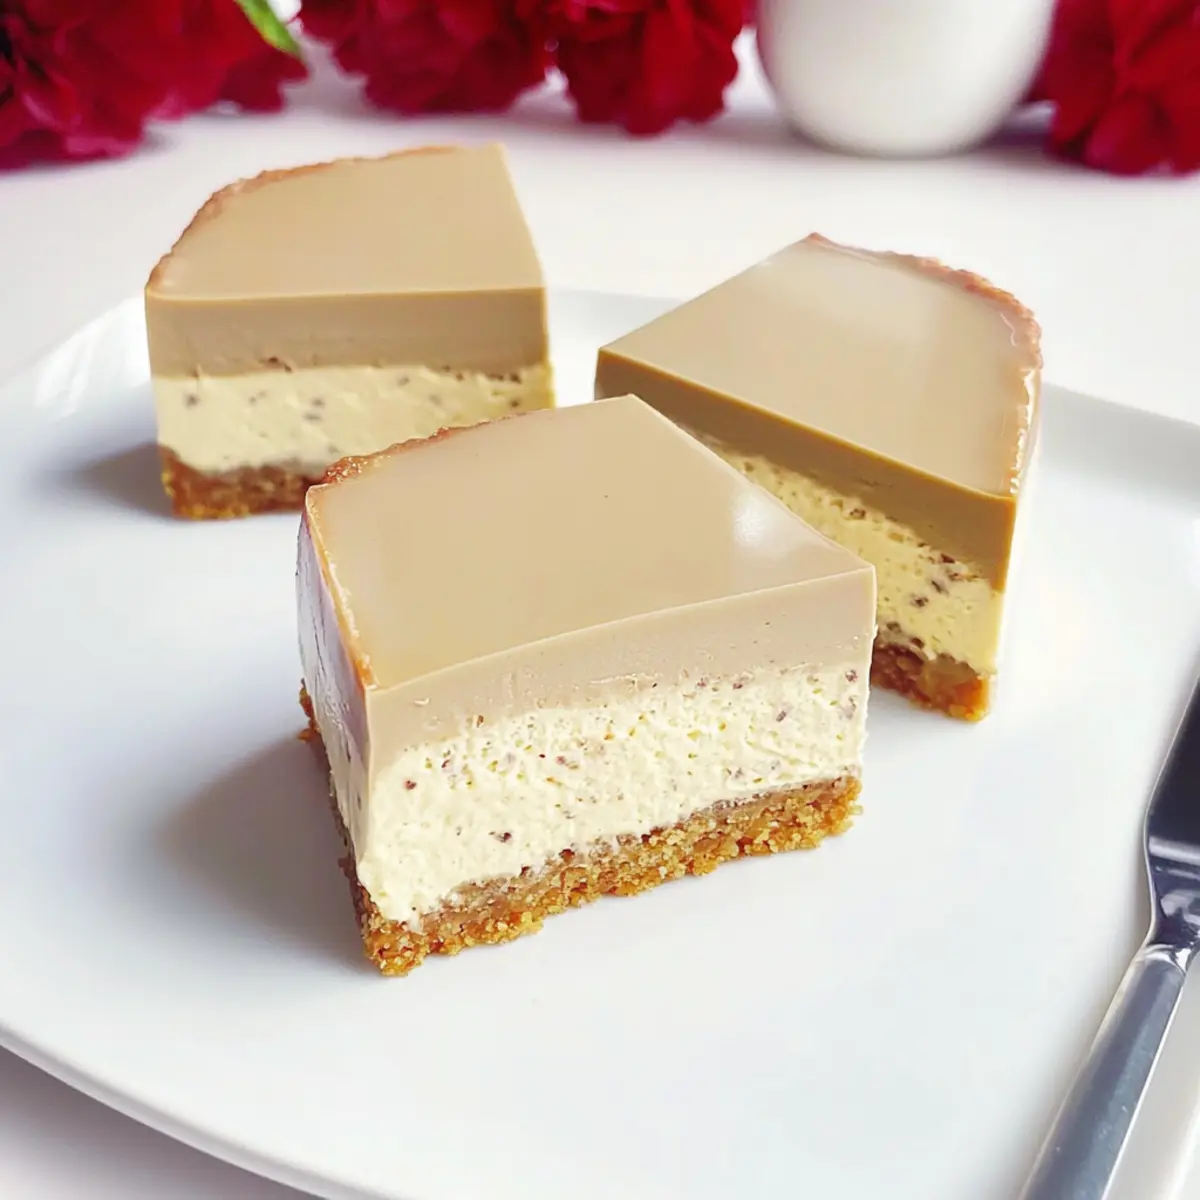
As I sat sipping my Earl Grey tea one afternoon, a delicious idea struck me: why not transform that soothing, citrusy aroma into an elegantly crafted dessert? Enter the No-Bake Earl Grey Mousse Cheesecake—a beautiful fusion of flavors that’s as sophisticated as it is approachable. This easy-to-make dessert not only saves you time by requiring no baking, but it also invites customization with your favorite tea flavors. Whether you’re hosting an afternoon tea or simply treating yourself, this cheesecake’s glossy mirror glaze and velvety texture will surely impress. Curious about how this delightful dessert comes together? Let’s dive in!
Why is Earl Grey Mousse Cheesecake So Special?
No-Bake Bliss: The beauty of this recipe lies in its effortless preparation, allowing you to whip up an elegant dessert without turning on the oven.
Customizable Flavors: Experiment freely with different tea options like matcha or jasmine, catering to your taste buds and making each cheesecake unique.
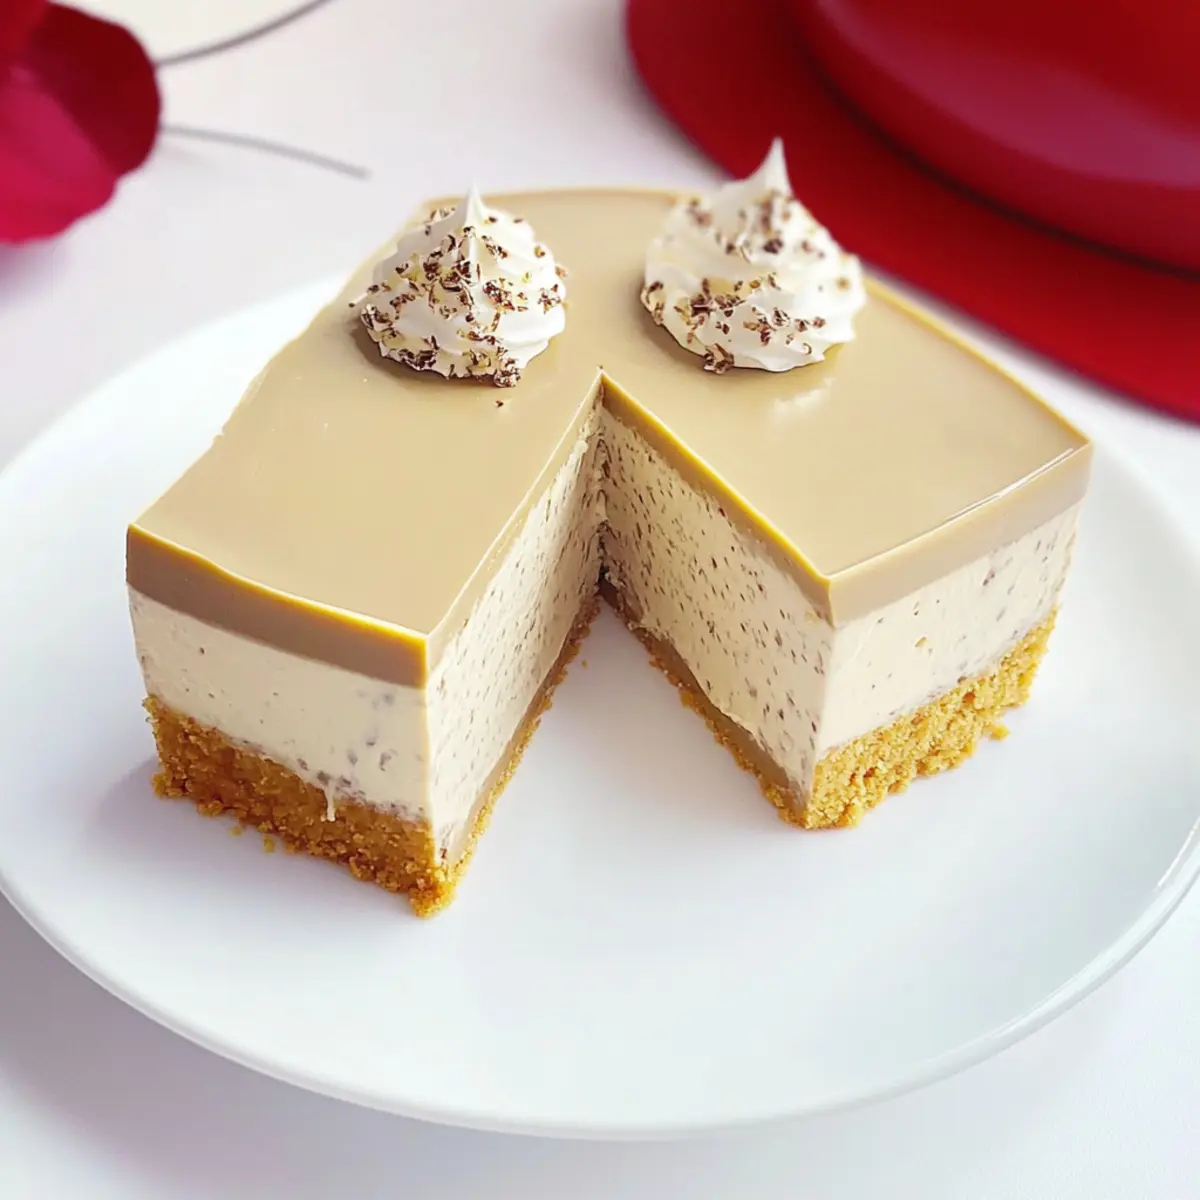
Sophisticated Elegance: With its glossy mirror glaze and velvety texture, this dessert elevates any gathering, whether it’s a formal tea party or a cozy night in.
Time-Saving Delight: You can prepare it ahead of time, freeing you to enjoy the occasion without stress—just like with the simple steps of my Sugar Cookie Cheesecake!
Crowd-Pleaser: Whether served to friends or family, the subtle flavors and airy mousse make this cheesecake a universal favorite, destined to impress even the toughest critics.
Earl Grey Mousse Cheesecake Ingredients
• Create your perfect Earl Grey Mousse Cheesecake with these simple and delightful components:
For the Biscuit Base
- Caramel Biscuits – The main ingredient providing sweetness and a lovely texture; digestive biscuits can work if you’re in a pinch.
- Unsalted Butter – Binds the biscuit crumbs for a cohesive base; regular butter will add more flavor.
For the Mousse Layer
- Cream Cheese – Forms the smooth and creamy base; remember to soften it at room temperature for easy blending.
- Caster Sugar – Sweetens the cheese mixture beautifully; granulated sugar can substitute, but the texture may differ.
- Hot Milk – Essential for dissolving gelatin and infusing Earl Grey flavor; aim for milk around 40°C for best results.
- Gelatin Sheets – Creates structure in the mousse layer; feel free to use powdered gelatin (1 sheet = ~2g) if preferred.
- Earl Grey Tea Powder – Infuses the mousse with its fragrant flavor; try matcha or hojicha for a different experience.
- Whipping Cream – Adds whipped lightness and volume; whip until you reach soft peaks for that perfect fluffiness.
For Decoration
- Crushed Caramel Biscuits – Optional but fabulous for visual appeal and added texture on top.
- Earl Grey Tea Bag – Used for the optional mirror glaze; gives an extra depth to the glaze flavor to complement your mousse.
Now, with all the right ingredients in hand, you’re one step closer to creating this delightful Earl Grey Mousse Cheesecake that will surely become a cherished recipe in your home!
Step‑by‑Step Instructions for Earl Grey Mousse Cheesecake
Step 1: Biscuit Base Preparation
Begin by crushing the caramel biscuits into fine crumbs using a food processor or a rolling pin. Melt the unsalted butter and mix it with the biscuit crumbs until the texture resembles wet sand. Firmly press this mixture into the bottom of a lined round mold, ensuring an even layer. Refrigerate the base for about 10 minutes to allow it to set before adding the mousse.
Step 2: Cheese Mousse Layer
While the biscuit base sets, prepare the creamy mousse layer. In a mixing bowl, combine softened cream cheese with 10g of caster sugar, beating until you achieve a smooth and creamy consistency. In a separate container, dissolve the gelatin sheets in hot milk (around 40°C), then stir in the Earl Grey tea powder. Slowly add this mixture to the cream cheese, blending until incorporated.
Step 3: Whipping Cream Incorporation
Next, whip the cream in a chilled bowl until soft peaks form, ensuring it’s light and fluffy but not over-whipped. Gently fold this whipped cream into the cheese and tea mixture, careful not to deflate the airy texture. For added texture, fold in crushed biscuit pieces if desired. Once combined, pour the mousse onto the chilled biscuit base evenly, smoothing the top with a spatula.
Step 4: Chilling Time
Cover the mold with plastic wrap or foil and refrigerate the cheesecake for at least 4 hours or preferably overnight. This allows the Earl Grey mousse to set perfectly, resulting in a light and airy texture for your Earl Grey Mousse Cheesecake that’s easy to slice and serve later.
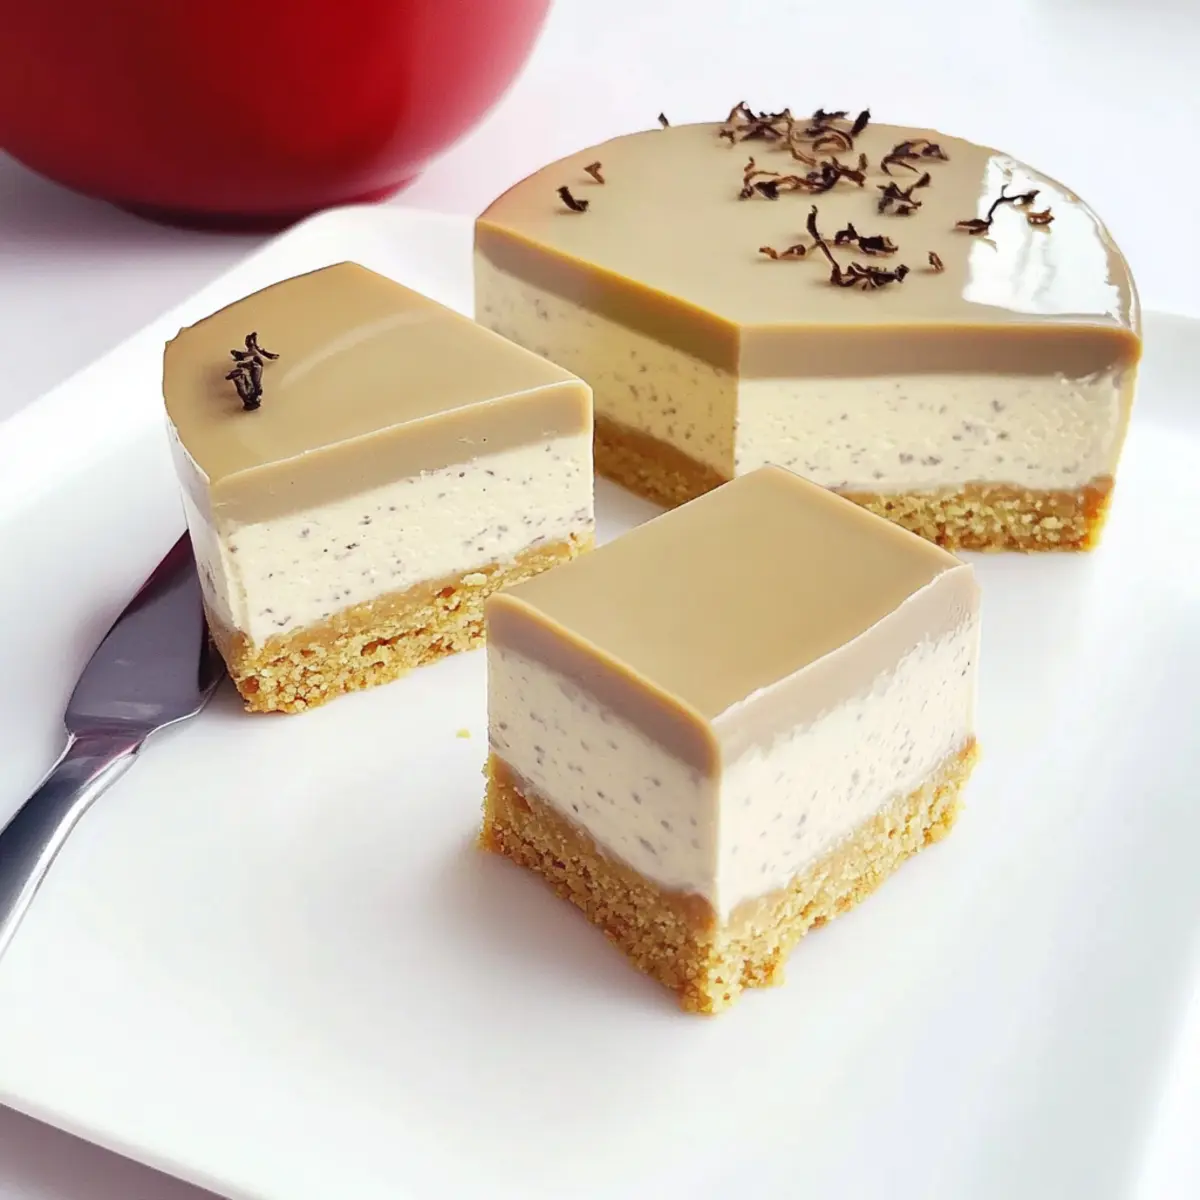
Step 5: Mirror Glaze (Optional)
For the optional glaze, steep one Earl Grey tea bag in a small amount of hot milk. Stir in sugar and a portion of gelatin until completely dissolved. Allow the glaze to cool slightly before carefully pouring it over the set mousse layer, ensuring it covers the entire surface for that elegant glossy finish. Refrigerate for an additional 1–2 hours to firm up the glaze.
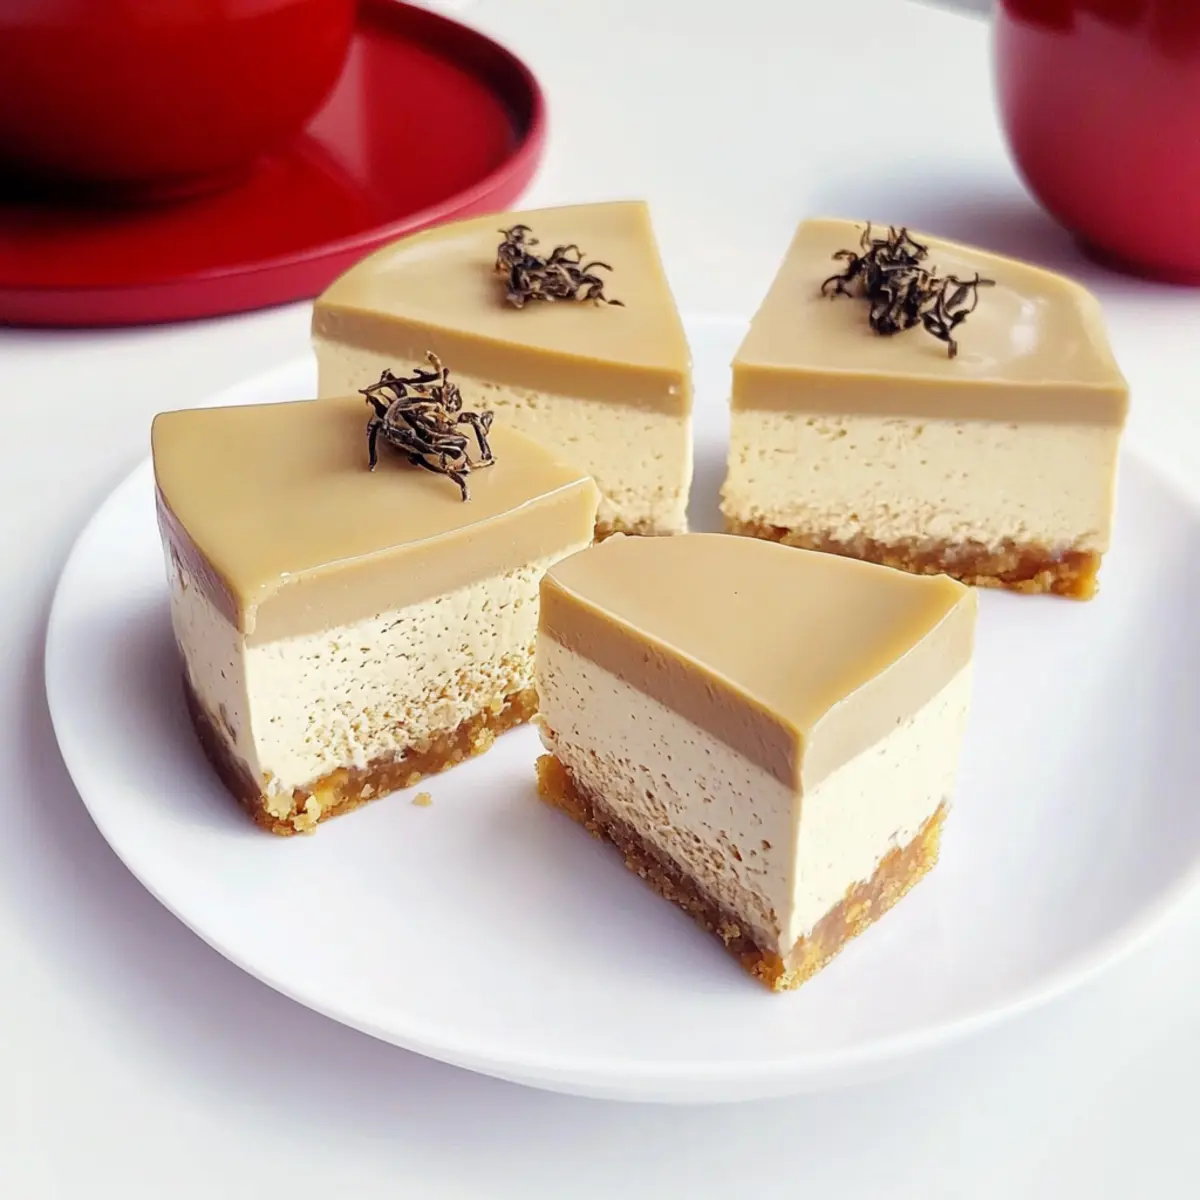
Step 6: Serving the Cheesecake
When you’re ready to serve, carefully unmold the Earl Grey Mousse Cheesecake by using a hairdryer on the edges of the mold for easy release. Decorate the top with crushed biscuits for visual appeal and a delightful crunch. Slice into servings and enjoy your beautifully crafted, no-bake dessert that’s sure to impress family and friends alike.
What to Serve with No-Bake Earl Grey Mousse Cheesecake
Elevate your dessert experience by pairing this delightful cheesecake with complementary dishes that enhance its flavors and textures.
- Fresh Berries: The tartness of raspberries or blueberries adds a vibrant burst, balancing the creamy mousse beautifully.
- Butter Pecan Ice Cream: The rich, nutty flavors of this ice cream contrast perfectly with the lightness of the cheesecake, creating a luscious experience.
- Minty Cucumber Salad: A refreshing salad with mint and cucumber provides a crisp, cooling element that complements the floral notes of the mousse.
- Sparkling Tea: Enjoy a glass of chilled sparkling tea infused with citrus to enhance the Earl Grey flavor and add sophisticated fizz.
- Chocolate-Dipped Strawberries: A touch of chocolate alongside your cheesecake creates an irresistible combination, playing off both texture and taste.
- Vanilla Shortbread Cookies: The buttery crunch of shortbread cookies offers a delightful contrast to the creamy mousse, making each bite memorable.
- Lemon Sorbet: This palate-cleansing sorbet brightens the meal, adding a refreshing touch that pairs nicely with the rich cheesecake.
- Earl Grey Tea: Brew a warm cup of Earl Grey to resonate with the dessert’s flavors, inviting a lovely thematic connection.
- Whipped Cream: A dollop of lightly sweetened whipped cream on top adds creaminess and elegance, enhancing the overall presentation.
How to Store and Freeze Earl Grey Mousse Cheesecake
- Fridge: Store the cheesecake covered in the refrigerator for up to 3 days. This keeps it fresh while maintaining the silky mousse texture.
- Freezer: Freezing is not recommended, as it can alter the delicate mousse’s texture, causing it to become grainy upon thawing.
- Serving Prep: If you make the cheesecake in advance, simply let it chill overnight in the fridge for easy serving the next day.
- Reheating: No reheating necessary for this no-bake dessert; serve chilled directly from the fridge for the best experience!
Expert Tips for Earl Grey Mousse Cheesecake
-
Room Temperature Cheese: Ensure cream cheese is at room temperature for a smooth blend, avoiding lumps in your mousse mixture.
-
Precise Measurements: Measure your gelatin correctly; if using powdered gelatin, add cold water to bloom it before dissolving in hot milk for best results.
-
Whip Wisely: Avoid over-whipping the cream. Stop when you see soft peaks for an airy, fluffy mousse rather than a grainy texture.
-
Chill Thoroughly: Be patient and refrigerate the cheesecake for the full recommended time so it sets properly, making slicing easier and maintaining structure.
-
Glaze Timing: If you opt for the mirror glaze, make sure to let it cool slightly before pouring to prevent melting the mousse layer beneath.
-
Creative Variations: Feel free to experiment with different tea flavors; the Earl Grey Mousse Cheesecake can be made uniquely by swapping teas, expanding your dessert repertoire!
Earl Grey Mousse Cheesecake Variations & Substitutions
Customize your Earl Grey Mousse Cheesecake and make it truly your own! Let your creativity flow with these delicious alternatives.
-
Matcha Twist: Substitute Earl Grey tea powder with matcha for a unique flavor and vibrant green hue.
-
Vegan Delights: Swap cream cheese for a vegan cream cheese alternative and use agar-agar in place of gelatin for a plant-based version.
-
Flavor Fusion: Experiment with jasmine tea or hojicha instead of Earl Grey for a fragrant twist that’s equally delightful.
-
Dairy-Free Option: Use coconut cream instead of whipping cream; it’ll give your mousse a rich and tropical flair.
-
Nutty Crunch: Fold in finely chopped nuts, like pistachios or almonds, for an added layer of flavor and texture that complements the creamy mousse.
-
Chocolate Indulgence: Add cocoa powder to the mousse for a chocolatey twist that’ll satisfy any sweet tooth, much like my decadent Triple Chocolate Mousse!
-
Spiced Sensation: Incorporate a touch of cinnamon or cardamom to elevate the warm notes of the tea for a cozy flavor profile.
-
Mirror Glaze Variations: Use green tea or chai tea bags for the mirror glaze to create a beautiful topping that surprises with each bite.
No matter what variations you choose, this dessert will remain elegant, delicious, and impress any guest at your table! If you’re feeling inspired, check out my Sugar Cookie Cheesecake for another easy yet impressive dessert idea.
Make Ahead Options
These Earl Grey Mousse Cheesecake slices are perfect for meal prep enthusiasts! You can prepare the entire cheesecake up to 24 hours in advance, allowing all those delightful flavors to meld beautifully. First, create the biscuit base and freeze it, then whip up the cheese mousse layer and pour it over the base. Cover and refrigerate for the minimum of 4 hours (overnight is best for optimal taste), ensuring it remains just as delicious when you’re ready to serve. If you choose to add the mirror glaze, prepare that right before serving to maintain its glossy shine. With these simple steps, you can impress your guests effortlessly while having more time to enjoy the occasion!
Earl Grey Mousse Cheesecake Recipe FAQs
What type of biscuits can I use for the base?
Absolutely! While caramel biscuits bring sweetness and texture, you can easily substitute them with digestive biscuits if that’s what you have on hand. The key is to ensure they are finely crushed to create a stable base that holds the mousse.
How should I store my Earl Grey Mousse Cheesecake?
Your cheesecake should be stored in the refrigerator, covered tightly, for up to 3 days. This approach keeps the flavors fresh and maintains that silky mousse texture. You can simply place it in an airtight container or cover it with plastic wrap.
Can I freeze Earl Grey Mousse Cheesecake?
Unfortunately, freezing is not recommended for this delicate mousse cheesecake. The texture can change significantly and may become grainy upon thawing. It’s best enjoyed fresh and chilled from the refrigerator.
What should I do if my mousse doesn’t set properly?
If your mousse doesn’t set as expected, it might be due to improperly bloomed gelatin. Always ensure the gelatin is dissolved thoroughly in hot milk before incorporating it into the cheese mixture. If you find the mousse too runny, gently reheat the mixture and add more bloomed gelatin, mixing well, and then refrigerate again until set.
Is this recipe suitable for people with dietary restrictions?
Yes! You can tailor the ingredients to fit various dietary needs. For a vegan option, simply replace cream cheese with a vegan substitute and use agar-agar in place of gelatin for the mousse layer. Always check the specific brand ingredients to ensure they meet allergy or dietary requirements.
How can I enhance the flavor variations of the Earl Grey Mousse Cheesecake?
The more the merrier when it comes to flavor! You can substitute Earl Grey with matcha, jasmine, or hojicha tea. Simply adjust the amount accordingly, and follow the same preparation steps for a delightful twist on this elegant dessert. Enjoy experimenting with different tea flavors to find your perfect blend!
Earl Grey Mousse Cheesecake: Elegant No-Bake Delight at Home
Ingredients
Equipment
Method
- Crush the caramel biscuits into fine crumbs. Melt the unsalted butter and mix it with the biscuit crumbs. Press into a lined round mold and refrigerate for 10 minutes.
- Combine softened cream cheese with 10g of caster sugar. In a separate container, dissolve the gelatin sheets in hot milk, then stir in Earl Grey tea powder. Slowly add this to the cream cheese.
- Whip the cream until soft peaks form, then fold into the cheese and tea mixture. Pour the mousse onto the biscuit base and smooth the top.
- Cover and refrigerate the cheesecake for at least 4 hours or overnight to set.
- For the glaze, steep the Earl Grey tea bag in hot milk. Stir in sugar and gelatin until dissolved, and pour over the set mousse layer.
- Unmold the cheesecake, decorate with crushed biscuits, slice, and enjoy.
Leave a Reply