
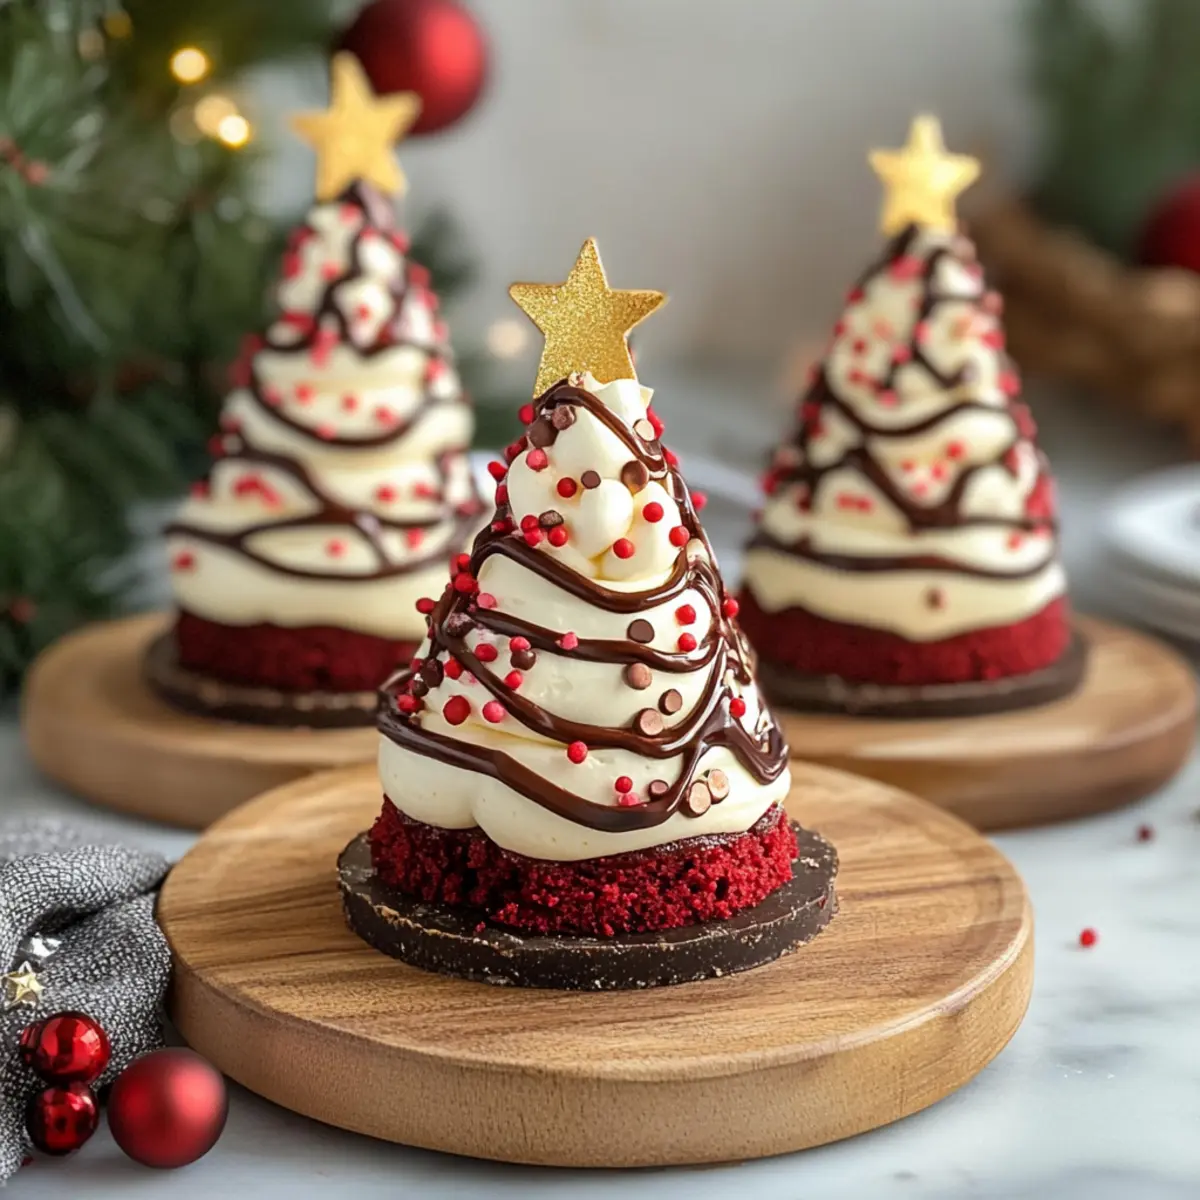
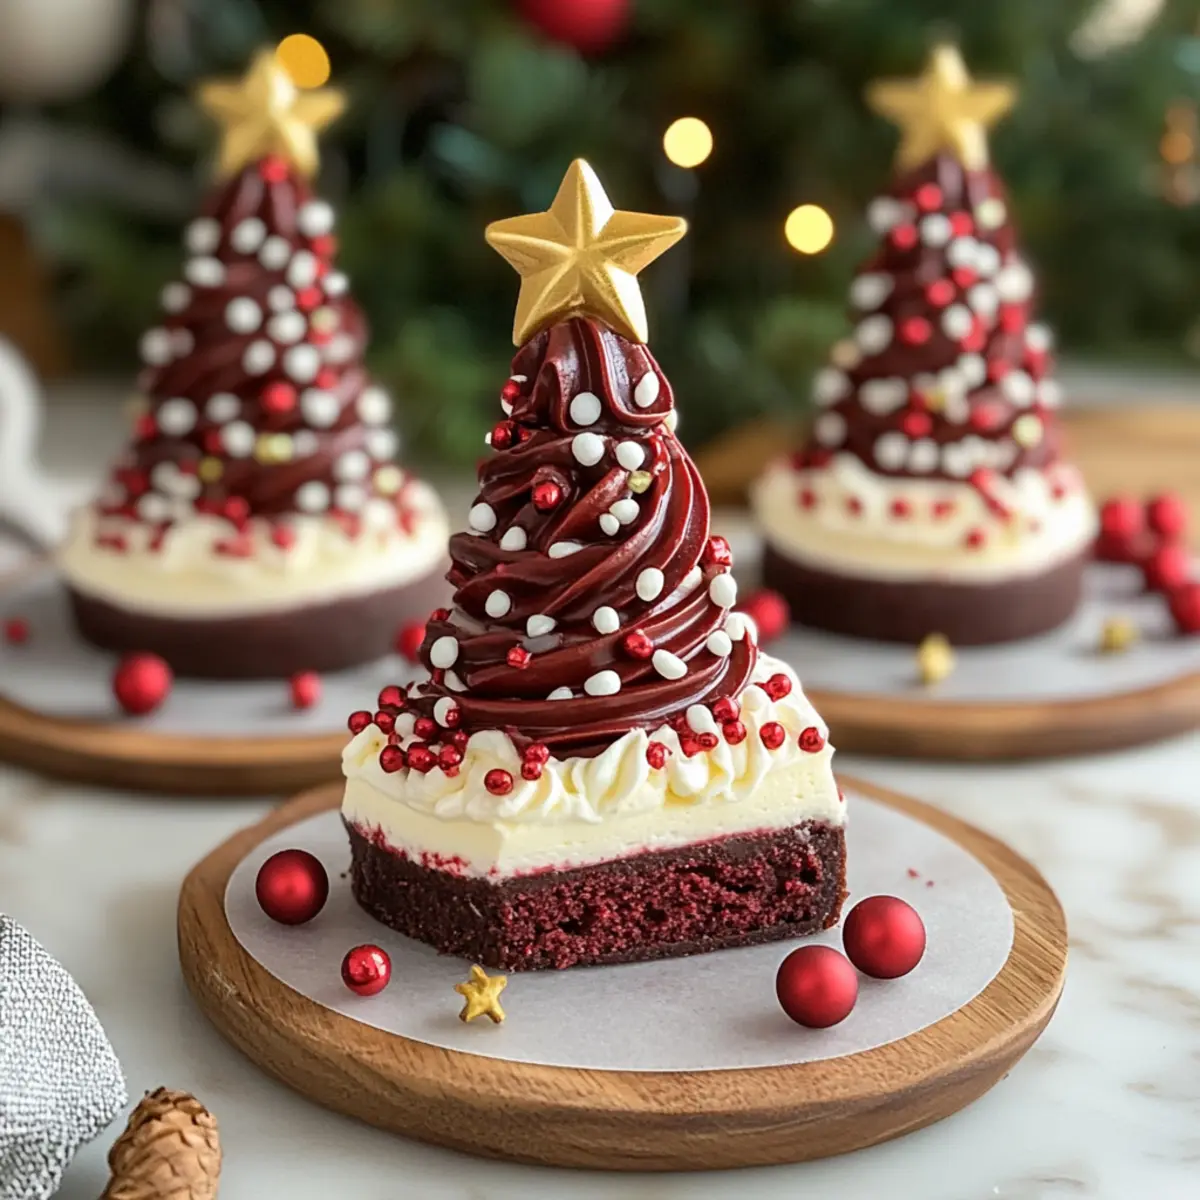
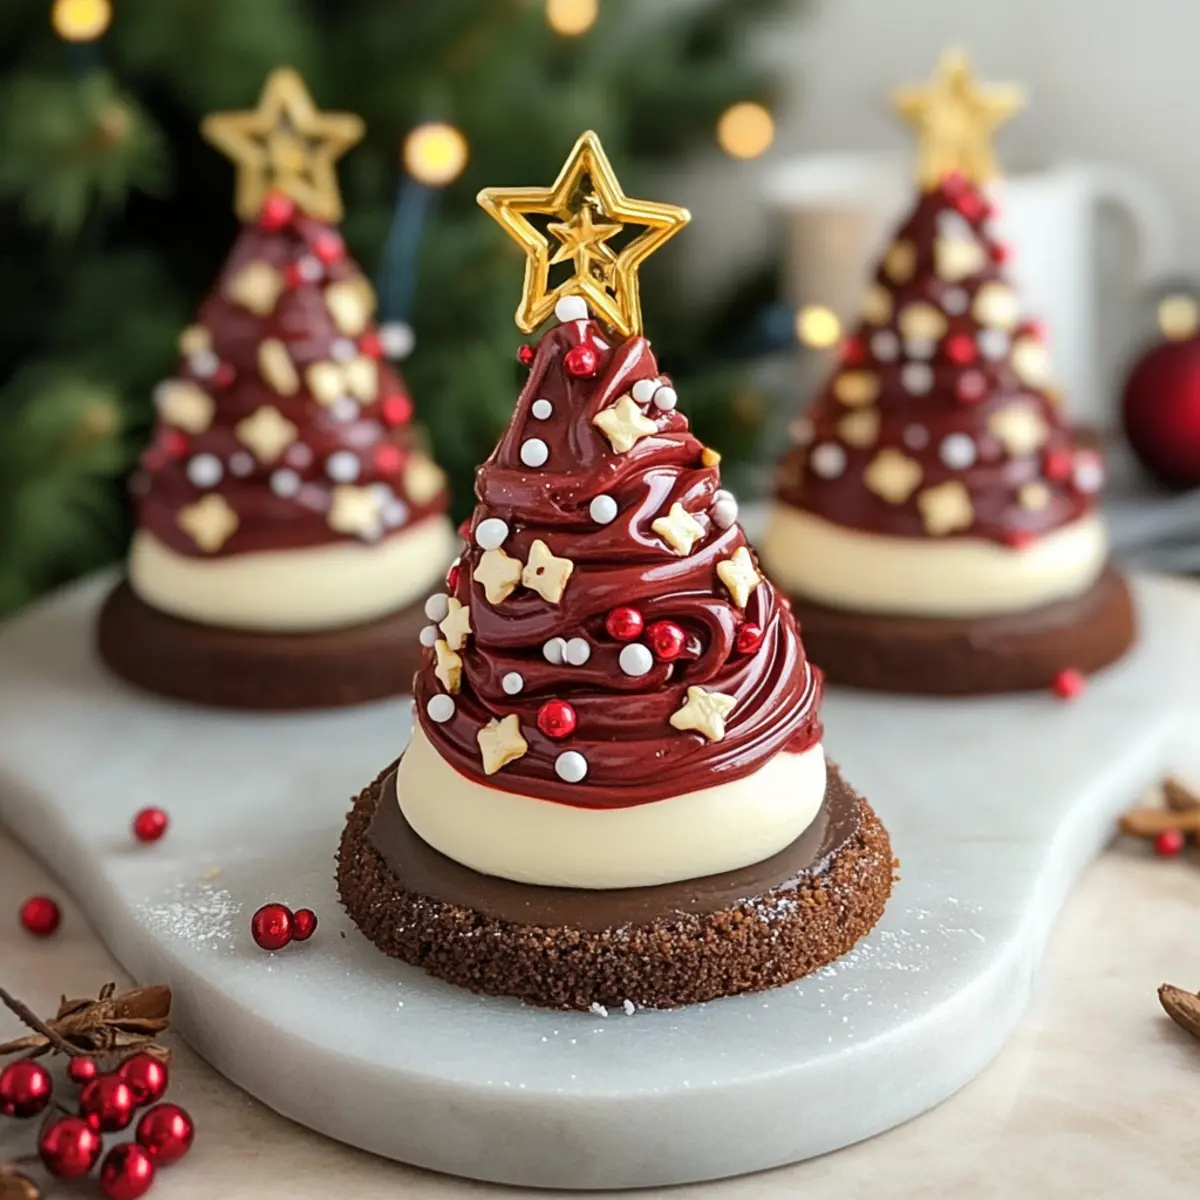
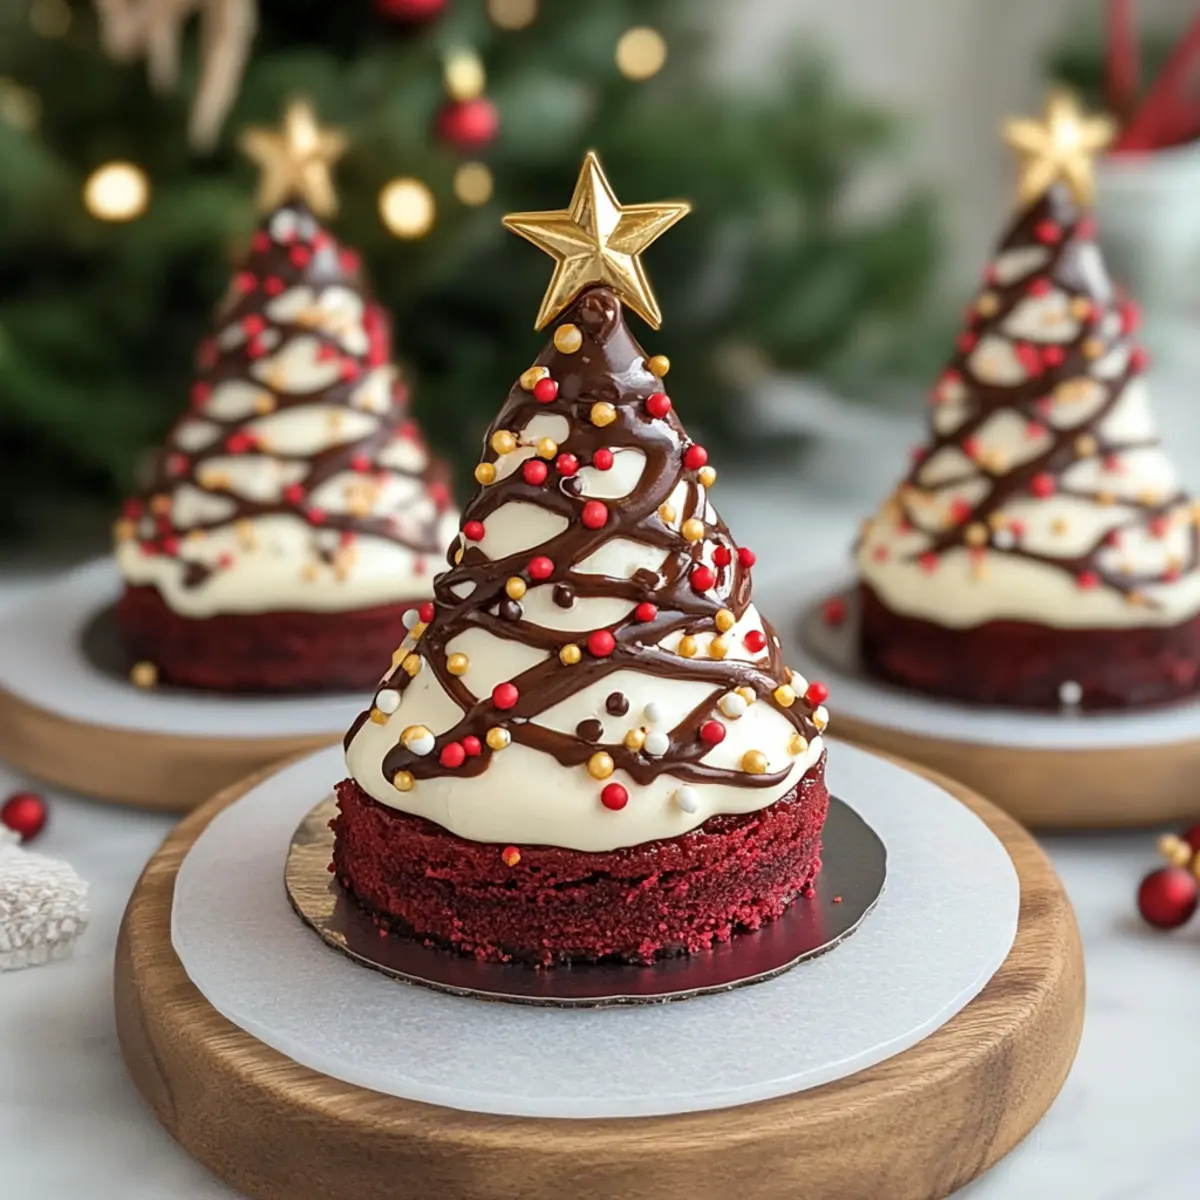
As I unwrapped the twinkling lights and scents of pine filled my kitchen, a wave of nostalgia washed over me. There’s something incredibly magical about the holiday season, and nothing captures that spirit quite like a Christmas Red Velvet Cheesecake Recipe. This dessert is a showstopper with its vibrant red hue and a luscious layer of cream cheese frosting that beckons you to take just one more bite. Not only does it make for a stunning centerpiece at your festive gatherings, but it also offers a delightful fusion of creamy cheesecake and subtle chocolatey red velvet, ensuring it’s a crowd-pleaser. Whether you’re a seasoned baker or just starting your culinary journey, this indulgent treat is surprisingly easy to prepare, making it perfect for anyone eager to swap takeout for homemade joy. Ready to impress your holiday guests? Let’s dive into this delicious cheesecake adventure together!
Why is this cheesecake a must-try?
Indulgent Flavors: With its blend of creamy cheesecake and rich red velvet, this dessert offers a delectable treat that everyone will adore.
Festive Appeal: The vibrant red color and fluffy white frosting make it a stunning centerpiece for your holiday table, leaving guests in awe.
Simple Preparation: Don’t worry if you’re not a pro in the kitchen. This recipe is easy to follow, perfect for chefs of any skill level looking to impress.
Versatile Variations: Want to switch it up? Try a ginger snap crust for added spice or incorporate some orange zest for a citrus twist!
Perfect Pairings: This cheesecake pairs beautifully with a cup of coffee or hot chocolate, creating an irresistible holiday experience for you and your loved ones.
For even more delightful treats, check out my Sugar Cookie Cheesecake or these festive Christmas Tree Meringues.
Christmas Red Velvet Cheesecake Ingredients
• Here’s everything you’ll need to create a festive masterpiece!
For the Crust
- Oreo cookies (24) – Perfect for a rich cookie crust; substitute with Graham cracker crumbs for a traditional base.
- Butter (⅓ cup, melted) – Essential for binding the crust; don’t skip this step!
For the Cheesecake Filling
- Cream cheese (4 blocks, 8 oz each) – The creamy heart of this dessert; make sure it’s softened to ensure smooth mixing.
- White sugar (½ cup) – Sweetens the filling beautifully; swap with granulated or coconut sugar if desired.
- Heavy whipping cream (2 cups) – Adds richness and creaminess; low-fat cream can lighten it up.
- Vanilla extract (1 tsp) – Enhances the flavors; always choose pure vanilla for best results.
- Cocoa powder (2 tbsp) – Brings depth to the red velvet taste; dark cocoa can intensify the chocolate flavor.
- Red food coloring – Creates that signature festive red hue; use gel food coloring for a more vibrant look.
- Christmas sprinkles (¼ cup) – Optional but delightful for a festive touch in the filling.
For Topping and Garnish
- Whipped cream – Adds a luscious finish; for a dairy-free option, use whipped coconut cream.
- Mini Oreos – Cute garnish option; swap for chocolate curls or festive berries for variety.
Step‑by‑Step Instructions for Christmas Red Velvet Cheesecake Recipe
Step 1: Prepare Pan & Oven
Preheat your oven to 350°F (175°C) to create the perfect baking environment. While the oven preheats, wrap the bottom of a 9-inch springform pan tightly with aluminum foil to prevent water from seeping in during the water bath. This involves placing the pan on a flat surface and ensuring the foil is smooth and secure around the edges.
Step 2: Make the Red Velvet Crust
In a medium bowl, crush the 24 Oreo cookies into fine crumbs, then mix them with the melted butter and 2 tablespoons of sugar until thoroughly combined. Press this mixture firmly into the bottom of the prepared springform pan, creating an even layer. Bake the crust in the preheated oven for 8-10 minutes until set, and then allow it to cool completely on a wire rack, setting the stage for your delicious Christmas Red Velvet Cheesecake.
Step 3: Prepare Cheesecake Filling
In a large mixing bowl, beat the 4 blocks of softened cream cheese with an electric mixer until it’s creamy and smooth. Gradually add the ½ cup of sugar while mixing well to dissolve the sugar. Stir in 1 teaspoon of vanilla extract, 2 tablespoons of cocoa powder, and your desired amount of red food coloring to achieve the signature hue. In a separate bowl, whip 1 cup of heavy cream to soft peaks and gently fold it into the cream cheese mixture along with the optional Christmas sprinkles, ensuring a light and airy filling.
Step 4: Bake the Cheesecake
Lower the oven temperature to 325°F (160°C). Place the springform pan filled with your cheesecake mixture into a larger roasting pan. Carefully pour hot water into the roasting pan until it reaches halfway up the sides of the springform pan. Bake for 1 hour to 1 hour and 15 minutes, checking for doneness—the edges should be set, while the center should still jiggle slightly when gently shaken.
Step 5: Cool & Chill
Turn off the oven once the cheesecake is baked, leaving the oven door ajar for about 1 hour to gradually cool the cheesecake. Afterward, let the cheesecake cool at room temperature for 2-3 hours. Then, cover and refrigerate it for at least 6-8 hours, or preferably overnight, until it’s well chilled and firm, allowing all those wonderful flavors to meld into your Christmas Red Velvet Cheesecake.
Step 6: Decorate & Serve
Once chilled, carefully remove the sides of the springform pan to reveal your festive cheesecake. Top the cheesecake generously with whipped cream, and if desired, garnish with mini Oreos and a sprinkle of festive sprinkles for an eye-catching presentation. For perfect slices, run a hot knife under warm water and wipe it clean after each cut, allowing everyone to indulge in this delightful holiday treat.
Christmas Red Velvet Cheesecake Variations
Feel free to add your personal touch to this festive delight; the possibilities are as delicious as they are varied!
-
Ginger Snap Crust: Replace the Oreo crust with crushed ginger snaps for a warm, spicy flavor that complements the cheesecake beautifully. This twist adds a delightful holiday touch.
-
Orange Zest: Incorporate 1-2 teaspoons of freshly grated orange zest into the filling for a refreshing citrus burst. The bright notes brighten up the rich flavors seamlessly.
-
Coconut Cream Topping: Swap the whipped cream for light and fluffy whipped coconut cream to make this cheesecake dairy-free while still offering a luscious finish.
-
Nutty Crunch: Add chopped pecans or walnuts to the crust mixture for an added layer of texture and flavor. The nuts give a delightful crunch that contrasts with the creamy filling.
-
Chocolate Ganache: Drizzle chocolate ganache over the top before garnishing. This rich layer enhances the chocolate flavor and adds a luxurious finish to your cheesecake.
-
Spicy Chocolate Version: Stir in a pinch of cayenne pepper or cinnamon into the filling to create a spicy chocolate sensation. This warm note takes the cheesecake to a whole new level!
For a touch of festive fun, consider garnishing with sugared cranberries or edible glitter. Whether you’re serving this at your Christmas feast or a cozy gathering, it pairs wonderfully with the rich flavors of festive beverages, such as my delightful Christmas Fruit Cake.
How to Store and Freeze Christmas Red Velvet Cheesecake
Room Temperature: Enjoy fresh slices of cheesecake for up to 2 hours at room temperature to let those delightful flavors shine before serving.
Fridge: Store leftovers in an airtight container in the refrigerator for 3-4 days. Allow the Christmas Red Velvet Cheesecake to come to room temperature for the best flavor before indulging.
Freezer: If you need to freeze, wrap slices or the whole cheesecake tightly in plastic wrap, then place it in a freezer-safe container. It will remain fresh for up to 2 months.
Reheating: When ready to enjoy frozen cheesecake, thaw it overnight in the fridge. For a warm treat, allow slices to sit at room temperature for about 30 minutes before serving.
Expert Tips for Christmas Red Velvet Cheesecake
-
Room Temperature Cheese: Ensure your cream cheese is at room temperature for easy mixing and a smooth texture that enhances your Christmas Red Velvet Cheesecake.
-
Water Bath Technique: Always use a water bath when baking the cheesecake. This prevents cracks and ensures even baking for a beautiful result.
-
Adjust Cooling Time: Slow cooling is key! Allow the cheesecake to cool gradually in the oven before refrigerating to help maintain its creamy structure.
-
Decorative Touches: Add festive sprinkles or mini Oreos just before serving for a vibrant presentation that will impress your guests without much hassle.
-
Storage Trick: Store leftovers in an airtight container in the refrigerator to keep the cheesecake fresh and delicious for up to 3-4 days. Allow it to reach room temperature for the best flavor when serving.
What to Serve with Christmas Red Velvet Cheesecake
This festive cheesecake is a delightful way to end your holiday meals, but pairing it with the right dishes can elevate your celebrations even further.
-
Rich Hot Chocolate: The creamy texture of hot chocolate complements the cheesecake’s richness while enhancing the holiday spirit. Imagine cozying up with a warm mug as you savor each bite!
-
Peppermint Bark: A crunchy, minty treat that adds a refreshing contrast to the cheesecake. The flavors meld perfectly, creating a quintessential holiday pairing that guests will rave about.
-
Vanilla Ice Cream: A scoop of vanilla ice cream adds a cool creaminess, balancing the dense cheesecake beautifully. The vanilla flavor lifts the red velvet notes, making each bite an experience.
-
Spiced Apple Cider: A warm cup of spiced apple cider brings cozy, aromatic flavors that harmonize with the cheesecake’s sweetness. Enjoy sipping while the scents fill your home.
-
Chocolate-Covered Strawberries: These indulgent treats provide a juicy, fruity touch that cuts through the richness of the cheesecake. It’s like an unexpected burst of joy with each forkful!
-
Gingerbread Cookies: A festive sweet treat that pairs nicely with the cheesecake’s chocolate notes, adding a spiced crunch that enhances the holiday atmosphere. A delightful nibble to balance the velvety richness!
-
Fresh Berries Salad: A refreshing mix of strawberries, blueberries, and raspberries adds a burst of color and acidity, brightening the overall dessert experience with their natural sweetness.
-
Pecan Pie: The nutty flavors and buttery crust of pecan pie create an inviting contrast to the cheesecake. The two desserts together will make your holiday dessert table truly unforgettable!
-
Sparkling Cranberry Punch: A fizzy, fruity drink that complements your dessert beautifully, offering a refreshing balance of flavors that guests will love. Perfect for toasting to festive moments!
-
Chocolate Mousse: A silky and dreamy mousse that resonates with the chocolate notes from the cheesecake. This rich dessert will make any chocolate lover’s heart flutter in delight!
Make Ahead Options
These Christmas Red Velvet Cheesecakes are perfect for meal prep enthusiasts! You can prepare the crust up to 24 hours in advance; simply crush the Oreo cookies, mix with melted butter and sugar, and store it tightly wrapped in the refrigerator. The cheesecake filling can also be made one day ahead, just ensure to keep it covered in the fridge after mixing to avoid drying out. When ready to bake, pour the filling over the crust and follow the baking instructions as usual. This not only saves you time on busy days but ensures the cheesecake is just as delicious and festive for your holiday gatherings!
Christmas Red Velvet Cheesecake Recipe FAQs
What type of Oreos should I use for the crust?
I recommend using regular Oreo cookies for that classic chocolatey flavor, but if you want a twist, try using Golden Oreos for a vanilla crust! You can also substitute with Graham cracker crumbs for a traditional base if you’re not an Oreo fan.
How do I store leftover cheesecake, and how long will it last?
Store your Christmas Red Velvet Cheesecake in an airtight container in the refrigerator for up to 3-4 days. Be sure to let it come to room temperature for the most delightful flavor when serving, as it tends to taste best that way.
Can I freeze the cheesecake, and if so, how?
Absolutely! To freeze your cheesecake, wrap it tightly in plastic wrap. Then place it in a freezer-safe container or a zip-top bag. This will keep it fresh for up to 2 months. When you’re ready to enjoy it, simply thaw overnight in the fridge, and let it sit at room temperature for about 30 minutes before serving for the best texture.
What if my cheesecake cracks while baking?
Don’t worry if that happens! It may crack if it bakes too long or if your oven temperature is too high. To prevent this, make sure to use a water bath, as it helps regulate the temperature. If a crack does appear, you can always cover it with whipped cream or sprinkles when serving.
Can I make this cheesecake dairy-free?
Yes, you can! Use dairy-free cream cheese and whipped coconut cream as substitutes. Be sure to choose dairy-free alternatives for the butter as well. Your cheesecake will still be delicious and festive—so everyone can enjoy it!
Are there any common allergens in this recipe?
This recipe contains dairy and gluten, specifically from the cream cheese and Oreo cookies. If you’re serving guests with allergies, consider using gluten-free Oreo cookies and dairy alternatives to accommodate their needs!
Decadent Christmas Red Velvet Cheesecake Recipe You Must Try
Ingredients
Equipment
Method
- Preheat your oven to 350°F (175°C) and wrap the bottom of a 9-inch springform pan with aluminum foil.
- Crush the 24 Oreo cookies into fine crumbs and mix with melted butter. Press into the bottom of the pan.
- Bake the crust for 8-10 minutes and let it cool completely.
- Beat the softened cream cheese until smooth. Gradually mix in sugar, vanilla extract, cocoa powder, and red food coloring.
- Whip 1 cup of heavy cream to soft peaks and fold into the cream cheese mixture.
- Lower the oven temperature to 325°F (160°C), place the filled springform pan into a roasting pan, and add hot water.
- Bake for 1 hour to 1 hour 15 minutes, until the edges are set but the center jiggles slightly.
- Turn off the oven, leave the door ajar for 1 hour, then let the cheesecake cool at room temperature for 2-3 hours.
- Refrigerate for at least 6-8 hours or overnight.
- Remove the sides of the springform pan and top with whipped cream, mini Oreos, and sprinkles before serving.
Leave a Reply