
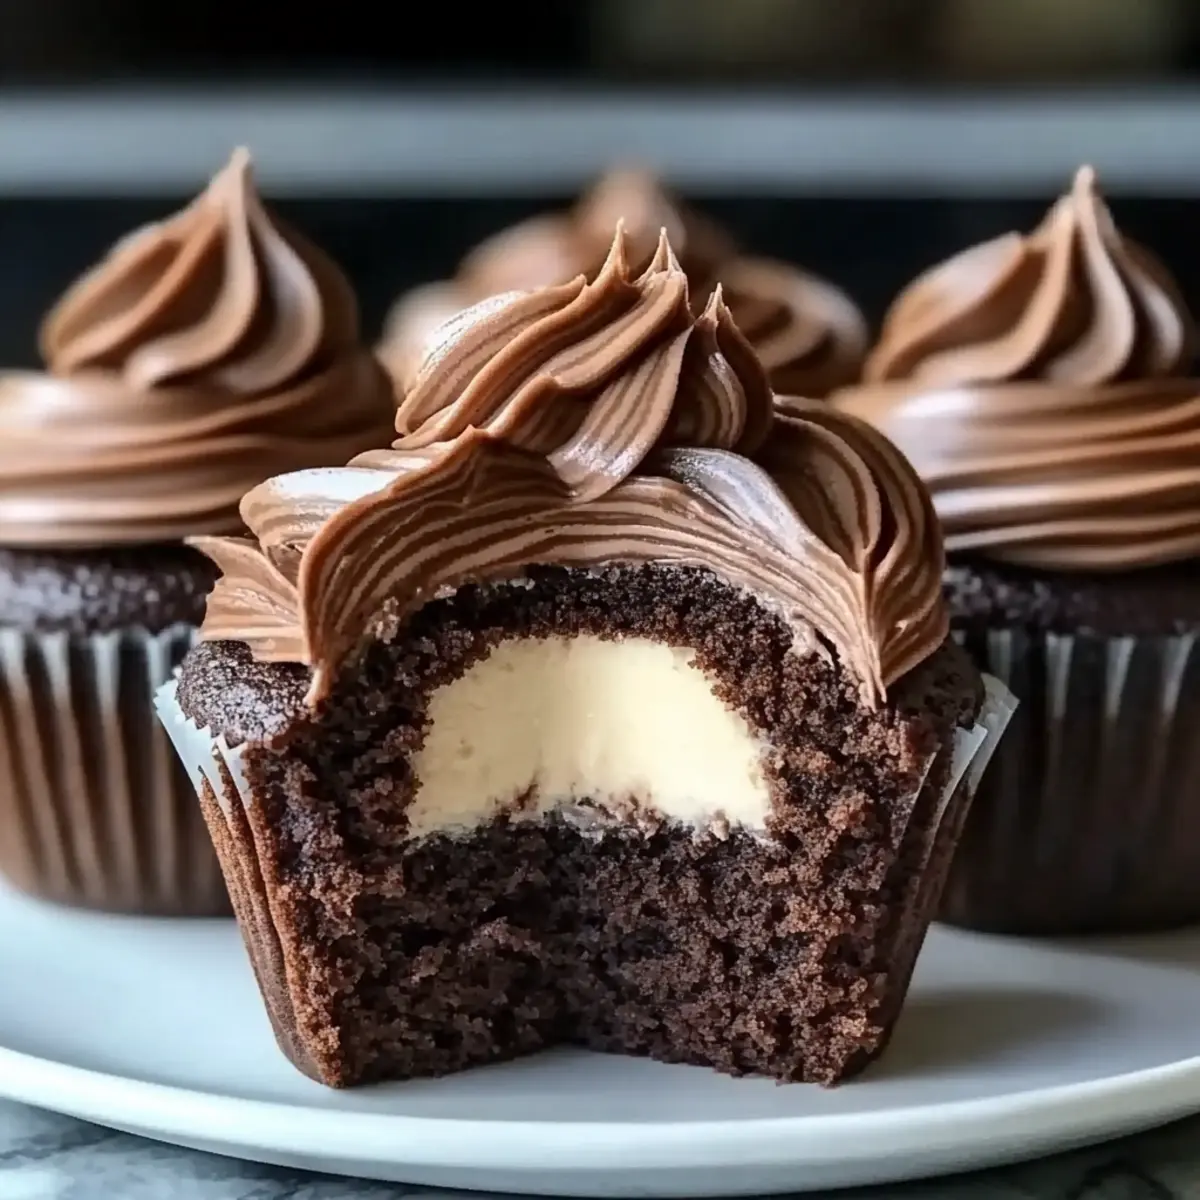
Chocolate-covered dreams come true when you take a bite of these delightful Swirled Chocolate Cupcakes with Rich Creamy Chocolate Filling. The moment you lift one from the tray, you’ll be captivated by the whimsical swirls of chocolate, hinting at the delicious surprise tucked inside. Not only are they quick to whip up, making them ideal for spontaneous celebrations or cozy movie nights, but their moist, fluffy texture paired with a velvety filling is bound to charm everyone at the table. Whether you’re looking to impress at a birthday bash or simply indulging your sweet cravings, these cupcakes are here to elevate your homemade dessert game. What’s your favorite occasion to enjoy a sweet treat like this?
Why Are Swirled Chocolate Cupcakes Irresistible?
Decadent Surprise: Each bite unveils a luxurious creamy chocolate filling that elevates every mouthful, turning a simple cupcake into a delightful experience.
Quick & Easy: Perfect for those unexpected cravings, these cupcakes come together easily, so you can indulge without spending hours in the kitchen.
Festive Appeal: The visually stunning swirls make these treats not just delicious but also a showstopper at any gathering—perfect for birthdays or cozy movie nights!
Versatile Base: Feel free to experiment with flavors; swap in dark chocolate for a richer experience or try out various toppings like sea salt for a gourmet twist.
Crowd-Pleasing Treat: Whether you’re baking for family or friends, these cupcakes are sure to win hearts and make any occasion feel special.
Swirled Chocolate Cupcakes Ingredients
Indulge in the magic of homemade Swirled Chocolate Cupcakes.
For the Cupcake Batter
- All-purpose flour – Provides structure and texture; substitute with gluten-free flour for a lighter option.
- Unsweetened cocoa powder – Key for an intense chocolate flavor; no substitutions can match its depth.
- Granulated sugar – Sweetens and helps create a tender crumb; swap for brown sugar for added richness.
- Baking soda & Baking powder – Essential leavening agents; ensure freshness for best rise.
- Salt – Enhances flavors and balances sweetness; consider using sea salt for a gourmet touch.
- Large eggs – Binds ingredients and adds moisture; for a vegan option, substitute with flaxseed meal mixed with water.
- Vegetable oil – Keeps cupcakes moist and fluffy; melted coconut oil works as a delicious alternative.
- Buttermilk – Contributes moisture and tanginess; regular milk or a non-dairy alternative with vinegar or lemon juice is a suitable substitute.
- Vanilla extract – Enhances sweetness and depth; best to use as is for optimal flavor.
- Semi-sweet chocolate chips – Creates rich chocolate swirls; dark chocolate can be used for a more intense flavor.
For the Creamy Filling
- Heavy cream – Forms the base of the filling; coconut cream works well for a dairy-free option.
- Milk chocolate – Adds a touch of sweetness to the filling; feel free to switch to dark chocolate for a less sweet experience.
Get ready to enchant your taste buds with these dreamy Swirled Chocolate Cupcakes!
Step‑by‑Step Instructions for Swirled Chocolate Cupcakes
Step 1: Preheat and Prepare
Begin by preheating your oven to 350°F (175°C). While the oven warms up, line a 12-cup muffin tin with colorful cupcake liners to add a delightful touch to your Swirled Chocolate Cupcakes. Make sure to have these ready before you mix your batter, as it helps streamline the process.
Step 2: Combine Dry Ingredients
In a large mixing bowl, whisk together the all-purpose flour, unsweetened cocoa powder, granulated sugar, baking soda, baking powder, and salt until thoroughly blended. This step is crucial for ensuring that all the leavening agents and flavors are evenly distributed, setting the foundation for your moist and fluffy cupcakes.
Step 3: Mix Wet Ingredients
In a separate bowl, beat together the large eggs, vegetable oil, buttermilk, and vanilla extract until smooth and well incorporated. The mixture should be pale and fluffy, creating a rich base for your batter. Once fully combined, gently pour the wet ingredients into the dry mixture, folding them together carefully to avoid overmixing.
Step 4: Fill Cupcake Liners
Divide the batter evenly among the lined muffin cups, filling each about two-thirds full. This ensures the cupcakes have room to rise without overflowing. Next, drizzle melted semi-sweet chocolate over the top of each filled liner. Use a toothpick to swirl the chocolate into the batter, creating beautiful marbled designs.
Step 5: Bake the Cupcakes
Place the muffin tin into the preheated oven and bake for 18-20 minutes. Check for doneness by gently pressing the tops; they should spring back slightly when touched. Once ready, carefully remove the tin from the oven and let the cupcakes cool in the pan for a few minutes before transferring them to a wire rack to cool completely.
Step 6: Prepare the Creamy Filling
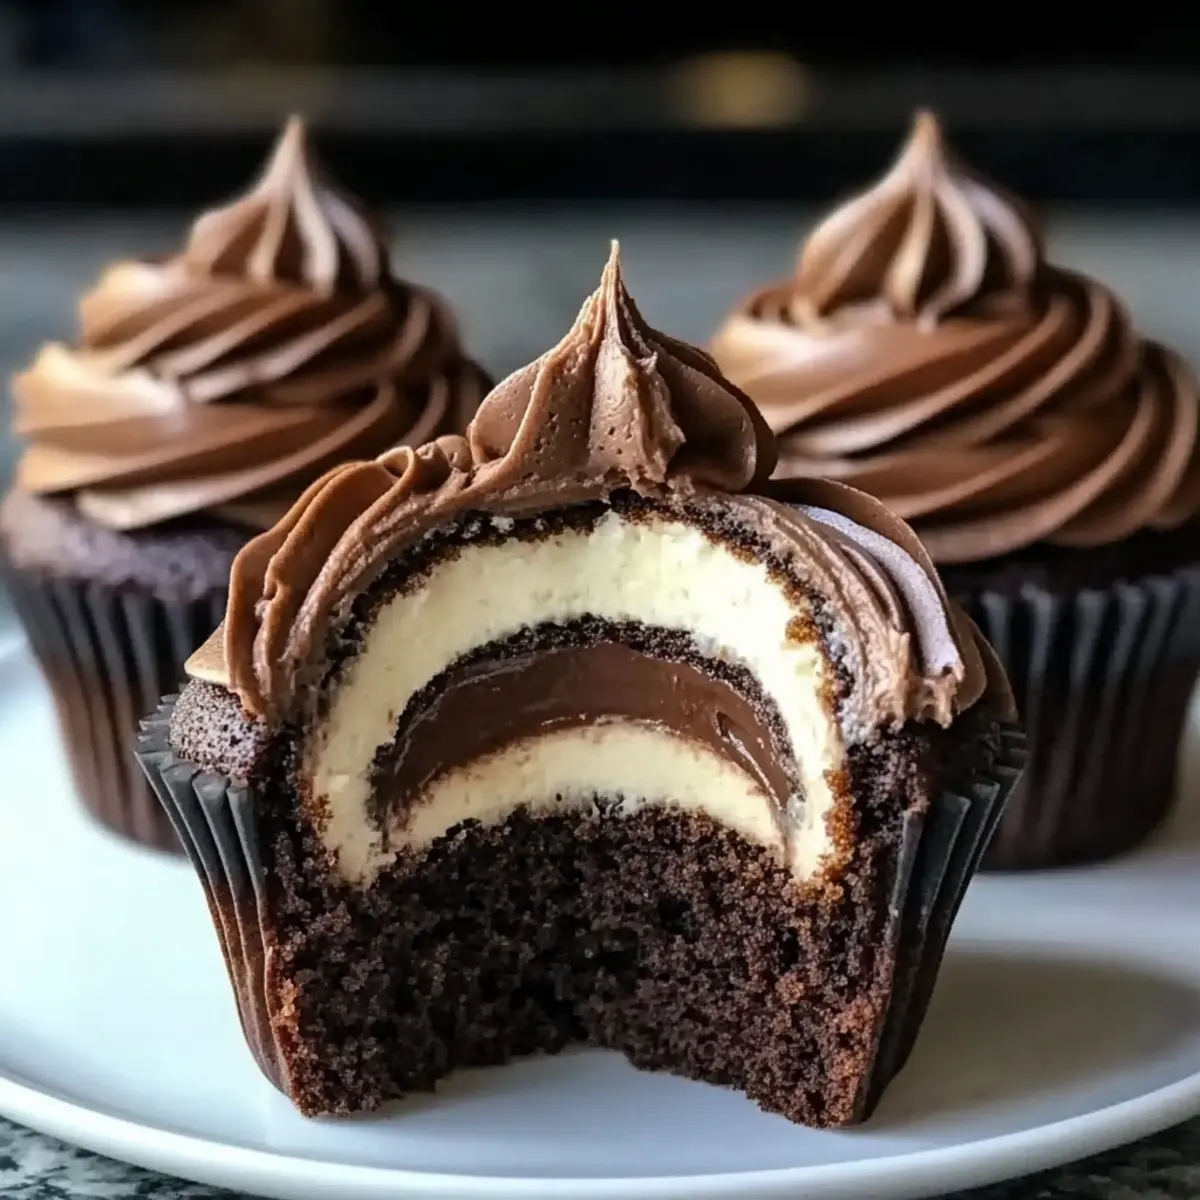
While the cupcakes cool, make the creamy filling. Heat the heavy cream in a saucepan over medium heat until it begins to simmer. Remove from heat and pour the hot cream over chopped milk chocolate in a bowl. Stir until melted and smooth, then allow it to cool slightly so it thickens, making it easier to pipe into the cupcakes.
Step 7: Fill the Cupcakes
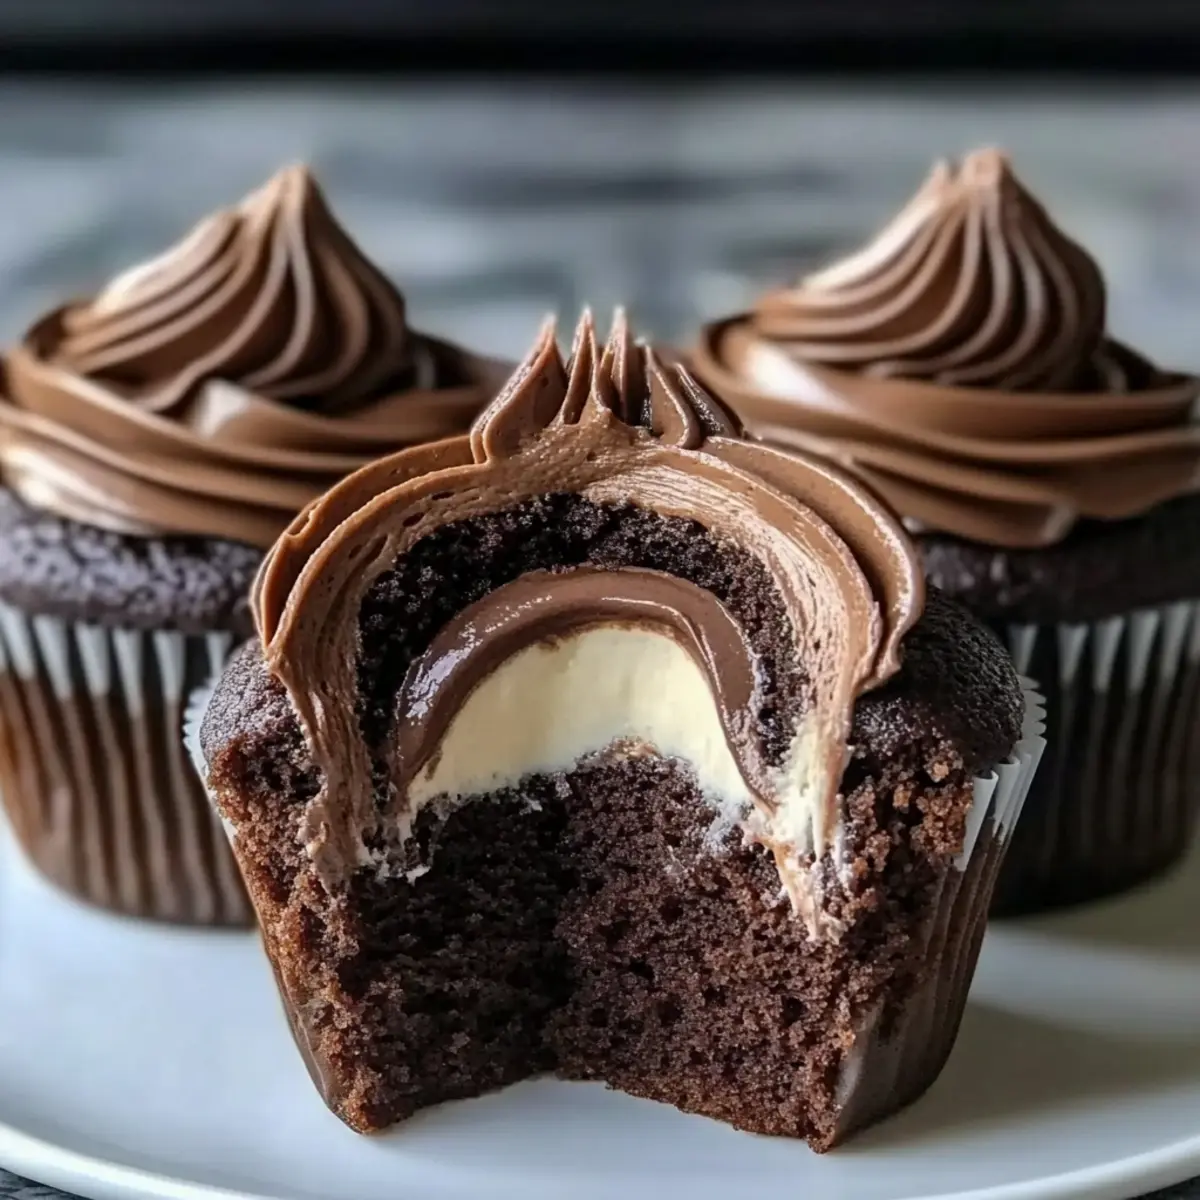
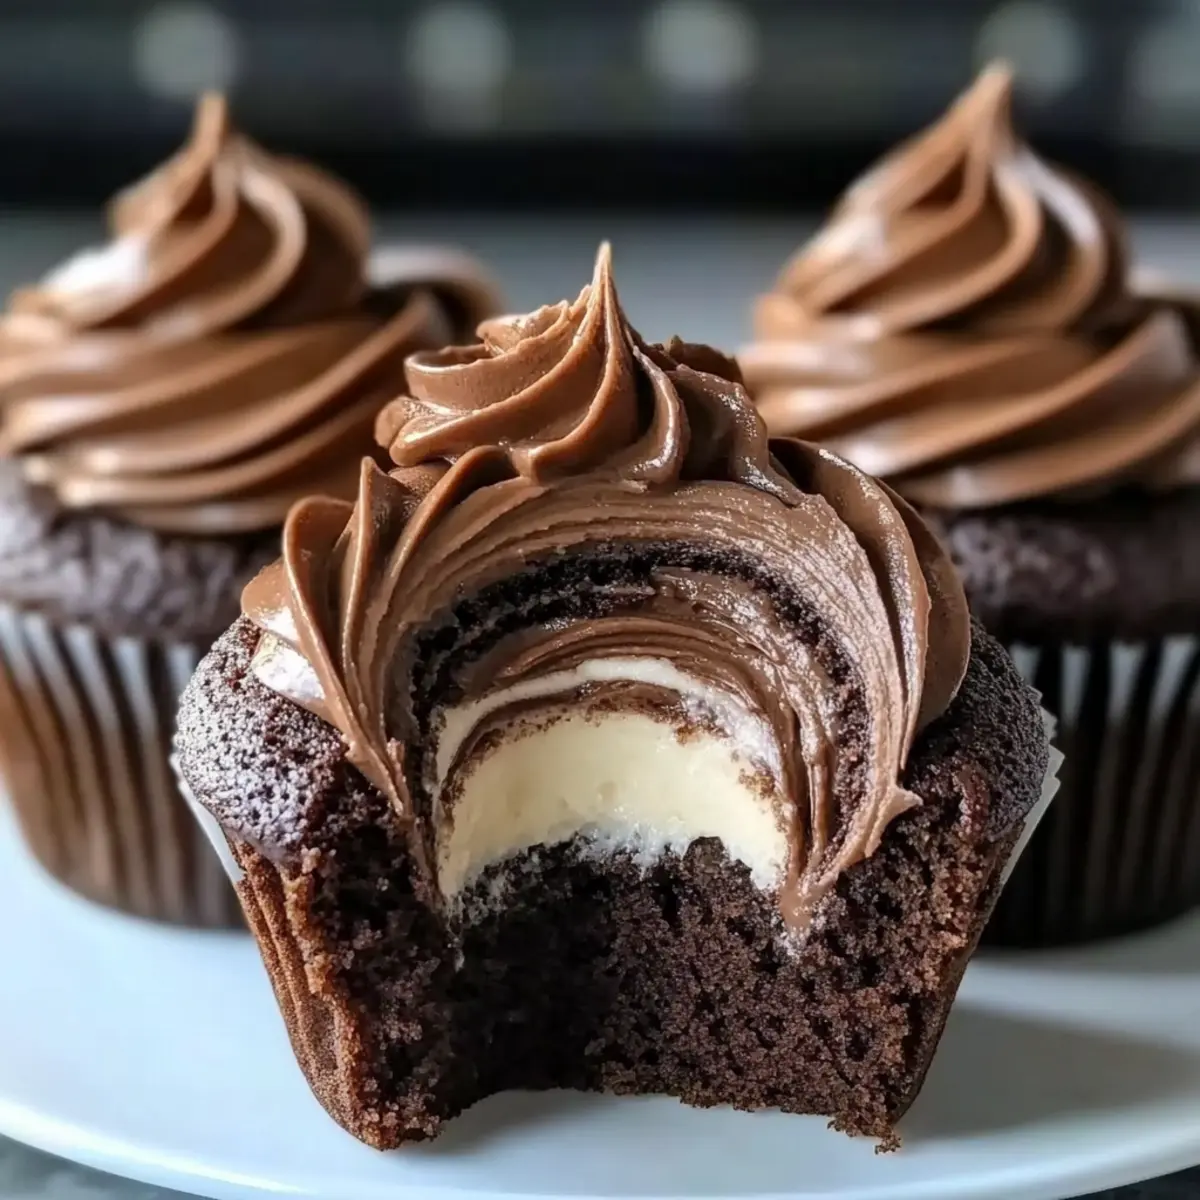
Once the cupcakes have cooled completely, use a piping bag fitted with a wide tip to fill each cupcake with the creamy chocolate filling. Insert the tip deep into the center of the cupcake and squeeze gently as you pull the tip out, letting the filling overflow just slightly for an inviting look.
Step 8: Serve and Enjoy
Your delicious Swirled Chocolate Cupcakes with Rich Creamy Chocolate Filling are now ready to impress! Serve them at room temperature for the best flavor and texture. These cupcakes are perfect for any occasion or just as a delightful treat to satisfy your chocolate cravings.
What to Serve with Swirled Chocolate Cupcakes?
Elevate your dessert experience by pairing these delightful cupcakes with accompaniments that will dance in harmony with their rich, chocolatey goodness.
- Vanilla Ice Cream: A scoop of creamy vanilla ice cream provides a refreshing contrast to the rich chocolate, balancing the dessert beautifully.
- Fresh Berries: Juicy strawberries or raspberries add a touch of tartness that brightens each decadent bite, making for a lovely visual presentation.
- Chocolate Ganache Drizzle: For the ultimate chocolate lover’s dream, a warm ganache drizzle enhances the flavors and adds a luxurious touch.
- Espresso or Coffee: A warm cup of espresso or brewed coffee pairs perfectly, cutting through the sweetness while enhancing the rich chocolate tones.
- Milkshake: A chilled chocolate milkshake complements the cupcakes’ flavors and adds a fun twist—a perfect treat for sharing!
- Caramel Sauce: A drizzle of salted caramel adds a delightful sweetness and a touch of sophistication that pairs wonderfully with the chocolate filling.
- Whipped Cream Topping: Light and airy whipped cream on the side allows for a creamy contrast, offering a comforting and enjoyable pairing.
- Mint Sprigs: Garnishing with fresh mint leaf not only adds a pop of color but also provides a refreshing burst that enhances the overall dessert experience.
With these delightful pairings, every bite of your Swirled Chocolate Cupcakes becomes a journey of flavor!
Make Ahead Options
These Swirled Chocolate Cupcakes are perfect for meal prep enthusiasts! You can prepare the cupcake batter up to 24 hours in advance. Simply mix the dry ingredients and store them in an airtight container, then keep the wet ingredients refrigerated separately. On baking day, combine them and swirl in the melted chocolate just before filling the cupcake liners. Additionally, you can make the creamy filling up to 3 days ahead; store it in the fridge in an airtight container. When you’re ready to serve, just pipe the filling into the cooled cupcakes, and they’ll taste just as delicious as if made fresh, saving you precious time on busy weeknights!
Swirled Chocolate Cupcakes Variations & Substitutions
Feel free to unleash your creativity and tailor these cupcakes to match your taste and dietary preferences!
- Dairy-Free: Use coconut cream for the filling and a non-dairy milk mixed with vinegar for the batter.
- Gluten-Free: Swap all-purpose flour with a high-quality gluten-free flour blend for a lighter version.
- Brown Sugar Twist: Substitute granulated sugar with brown sugar to enrich the flavor profile with a hint of caramel.
- Dark Chocolate Delight: Replace semi-sweet chocolate chips with dark chocolate for a bold, intense flavor experience.
- Vegan Option: Instead of eggs, use flaxseed meal mixed with water to bind the ingredients and maintain moisture.
- Nutty Crunch: Fold in chopped nuts like walnuts or hazelnuts into the batter for an added texture surprise.
- Spiced Delight: Add a teaspoon of cinnamon or espresso powder to the dry ingredients to elevate the flavor with a warm twist.
- Gourmet Finish: Top each cupcake with a pinch of sea salt after frosting for a sophisticated touch that enhances the chocolate.
If you’re feeling adventurous, try pairing these delightful cupcakes with a lovely cup of Disneylands Hot Chocolate or perhaps a delectable slice of Triple Chocolate Mousse for a truly indulgent experience!
Expert Tips for Swirled Chocolate Cupcakes
- Whisk with Care: Whisk eggs until pale yellow to ensure proper volume and a light texture in your cupcakes.
- Don’t Overfill: Avoid filling the cupcake liners more than two-thirds full to prevent messy overflow during baking.
- Creative Swirling: Use a chopstick or skewer for swirling if you don’t have fancy tools—it’s simple and fun!
- Cool Completely: Make sure the cupcakes are completely cool before filling them with the creamy chocolate filling for the best results.
- Storage Advice: Keep Swirled Chocolate Cupcakes in an airtight container at room temperature for up to 2 days for optimal freshness.
How to Store and Freeze Swirled Chocolate Cupcakes
Room Temperature: Store cupcakes in an airtight container at room temperature for up to 2 days to maintain their moist texture and rich flavor.
Fridge: If you need to keep them longer, transfer to the refrigerator where they’ll last for about a week. Just be sure to seal them tightly to prevent drying out.
Freezer: For extended storage, freeze your cupcakes individually wrapped in plastic wrap and placed in a freezer-safe container. They’ll maintain quality for up to 3 months.
Reheating: To enjoy frozen Swirled Chocolate Cupcakes, thaw them overnight in the fridge and allow them to come to room temperature before serving for optimal taste.
Swirled Chocolate Cupcakes Recipe FAQs
What is the best way to select ripe ingredients for the cupcake batter?
Absolutely! When choosing your eggs, look for ones that are cleaner, without cracks; this indicates freshness. For cocoa powder, always check the expiration date, as older cocoa may lose its rich flavor. If your eggs are pale and past their expiration, opt for fresh ones, and make sure your buttermilk is not nearing its sell-by date to ensure moisture and tanginess in your cupcakes!
How do I store Swirled Chocolate Cupcakes and for how long?
The more the merrier when it comes to storage! Store your Swirled Chocolate Cupcakes in an airtight container at room temperature for up to 2 days. If you’d like to keep them longer, transfer them to the fridge, where they should stay fresh for about a week. Just make sure to seal them tightly to prevent drying out.
Can I freeze Swirled Chocolate Cupcakes, and if so, how?
Yes, you can certainly freeze your cupcakes for extended enjoyment! To freeze, wrap each cupcake individually in plastic wrap, ensuring they are tightly sealed to avoid freezer burn. Then, place them in a freezer-safe container or zip-top bag. Your cupcakes will maintain their taste and texture for up to 3 months. When you’re ready to enjoy, simply thaw them overnight in the fridge and let them sit at room temperature for an hour before serving!
What common troubleshooting advice do you have for cupcakes that don’t rise?
Very good question! If your Swirled Chocolate Cupcakes don’t rise as expected, check the freshness of your baking powder and baking soda; they should be less than 6 months old for the best results. Additionally, avoid overmixing your batter, as this can lead to dense cupcakes. It’s also crucial to make sure your oven is preheated properly before baking to ensure the right temperature throughout the cooking process.
Are there any dietary considerations for making these cupcakes?
Absolutely! If you’re baking for someone with dietary restrictions, you can easily adapt this recipe. For a vegan option, substitute the large eggs with 1 tablespoon of flaxseed meal mixed with 2.5 tablespoons of water (let it sit for a few minutes until it gels). For dairy-free options, use non-dairy milk combined with vinegar for buttermilk alternatives and opt for coconut cream instead of heavy cream in the filling—both will still yield delicious results!
Can I use different ingredients for the chocolate filling?
Definitely! If you’d prefer a less sweet filling, swap the milk chocolate for dark chocolate to achieve a richer flavor. Additionally, you can mix in a spoonful of espresso powder with the melted chocolate for a delightful coffee infusion—this balances the sweetness beautifully! Just remember to adjust the cream accordingly to maintain the creamy texture.
Swirled Chocolate Cupcakes That Melt in Your Mouth
Ingredients
Equipment
Method
- Preheat your oven to 350°F (175°C) and line a 12-cup muffin tin with colorful cupcake liners.
- In a large bowl, whisk together flour, cocoa powder, sugar, baking soda, baking powder, and salt.
- In a separate bowl, beat together eggs, vegetable oil, buttermilk, and vanilla until smooth. Gently fold into the dry mixture.
- Divide the batter among the lined muffin cups, filling each about two-thirds full. Drizzle melted chocolate and swirl with a toothpick.
- Bake for 18-20 minutes. Check if done by pressing the tops; they should spring back.
- Heat heavy cream until simmering. Pour over chopped chocolate, stir until melted, and let cool slightly.
- Once cooled, fill each cupcake with the creamy chocolate filling using a piping bag.
- Serve at room temperature for the best flavor and texture.
Leave a Reply