
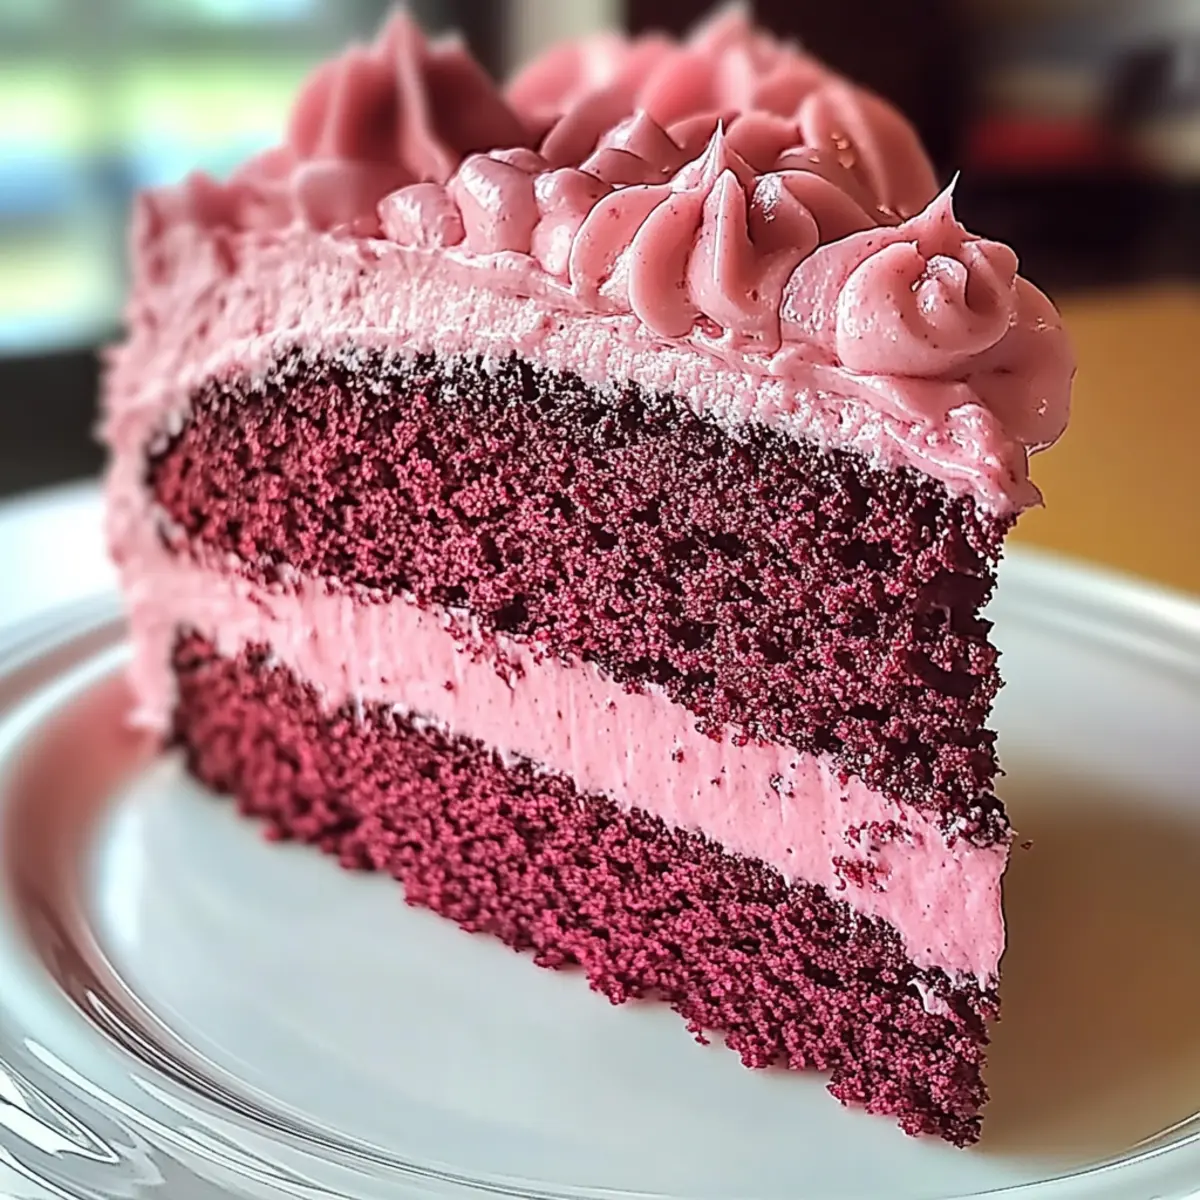
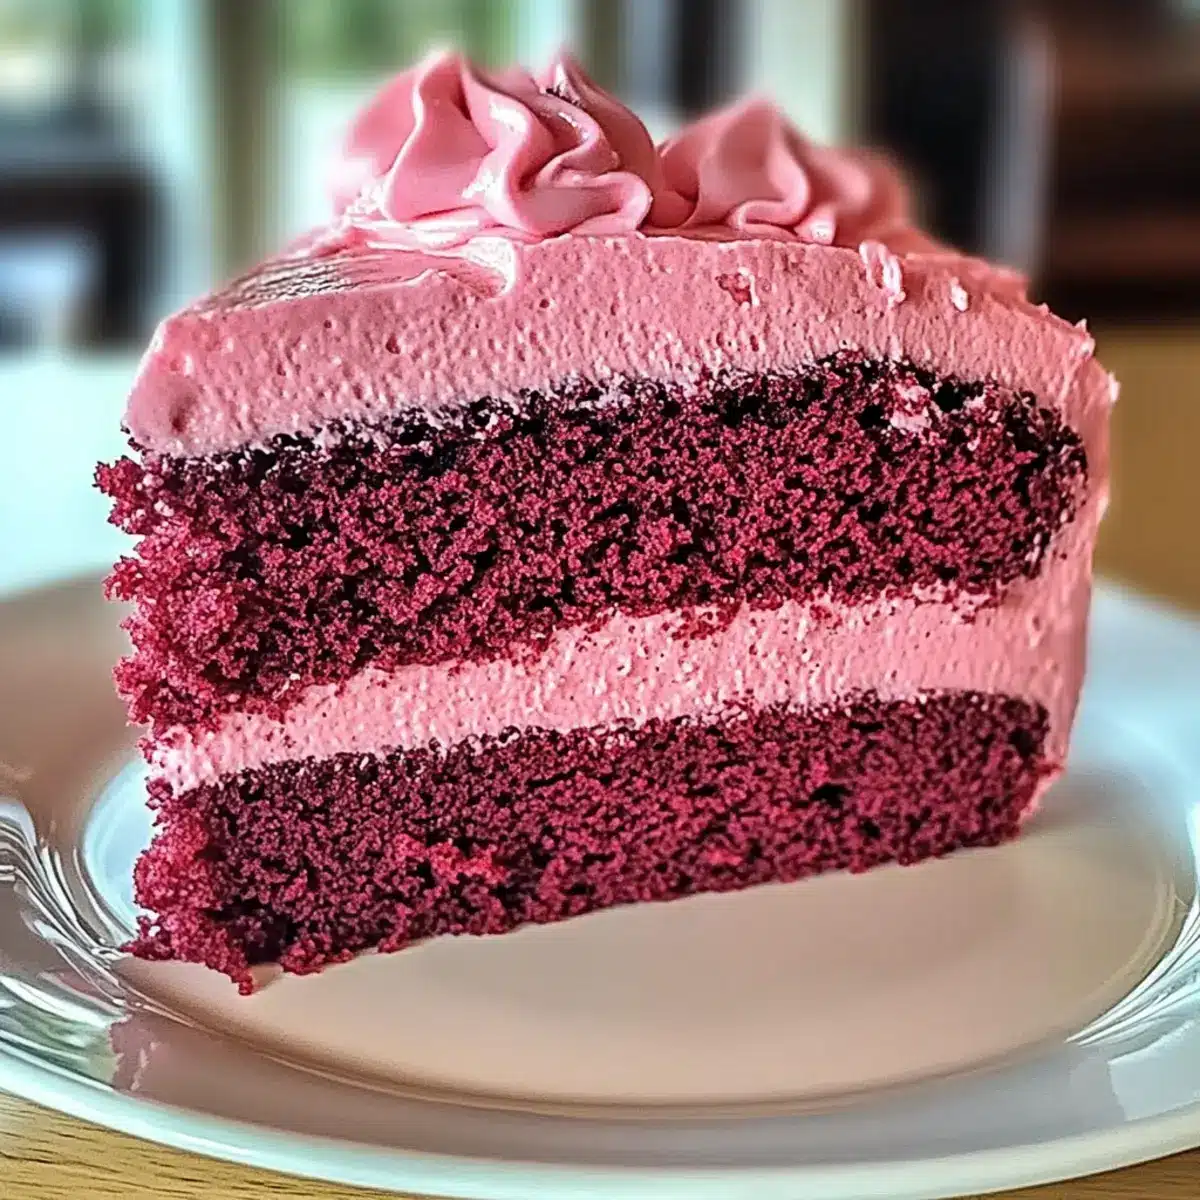
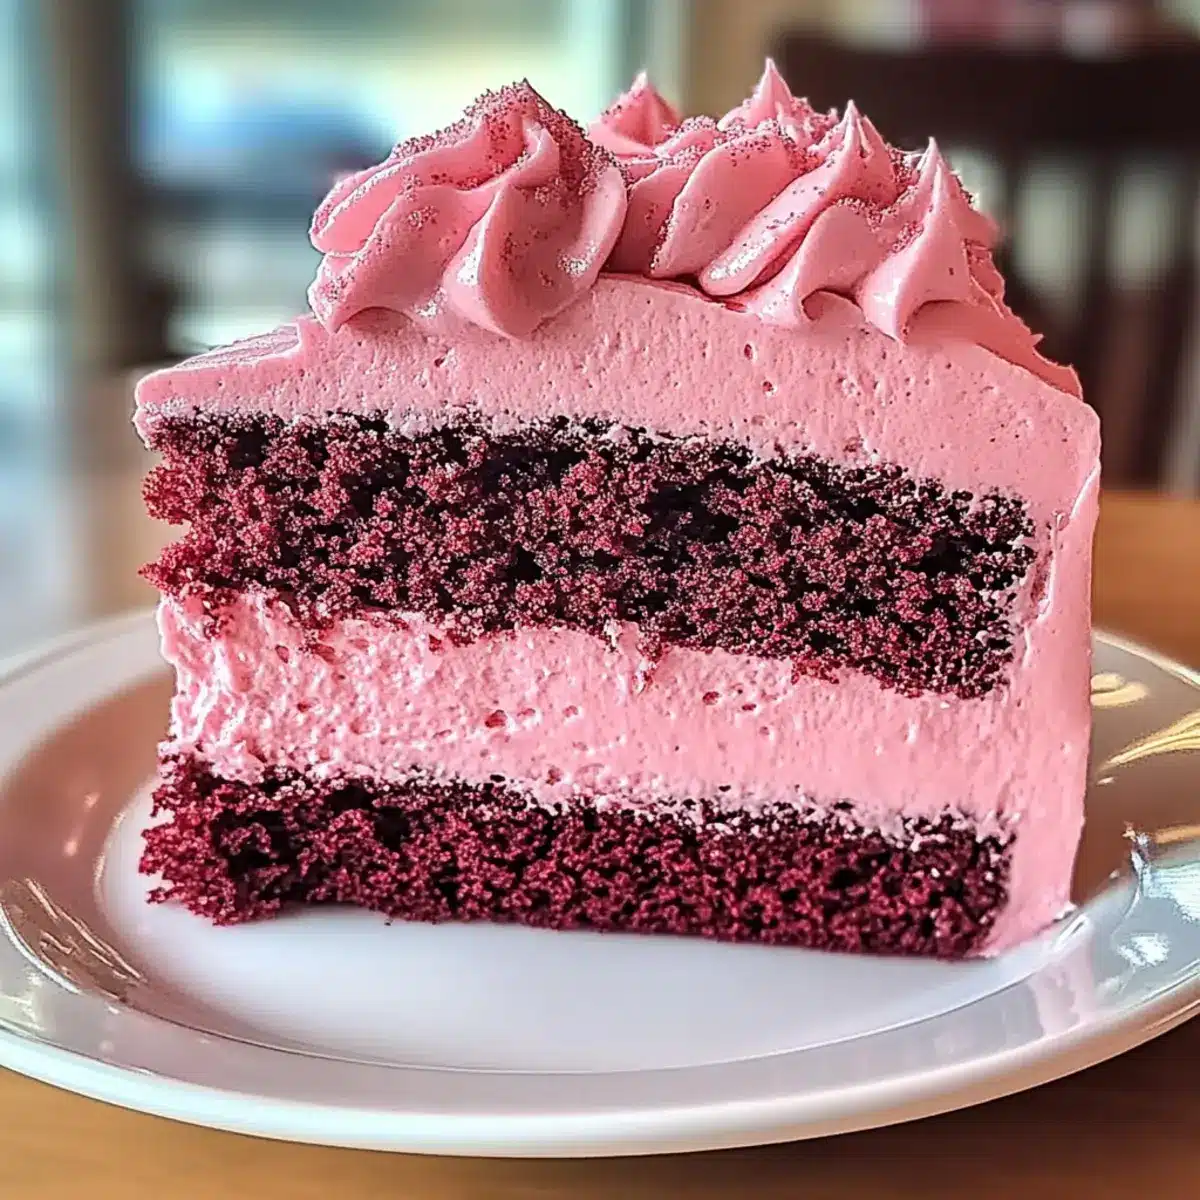
As I picked up the whisk and began to mix the batter for my Mother’s Day Pink Velvet Cake, a wave of nostalgia washed over me. This cake isn’t just a dessert; it’s a celebration of love, memories, and all the delightful moments shared with the extraordinary women in our lives. With its enchanting layers of cocoa and vanilla, this cake offers an irresistibly soft texture that’s hard to beat. It’s not only picturesque with its lovely pink hue, but it’s also incredibly versatile—perfect for any occasion and easily customizable with hints of almond extract for a unique twist. Plus, its quick prep time means you can whip it up without a hitch, leaving more moments to savor. Ready to embark on this deliciously nostalgic journey with me? Let’s dive into the recipe!

Why is Pink Velvet Cake So Special?
Versatile for Celebrations: Whether it’s Mother’s Day, birthdays, or any joyful gathering, this cake shines on any dessert table.
Customizable Flavors: Want to switch things up? Add almond extract or top it with fresh berries for a delightful twist!
Quick and Easy Prep: With just a few simple steps, you can create this stunning cake without stress, saving precious time for what really matters.
Stunning Presentation: Its eye-catching pink hue and fluffy layers not only taste divine but also make for an impressive centerpiece.
Nostalgic and Heartfelt: Each bite brings back delightful memories, making it more than just cake—it’s a slice of love and joy!
Mother’s Day Pink Velvet Cake Ingredients
• Get ready to create a masterpiece that captures hearts!
For the Cake
- Cake Flour – Provides structure; for a denser texture, swap with all-purpose flour.
- Unsweetened Cocoa Powder – Adds luscious chocolate flavor; omit for a lighter vanilla version.
- Baking Powder – Acts as a leavening agent; ensure it’s fresh for optimal rise.
- Salt – Enhances overall flavor; a slight reduction is fine, but don’t skip it.
- Unsalted Butter – Supplies rich moisture; margarine or vegan butter can be used as alternatives.
- Granulated Sugar – Sweetens and lightens the cake; brown sugar brings a lovely molasses note.
- Large Eggs – Bind and add moisture; flaxseed meal can substitute for a vegan option.
- Buttermilk – Adds necessary acidity for leavening; mix milk with vinegar as a substitute.
- Vanilla Extract – Enriches the flavor; vanilla bean paste can enhance the depth.
- Red Food Coloring – Creates that stunning pink hue; adjust for desired intensity.
For the Topping
- Cream Cheese Frosting – Adds a creamy, tangy finish; feel free to experiment with buttercream options!
Step‑by‑Step Instructions for Mother’s Day Pink Velvet Cake
Step 1: Preheat and Prepare
Start by preheating your oven to 350°F (175°C). While it warms up, take two 9-inch round cake pans and grease them thoroughly with butter or cooking spray, then dust them lightly with flour. This ensures your Mother’s Day Pink Velvet Cake will release easily after baking and helps you achieve a perfect golden crust.
Step 2: Mix Dry Ingredients
In a large mixing bowl, whisk together 2 cups of cake flour, 1 tablespoon of unsweetened cocoa powder, 1 ½ teaspoons of baking powder, and ½ teaspoon of salt. Make sure these dry ingredients are well-blended, as this step is crucial for the even texture of your cake. Set aside this mixture while you prepare the wet ingredients.
Step 3: Cream Butter and Sugar
In a separate large bowl, use a hand mixer to cream together ½ cup of unsalted butter and 1 ½ cups of granulated sugar. Beat them for about 3 minutes until the mixture is light and fluffy, turning a pale yellow. This aeration is essential for achieving a soft and delightful texture in your Mother’s Day Pink Velvet Cake.
Step 4: Incorporate Eggs
Add 2 large eggs to the butter and sugar mixture, one at a time. Mix thoroughly after each addition, ensuring each egg is fully incorporated before adding the next. This will bind the ingredients and add moisture, creating the optimal batter consistency for your cake layers.
Step 5: Add Wet Ingredients
Now, pour in 1 cup of buttermilk, 1 teaspoon of vanilla extract, and your desired amount of red food coloring into the egg mixture. Mix it all together until smooth and fully combined. This is where the cake gets its charming pink hue and wonderful flavor, so make sure there are no lumps before moving forward.
Step 6: Combine Dry and Wet Mixtures
Gradually fold the dry ingredient mixture into the wet mix using a spatula. Mix gently until just combined—be cautious not to overmix, as you want to maintain the cake’s light, fluffy texture. The batter should have a beautiful pink color, inviting and ready for baking.
Step 7: Bake the Cake
Divide the batter evenly between the prepared cake pans. Place them in the preheated oven and bake for 25-30 minutes. You’ll know they’re done when a toothpick inserted in the center comes out clean or with a few moist crumbs. This is the moment your Mother’s Day Pink Velvet Cake starts to transform!
Step 8: Cool the Cakes
Once baked, remove the pans from the oven and let them cool for about 10 minutes. Carefully run a knife around the edges to loosen the cakes, then invert them onto wire racks to cool completely. Proper cooling prevents sogginess and ensures a clean frosting application.
Step 9: Frost and Assemble
With the cakes fully cooled, spread a generous layer of cream cheese frosting on top of one layer. Gently place the second layer on top and frost the top and sides as desired. Decorate your Mother’s Day Pink Velvet Cake with fresh berries or sprinkles for an added touch of charm and celebration.
Storage Tips for Mother’s Day Pink Velvet Cake
- Room Temperature: Store your cake covered at room temperature for up to 3 days. This keeps it fresh and moist, ready for delightful slices whenever you crave a treat.
- Fridge: If you have leftover cake, refrigerate it for up to a week. Make sure to wrap it tightly in plastic wrap or a cake carrier to prevent it from drying out.
- Freezer: To keep it longer, freeze the unfrosted cake layers for up to 3 months. Wrap them well in plastic wrap and aluminum foil before freezing. Thaw in the fridge overnight before frosting.
- Reheating: For a warm slice of your Mother’s Day Pink Velvet Cake, pop it in the microwave for 15-20 seconds. Enjoy the nostalgia with every mouthful!
Helpful Tricks for Pink Velvet Cake
-
Room Temperature Ingredients: Ensure your butter, eggs, and buttermilk are at room temperature for optimal mixing and a smooth, creamy batter.
-
Avoid Overmixing: Mix until just combined to maintain the fluffy texture of your Mother’s Day Pink Velvet Cake—overmixing can lead to a dense crumb.
-
Color Gradation: Add red food coloring gradually while mixing; this prevents over-saturation and lets you achieve the perfect pink hue without going too dark.
-
Proper Cooling Technique: Allow your cakes to cool in the pan for only 10 minutes before transferring them to wire racks; this helps maintain structure and prevent sogginess.
-
Frosting Flexibility: Experiment with different frosting options! Cream cheese is delightful, but buttercream or whipped cream can also complement the cake beautifully.
Variations & Substitutions for Day Pink Velvet Cake
Feel free to let your imagination run wild—there are countless delightful ways to customize this beautiful cake!
-
Almond Extract: Swap vanilla extract for almond extract to add a lovely nutty flavor, making each bite uniquely special. Almond has a way of elevating your cake’s profile, adding warmth and depth that friends and family will adore!
-
Fresh Berries: Top your frosted cake with luscious fresh berries like strawberries or raspberries for a fruity burst of flavor and eye-catching contrast. The sweetness of berries pairs exquisitely with the cake’s rich cream cheese frosting, creating a truly delightful dessert experience.
-
Different Frosting: Experiment with alternative frostings, such as a fluffy buttercream or a light whipped cream. Each frosting offers a unique texture and flavor that can transform the cake, keeping it fresh and exciting for any occasion.
-
Chocolate Chips: Fold in mini chocolate chips to the batter for an indulgent chocolate surprise in every slice. These little bursts of sweetness will take your pink velvet cake to a whole new level of flavor!
-
Coconut Flakes: Add sweetened coconut flakes to the frosting for a tropical twist. This combination strikes a perfect balance between the cake’s classic flavor and a fun, chewy texture.
-
Spice it Up: Introduce a pinch of cinnamon or nutmeg to the batter for a warm, aromatic surprise that beckons nostalgia and makes the cake feel even more special.
-
Layered Dessert: Transform your cake into a show-stopping layered dessert by slicing it into multiple layers, stacking them with different fillings such as fruit compote or chocolate ganache. This not only enhances presentation but allows for flavorful surprises hidden between the layers!
For an elegant dessert experience, consider serving this captivating cake alongside a scoop of vanilla ice cream—perfection! And if you’re in the mood for more sweet creations, don’t miss our other delightful recipes like the Christmas Fruit Cake and Chocolate Mousse Cake. Enjoy every delicious moment!
Make Ahead Options
These Mother’s Day Pink Velvet Cakes are perfect for busy home cooks who want to save time while still creating a beautiful dessert! You can bake the cakes up to 24 hours in advance. After they’ve completely cooled, wrap each layer tightly in plastic wrap to keep them moist. For the best flavor and texture, frost the cake just before serving. If you prefer to prep even further, make the cream cheese frosting up to 3 days ahead and store it in an airtight container in the refrigerator. When you’re ready to enjoy, simply spread the frosting between the layers and on top, and you’ll have a stunning, delicious cake with minimal last-minute effort!
What to Serve with Mother’s Day Pink Velvet Cake
Indulge your senses and create the perfect celebration around this delightful dessert, as every meal deserves a little extra love!
-
Fresh Berries: The sweet-tart flavors of raspberries or strawberries beautifully complement the rich cake, adding a burst of freshness.
-
Vanilla Ice Cream: A scoop of creamy vanilla ice cream offers a luscious contrast to the soft layers, melting delightfully onto each slice.
-
Chocolate Ganache: Drizzle a silky chocolate ganache over your cake for an indulgent treat that enhances the cocoa flavors and adds depth.
-
Whipped Cream Topping: Light whipped cream adds airy texture, allowing the cake’s rich layers to shine without overwhelming your palate.
-
Mint Sprigs Garnish: A refreshing mint garnished on each slice elevates the presentation while delivering an aromatic finish to your indulgence.
-
Fruit Compote: A homemade fruit compote brings a juicy, tangy element that highlights the cake’s sweetness, making each bite a lovely experience.
-
Coffee or Tea: Pair your cake with a warm cup of coffee or fragrant herbal tea; the cozy sips make for perfect afternoon delight.
-
Sparkling Wine: Celebrate with a glass of bubbly! The effervescence cuts through the cake’s richness, creating a sophisticated pairing for your gathering.
Mother’s Day Pink Velvet Cake Recipe FAQs
What is the best way to select ripe ingredients for the cake?
Absolutely! When selecting your ingredients, look for cake flour that is finely milled for a light texture. For the butter, choose sticks that are smooth and creamy, avoiding any that are discolored. If you’re using fresh eggs, they should fit snugly when shaken gently—no rattling indicates they’re fresh!
How should I store my Mother’s Day Pink Velvet Cake after baking?
For optimal freshness, store your cake covered at room temperature for up to 3 days. If you have leftovers, wrap them tightly in plastic wrap or keep them in an airtight container in the refrigerator for up to a week. This will help maintain that delightful moisture and flavor!
Can I freeze the Mother’s Day Pink Velvet Cake?
Yes, you can! To freeze, first cool the unfrosted cake layers thoroughly. Wrap each layer tightly in plastic wrap, then in aluminum foil for up to 3 months. When you’re ready to enjoy, thaw in the fridge overnight before frosting. Reheat slices in the microwave for a warm, nostalgic treat!
What are some common troubleshooting tips for this recipe?
One common issue is overmixing the batter, which can lead to a dense cake. Mix until just combined for a fluffy texture! Additionally, ensure your baking powder is fresh to get the best rise. If your cake seems to sink in the middle, it might have been underbaked—always check for doneness with a toothpick!
Are there any dietary considerations for this recipe?
Yes! This cake contains common allergens such as eggs, dairy, and gluten. For a vegan option, substitute the eggs with flaxseed meal (1 tablespoon mixed with 3 tablespoons of water equals one egg) and use plant-based butter and unsweetened almond milk in place of buttermilk. Just remember to check all packaged ingredients for allergens!
Can I customize the flavors in the Mother’s Day Pink Velvet Cake?
The more the merrier! You can easily customize this cake by swapping vanilla extract with almond extract for a delightful twist. Top with fresh berries or even a drizzle of chocolate ganache for extra flair. The recipe is versatile, allowing you to tailor it to your family’s favorite flavors!
Delightful Mother’s Day Pink Velvet Cake for Cherished Moments
Ingredients
Equipment
Method
- Preheat your oven to 350°F (175°C) and grease two 9-inch round cake pans, then dust lightly with flour.
- In a large mixing bowl, whisk together 2 cups of cake flour, 1 tablespoon of unsweetened cocoa powder, 1.5 teaspoons of baking powder, and 0.5 teaspoon of salt.
- Cream together 0.5 cups of unsalted butter and 1.5 cups of granulated sugar for about 3 minutes until light and fluffy.
- Add 2 large eggs to the mixture one at a time, mixing thoroughly after each addition.
- Pour in 1 cup of buttermilk, 1 teaspoon of vanilla extract, and red food coloring into the mixture, combining until smooth.
- Fold the dry mixture into the wet mix gently until just combined, maintaining the cake's light texture.
- Divide the batter evenly between prepared pans and bake for 25-30 minutes until a toothpick comes out clean.
- Remove the cakes and let them cool for about 10 minutes before inverting onto wire racks to cool completely.
- Spread a layer of cream cheese frosting on one layer, top with the second layer, and frost the top and sides as desired.
Leave a Reply