
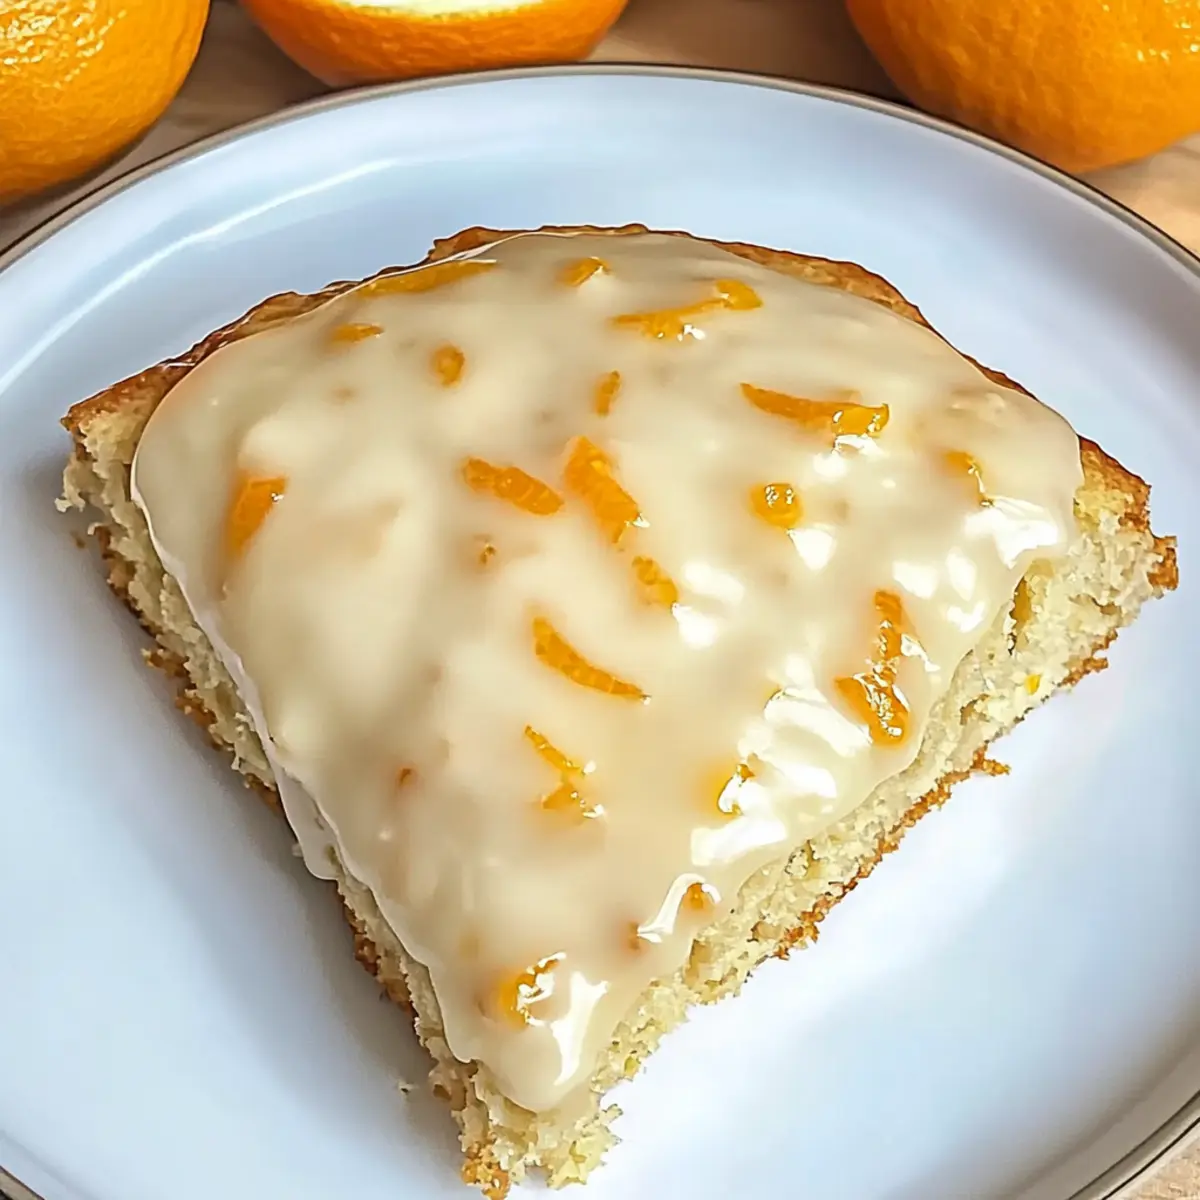
As the sun begins to rise, the tantalizing aroma of warm, freshly baked scones wafts through the kitchen, instantly awakening my senses. There’s something undeniably comforting about these Copycat Panera Glazed Orange Scones, which offer a delightful twist on a classic favorite. Not only are they quick and easy to whip up, but they also provide a budget-friendly way to elevate your breakfast game. With their flaky, golden exterior and a touch of sweet glaze, these scones are perfect for cozy weekends or busy mornings when you need something special. Want to add a personal flair? Feel free to explore variations with lemon, berries, or even chocolate! What flavor combination will you try first?
Why are these scones a breakfast must?
Simplicity at its best: You’ll love how quick and easy these scones are to whip up—perfect for busy mornings or weekend brunches.
Vibrant flavor: The infusion of orange zest and juice provides a refreshing burst of citrus that wakes up your taste buds.
Customization galore: With options to add lemon, berries, or even chocolate, every batch can be uniquely yours!
Crowd-pleaser: Whether entertaining guests or enjoying solo, these scones will impress anyone who takes a bite.
Budget-friendly: Save money while savoring café-quality goodness right at home—a real win for your wallet!
Indulge in these homemade delights that rival Panera’s version while capturing those cherished café vibes.
Panera Glazed Orange Scones Ingredients
For the Scone Dough
- All-Purpose Flour – Essential for structure; you can substitute with gluten-free flour for a gluten-free version.
- Granulated Sugar – Adds sweetness; feel free to adjust it to your taste preferences.
- Baking Powder – Ensures proper rise; make sure it’s fresh for the best results.
- Fine Salt – Enhances flavor; opt for fine salt for better integration.
- Cold Butter – Creates those flaky layers; keep it cubed and cold for best texture.
- Heavy Cream – Provides moisture and richness; substitute with non-dairy alternatives like coconut or almond milk if needed.
- Orange Juice Concentrate – Adds vibrant citrus flavor; fresh orange juice can be substituted for a fresher taste.
- Grand Marnier or Orange Extract – Deepens the orange flavor profile for a delightful twist.
- Fresh Orange Zest – Vital for a bright flavor boost; always use fresh for maximum taste.
For the Glaze
- Powdered Sugar – Creates a smooth glaze; sifting will help achieve the best consistency.
- Additional Heavy Cream – Adjusts the glaze’s consistency for optimum drizzle over your scones.
Now you’re ready to bring that sunshiny flavor right from your kitchen! Enjoy your homemade Panera Glazed Orange Scones!
Step‑by‑Step Instructions for Panera Glazed Orange Scones
Step 1: Preheat and Prepare
Begin by preheating your oven to 400°F (200°C) while you line a baking sheet with parchment paper. This preparation ensures an even bake for your Panera Glazed Orange Scones. The parchment will help prevent sticking and allow for easier cleanup afterward.
Step 2: Mix Dry Ingredients
In a large mixing bowl, whisk together the all-purpose flour, granulated sugar, baking powder, and fine salt. Aim for an even mixture, which will create a solid base for your scones. This step is crucial for achieving the right texture, so take a moment to ensure everything is well combined.
Step 3: Cut in the Butter
Next, add the cold, cubed butter to the dry mixture. Use a pastry cutter or your fingertips to cut the butter into the flour until the mixture resembles coarse crumbs. This process is key for creating the flaky texture that makes these scones so delightful.
Step 4: Combine Wet Ingredients
In another bowl, whisk together the heavy cream, orange juice concentrate, Grand Marnier, and fresh orange zest. The combination of these wet ingredients adds depth to the scone’s citrus flavor. Ensure everything is well blended before proceeding to the next step.
Step 5: Mix the Dough
Gently combine the wet and dry ingredients, stirring just until moistened. Be careful not to overmix, as this can lead to dense scones instead of the light, flaky texture you’re aiming for with these Panera Glazed Orange Scones.
Step 6: Shape the Dough
Lightly knead the dough on a floured surface just until it comes together, then flatten it into a circle about ¾-inch thick. This thickness is essential for achieving the right scone height. Avoid overworking the dough to maintain its airy quality.
Step 7: Cut and Transfer
Cut the flattened dough into triangular scone shapes using a sharp knife or a bench scraper. Carefully transfer each scone onto the prepared baking sheet, ensuring they are spaced apart for even baking. This is the moment where you can admire your handiwork!
Step 8: Bake to Perfection
Place the scones in the preheated oven and bake for 15-17 minutes, or until they turn golden brown and a toothpick inserted in the center comes out clean. As they bake, the enticing aroma of orange will fill your kitchen, creating an irresistible atmosphere.
Step 9: Cool on a Rack
Once the scones are baked, remove them from the oven and allow them to cool on a wire rack for about 10 minutes. This cooling period helps the scones set while still being warm and inviting, making them perfect for glazing.
Step 10: Prepare the Glaze
While the scones are cooling, whisk together the powdered sugar, additional heavy cream, and a splash of orange juice concentrate in a small bowl. Aim for a smooth, pourable consistency that will beautifully coat your scones, adding that signature glaze.
Step 11: Glaze the Scones
Once the scones are slightly cooled, drizzle the glaze generously over the warm scones. Allow the glaze to set for a few moments; this helps it adhere better and creates a delightful finish, reminiscent of the Panera Glazed Orange Scones you love.
Tips for the Best Panera Glazed Orange Scones
Cold Ingredients: Keep all dairy ingredients cold—this helps achieve that perfect flaky texture.
Avoid Overmixing: Gently combine the wet and dry ingredients to prevent dense scones. Overmixing is a common mistake!
Watch the Bake Time: Ovens can vary; check for golden brown tops and a clean toothpick to ensure perfect baking every time.
Fresh Zest Matters: Always use fresh orange zest for the most vibrant and aromatic flavor in your Panera Glazed Orange Scones.
Glazing Warm Scones: Apply the glaze while scones are still warm; this ensures better adherence and a beautiful finish.
Panera Glazed Orange Scones: Customization Ideas
Feel free to get creative and make these delightful scones uniquely yours with these fun variations!
-
Lemon Twist: Substitute orange juice with lemon juice for a zesty, refreshing twist that’s perfect for spring.
-
Berry Bliss: Add a handful of fresh or dried berries, such as blueberries or cranberries, to the dough for a burst of sweetness.
-
Chocolate Indulgence: Fold in chocolate chips, ideally semi-sweet, for a decadent treat that perfectly complements the orange flavor.
-
Nutty Goodness: Mix in chopped walnuts or almonds to add a nice crunch and a hint of nuttiness.
-
Herb-Infusion: Try adding a teaspoon of fresh rosemary or thyme for an unexpected savory note that will surprise and delight your palate.
-
Spicy Kick: Add a pinch of cinnamon or nutmeg into the dry ingredients for a warm, aromatic twist that evokes the comfort of fall.
-
Vegan Delight: Replace heavy cream with coconut milk and the butter with vegan margarine for a scrumptious dairy-free version.
-
Glazed Citrus Fusion: Use a mix of citrus juices, like grapefruit or lime, in the glaze for a vibrant citrus medley. This twist will transport you to a sun-drenched café in no time!
With so many ways to tailor these scones, you can truly enjoy a different experience every time! If you’re curious about enhancing your baking repertoire even further, consider trying out a delightful Orange Tart Brightens or experimenting with a Rosemary Orange Glazed dish for your next meal. Happy baking!
What to Serve with Copycat Panera Glazed Orange Scones
Indulge in a complete breakfast experience that brings warmth and joy to your morning routine.
- Creamy Mashed Potatoes: Silky potatoes with butter add a comforting contrast to the flaky scones—perfect for a cozy brunch.
- Fresh Fruit Salad: A mix of berries and citrus will enhance the scone’s zesty flavors, lightening up your meal with fresh, vibrant tastes.
- Iced Coffee: A refreshing iced coffee complements the sweetness of the orange glaze, making it a perfect morning pick-me-up.
- Greek Yogurt: Creamy yogurt topped with honey or fruit adds a protein boost and pairs beautifully with the scone’s light texture.
- Scrambled Eggs: Fluffy eggs bring a savory balance to the sweet scone, making it a satisfying breakfast. The warmth contrasts splendidly with the refreshing scone.
- Herbal Tea: Fragrant tea infuses your breakfast with calmness, enhancing the citrus notes of the scone for a serene start to your day.
- Chocolate Croissant: For a sweet indulgence, pair the freshness of orange scones with flaky, buttery chocolate croissants, satisfying your pastry cravings.
- Orange Juice: Bright, chilled orange juice pairs harmoniously, amplifying the lovely citrus flavors and refreshing your palate.
- Panna Cotta: For dessert, a light panna cotta drizzled with citrus syrup will echo the orange notes, making a delightful finish to your meal.
- Nutty Granola: A sprinkle of nutty granola adds crunch, enhancing the overall texture and offering a delightful contrast to the soft scones.
Storage Tips for Panera Glazed Orange Scones
Room Temperature: Store in an airtight container at room temperature for up to 3 days. This keeps them fresh and soft, ready for breakfast anytime!
Freezer: You can freeze these delicious scones for up to 3 months. Wrap individually in plastic wrap and place them in a freezer-safe bag.
Thawing: When ready to enjoy, simply thaw them at room temperature or reheat in a preheated oven at 350°F (175°C) for about 5-10 minutes for a freshly baked taste.
Reheating: For optimal flavor and texture, always reheat your Panera Glazed Orange Scones in the oven rather than the microwave. This will bring back their delightful flakiness!
Make Ahead Options
These Copycat Panera Glazed Orange Scones are perfect for those busy mornings when time is of the essence! You can prepare the scone dough up to 24 hours in advance; simply combine the dry ingredients and store them in an airtight container. You can also cut the scones into their triangular shapes, placing them on the baking sheet, and refrigerate them, covered, for up to 3 days. When you’re ready to bake, just add a few extra minutes to the baking time to ensure they’re perfectly cooked. For the glaze, mix it just before serving to maintain its smooth texture and drizzle it over the warm scones, ensuring they look as delightful as they taste! This makes enjoying homemade scones even easier on busy days!
Panera Glazed Orange Scones Recipe FAQs
How do I select the right ingredients for the scones?
Absolutely! For the best flavor, always choose fresh ingredients. Look for all-purpose flour that feels fine and is free from lumps. Fresh oranges are essential—opt for ones with a bright, firm skin and no dark spots. For butter, use unsalted, and make sure it’s cold to ensure those delightful flaky layers.
How should I store the scones to keep them fresh?
To maintain their deliciousness, store your Panera Glazed Orange Scones in an airtight container at room temperature for up to 3 days. If you need to keep them longer, they can be frozen for up to 3 months. Just wrap each scone in plastic wrap and place them in a freezer-safe bag to prevent freezer burn.
What’s the best way to freeze the scones?
Great question! Once your scones are completely cooled, wrap each one individually in plastic wrap, then place them in a freezer-safe zipper bag. Ensure you squeeze out as much air as possible before sealing. When you want one, simply thaw at room temperature or pop it in a preheated oven at 350°F (175°C) for about 5-10 minutes to bring back that fresh-baked taste.
What should I do if my scones turn out dense?
If your scones aren’t as flaky as you’d hoped, it’s usually due to overmixing the dough or using warm ingredients. Next time, be sure to gently combine the wet and dry ingredients just until moistened, and keep all dairy ingredients cold. If you find the dough too sticky, you can lightly dust it with flour as you shape it.
Are there any dietary considerations for these scones?
Yes, absolutely! This recipe can easily accommodate various dietary needs. For a gluten-free version, replace all-purpose flour with a gluten-free blend. Feel free to swap heavy cream with non-dairy alternatives like coconut or almond milk. Also, if you have nut allergies, be cautious with add-ins like walnuts or almonds—opt for dried fruits or chocolate chips instead!
Can I reheat leftover scones?
Definitely! To enjoy your scones warm again, avoid the microwave, as it can make them tough. Instead, preheat your oven to 350°F (175°C) and reheat them for about 5-10 minutes. This way, they’ll regain their freshness, delivering that lovely flaky texture you adore.

Panera Glazed Orange Scones: Brighten Your Breakfast Routine
Ingredients
Equipment
Method
- Preheat your oven to 400°F (200°C) and line a baking sheet with parchment paper.
- In a large bowl, whisk together all-purpose flour, granulated sugar, baking powder, and fine salt.
- Add cold, cubed butter to the dry mixture and cut until it resembles coarse crumbs.
- In another bowl, whisk together heavy cream, orange juice concentrate, Grand Marnier, and fresh orange zest.
- Gently combine the wet and dry ingredients, stirring just until moistened.
- Knead the dough lightly on a floured surface and flatten it to about ¾-inch thick.
- Cut the dough into triangular shapes and transfer to the prepared baking sheet.
- Bake for 15-17 minutes until golden brown and a toothpick comes out clean.
- Allow scones to cool on a wire rack for about 10 minutes.
- Whisk together powdered sugar, additional heavy cream, and splash of orange juice to prepare the glaze.
- Drizzle the glaze over warm scones and let set before serving.
Leave a Reply