
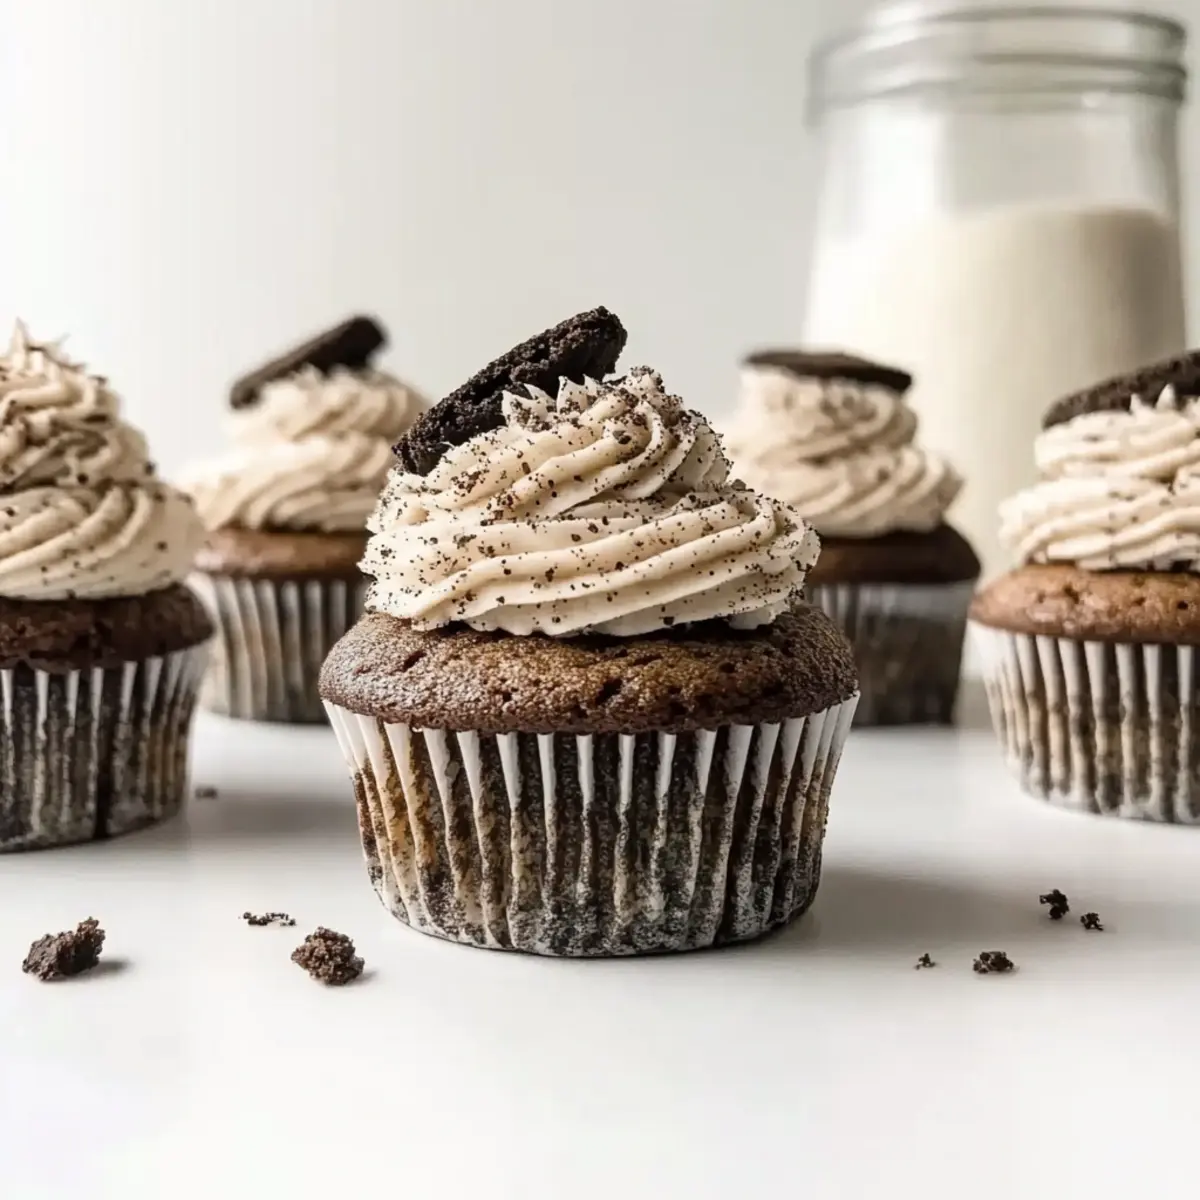
Is it just me, or is there something magical about the combination of cookies and cream? As I started experimenting in the kitchen, I felt a wave of nostalgia wash over me, reminding me of childhood treats. That’s how these Gluten-Free Cookies & Cream Cupcakes came to life—each bite capturing that iconic flavor without any gluten. They’re not just scrumptious; they’re quick to whip up, making them the ideal dessert for spontaneous gatherings or cozy family nights. Imagine rich chocolate cookie bases topped with a moist, fluffy vanilla cake, all crowned with a luscious cookies & cream frosting. Trust me, you won’t be able to resist! Ready to dive into this delightful recipe? Let’s bake some memories together!
Why are These Cupcakes So Irresistible?
Indulgent with a cookies & cream twist, these cupcakes bring a nostalgic flavor that delights everyone! Moist and fluffy, every bite is a luscious blend of textures, from the rich chocolate cookie base to the creamy frosting. Quick to make, they come together effortlessly, perfect for sharing at parties or enjoying on a cozy evening. Pair them with a glass of cold milk or a scoop of vanilla ice cream for the ultimate treat! If you’re craving more adventures in flavor, check out my Cannoli Cookies Bring or Pistachio Shortbread Cookies for delightful variations!
Cookies & Cream Cupcake Ingredients
For those ready to bake these delightful cupcakes, here’s what you need!
For the Cupcakes
• Butter (1 stick, softened) – Provides richness and moisture; feel free to use dairy-free butter for a lactose-free treat.
• Oil (3 tbsp, coconut or vegetable) – Adds moisture and lightness; coconut oil gives a subtle coconut flavor that pairs wonderfully!
• Granulated Sugar (1 cup) – Sweetens the cupcakes and helps with browning; consider a sugar substitute if you’re watching your sugar intake.
• Egg Whites (3) – Provide structure and stability; for a vegan option, try flax eggs or unsweetened applesauce.
• Sour Cream (1/3 cup) – Adds moisture and tanginess; swap for dairy-free sour cream or yogurt if needed.
• Milk (1/2 cup) – Hydrates the batter; any non-dairy milk works as a perfect substitute.
• Vanilla Extract (2 tsp) – Enhances flavor depth; opt for pure vanilla extract for the best results.
• Gluten-Free Flour (1 1/2 cups) – Acts as the main structure; ensure it’s a high-quality gluten-free blend for the fluffiest texture.
• Baking Powder (2 tsp) – Acts as a leavening agent; always double-check freshness for the best rise.
• Salt (1/2 tsp) – Balances sweetness and enhances overall flavor.
• Crushed Gluten-Free Chocolate Sandwich Cookies (6) – Adds flavor and texture to the batter, echoing that beloved cookies & cream taste!
For the Frosting
• Butter (2 sticks, softened) – Adds creaminess to the frosting; remember to let it soften for easy mixing.
• Cream Cheese (4 oz, softened) – Provides a tangy richness; vegan cream cheese can be a great alternative here!
• Powdered Sugar (4 cups) – Sweetens and thickens the frosting; adjust the quantity if you prefer a sweeter frosting.
• Vanilla Extract (1 tsp) – Enhances flavor; a little goes a long way!
• Heavy Cream or Milk (1 tbsp) – Adjusts the frosting’s consistency; non-dairy milk works perfectly if you need a vegan option.
• Crushed Chocolate Cookies (10) – Mixed in for extra texture and flavor, making the frosting irresistibly delicious!
For Assembly
• Additional Sandwich Cookies (21) – Placed at the bottom of each cupcake liner to create a scrumptious surprise waiting to be discovered!
Now that you have all the ingredients ready, let’s bring these cookies & cream cupcakes to life!
Step‑by‑Step Instructions for Cookies & Cream Cupcakes
Step 1: Preheat the Oven
Begin by preheating your oven to 350°F (175°C). This ensures that your oven is at the perfect temperature to create those deliciously moist cookies & cream cupcakes. While the oven warms, prepare your cupcake pan by lining it with paper liners, ready to cradle the delightful treats.
Step 2: Cream the Butter and Sugar
In a large mixing bowl, combine the softened butter, coconut or vegetable oil, and granulated sugar. Using an electric mixer, beat the mixture on medium-high speed for about 2-3 minutes, until it becomes light and fluffy. The key is to achieve a creamy texture that showcases the richness of your cupcakes.
Step 3: Incorporate the Egg Whites
Add the egg whites one at a time to the butter mixture, making sure to mix well after each addition. This step helps create a stable structure for your cupcakes as it binds the ingredients. Continue mixing until the mixture is smooth and homogenous, the texture should be silky and inviting.
Step 4: Mix in Dairy Ingredients
Pour in the sour cream, milk, and vanilla extract into your batter. Beat the mixture on low speed until everything is well combined. As the wet ingredients blend seamlessly with the creamed mixture, the batter should start to look a bit more cohesive. This adds moisture and flavor to your cookies & cream cupcakes.
Step 5: Combine Dry Ingredients
In a separate bowl, sift together the gluten-free flour, baking powder, and salt. Gradually add the dry mixture to the wet ingredients, beating on low speed until just combined. Be cautious not to overmix; a well-blended batter is crucial for a light and airy texture in your cupcakes.
Step 6: Fold in Crushed Cookies
Gently fold in the crushed gluten-free chocolate sandwich cookies by hand using a spatula. This adds that signature cookies and cream flavor to your batter. Aim to distribute the cookie bits evenly without over-mixing, as you want to maintain the lightness of the batter.
Step 7: Prepare the Cupcake Liners
Take your prepared cupcake pan and place one chocolate sandwich cookie at the bottom of each paper liner. This hidden treat at the base adds an extra layer of decadence to your cupcakes. Now you’re ready to fill those liners with your delicious batter!
Step 8: Fill the Cupcake Liners
Carefully fill each cupcake liner about three-quarters full with the batter. Make sure to evenly distribute the batter to ensure uniformity in baking. As the cupcakes rise, they will be beautifully rounded and inviting, so take your time to fill them just right.
Step 9: Bake the Cupcakes
Place the cupcake pan in the preheated oven and bake for approximately 22 minutes. Keep an eye on them, and they’re done when a toothpick inserted into the center comes out clean. The tops should look lightly golden and slightly spring back when gently pressed.
Step 10: Cool the Cupcakes
Once baked, remove the cupcakes from the oven and allow them to cool in the pan for about 8-10 minutes. This allows them to set slightly. Afterward, transfer them to a wire rack to cool completely. This step is essential for achieving the perfect texture for your cookies & cream cupcakes.
Step 11: Make the Frosting
In a mixing bowl, beat the softened butter and cream cheese together until creamy and well-combined. This will create a rich and durable base for your frosting. Make sure to give it 2-3 minutes of mixing for a delightful texture, ensuring that each cupcake will be generously topped.
Step 12: Add the Sugar and Flavor
Gradually add in the powdered sugar, half a cup at a time, mixing well after each addition until smooth. Then, pour in the vanilla extract and heavy cream. Blend until the frosting is light and fluffy; it should easily spread but hold its shape. Fold in the crushed chocolate cookies for that final touch!
Step 13: Frost the Cupcakes
Once the cookies & cream cupcakes have cooled completely, it’s time to frost them. Use a knife or a piping bag fitted with your favorite tip to generously add the frosting on top. Make each cupcake a visual delight, showcasing the creamy, cookie-studded magic awaiting each taste.
Make Ahead Options
These Gluten-Free Cookies & Cream Cupcakes are perfect for busy bakers looking to save time without sacrificing flavor! You can prepare the cupcake batter up to 24 hours in advance; simply mix it as directed, cover tightly with plastic wrap, and store it in the refrigerator. The crushed cookies can also be prepped ahead and stored in an airtight container for up to 3 days. When you’re ready to bake, just pour the batter into the lined cupcake pan over the cookie bases and pop them in the oven. For the frosting, you can make it ahead as well—store it in the refrigerator for up to 5 days; simply give it a good mix before using. This way, you’ll have delectable cupcakes ready with minimal effort on busy weeknights!
How to Store and Freeze Cookies & Cream Cupcakes
Fridge: Store the cupcakes in an airtight container in the refrigerator for up to 5 days. If the frosting gets a bit firm, allow it to sit at room temperature for a few minutes before serving.
Freezer: For longer storage, freeze the cupcakes without frosting in an airtight container for up to 3 months. Wrap them individually in plastic wrap to maintain freshness.
Frosting: If you have leftover frosting, store it in the fridge for up to 1 week. Rewhip it before use to restore creaminess—perfect for your cookies & cream cupcakes when a sweet craving strikes!
Reheating: To enjoy your frozen cupcakes, allow them to thaw in the fridge overnight, then bring to room temperature before serving for the best texture and flavor.
Expert Tips for Cookies & Cream Cupcakes
-
Room Temperature Ingredients: Allow butter and cream cheese to reach room temperature before mixing for a smoother, creamier frosting that spreads effortlessly.
-
Check Baking Powder Freshness: A common mistake is using stale baking powder, which can result in sinking cupcakes. Always check the expiration date for the best rise.
-
Even Filling Technique: For uniform cupcakes, fill each liner evenly but avoid overfilling. Aim for about three-quarters full so they have room to rise beautifully.
-
Adjust Frosting Thickness: If your frosting is too thin, gradually add more powdered sugar until you achieve your desired consistency, perfect for a nice swirl.
-
Piping Tricks: For a professional touch, practice piping techniques using a star tip to create lovely swirls of frosting on your cookies & cream cupcakes.
Cookies & Cream Cupcakes Variations
Feel free to play around with these ideas and make these cupcakes your very own delicious creation!
-
Nutty Twist: Swap gluten-free flour with almond flour for a nutty flavor that elevates the deliciousness. Chopped nuts can also add a delightful crunch to each bite.
-
Flavored Frosting: Use vanilla or chocolate frosting instead of cookies & cream for a different taste. Imagine the sweetness of vanilla or richness of chocolate playing with those chocolate cookies!
-
Chocolate Chip Surprise: Incorporate mini chocolate chips or other flavored sandwich cookies into the batter for added texture and flavor. It’ll make every bite a delightful surprise!
-
Vegan Delight: For a completely vegan version, replace egg whites with flax eggs and use non-dairy milk and yogurt. These cupcakes can cater to your entire crowd without missing out on flavor!
-
More Cookie Crunch: Add extra crushed cookies on top of the frosting for an added crunch. This transforms the decoration into a delightful and tasty theme.
-
Minty Freshness: Stir in some peppermint extract into the frosting for a refreshing twist. This combination complements the chocolate and adds a fun holiday flair!
-
Spicy Alternative: Mix in a dash of cinnamon or even cayenne pepper into the batter for a surprising warmth. It’s a twist that adds depth to the classic cookies & cream flavor!
-
Fruity Flavor: Top your cupcakes with fresh berries for a fruity flavor burst and a stunning presentation. Strawberries or blueberries paired with the cookies and cream is tantalizingly delicious!
If you love the cookie infusion, you might also enjoy crafting these delightful Twisted Christmas Cookies or savoring the creamy delight of my Lemon Blueberry Cream. Happy baking!
What to Serve with Deliciously Moist Gluten-Free Cookies & Cream Cupcakes
Pair these delightful cupcakes with scrumptious sides and drinks to create an unforgettable dessert experience!
- Cold Milk: A classic pairing that enhances the rich flavors of the cupcakes, perfect for a nostalgic treat.
- Vanilla Ice Cream: Scoop a dollop of creamy vanilla ice cream alongside your cupcakes; its coolness complements the warm, moist texture of the cake.
- Fresh Berries: Add a refreshing touch with plump berries; their tartness balances the sweetness and adds vibrant color to the plate.
- Coffee or Espresso: The bold flavors of coffee perfectly contrast the sugary elements, creating a sophisticated dessert experience.
- Chocolate Sauce: Drizzle warm chocolate sauce over the cupcakes for an extra dose of indulgence that brings out the cookies & cream flavor.
- Whipped Cream: Pillowy whipped cream adds lightness and complements the frosting’s richness, creating a luscious, well-rounded dessert.
- Chocolate Milkshake: Treat yourself to a frosty chocolate milkshake for a delightful pairing, reminiscent of an ice cream parlor treat!
- Coconut Whipped Cream: For a twist, top your cupcakes with coconut whipped cream for a tropical flair, enhancing the sweetness with a hint of coconut.
- Sparkling Water: A refreshing alternative beverage, sparkling water cleanses the palate and prepares you for each delightful bite.
- Brownie Bites: Keep the chocolate theme going by serving brownie bites on the side—rich, fudgy goodness is the perfect addition to these cupcakes!
Gluten-Free Cookies & Cream Cupcakes Recipe FAQs
What type of gluten-free flour should I use?
Absolutely! For the best results, I recommend using a high-quality gluten-free flour blend that includes xanthan gum or guar gum to help achieve a fluffy texture. Avoid single flours like almond or coconut for the main mix, as they won’t provide the structure you need.
How should I store leftover cupcakes?
You can keep these deliciously moist gluten-free cookies & cream cupcakes in an airtight container in the refrigerator for up to 5 days. If the frosting becomes a bit firm, just let it sit at room temperature for a few minutes before diving in—it’s still just as delightful!
Can I freeze the cupcakes?
Yes! Freeze the cupcakes without frosting for easy storage. Wrap each cupcake individually in plastic wrap and place them in an airtight container. They can last up to 3 months in the freezer. When you’re ready to enjoy, simply thaw them in the fridge overnight and let them come to room temperature.
What if my cupcakes sink after baking?
Very often, sinking can happen due to stale baking powder or overmixing the batter. Make sure to check the freshness of your baking powder. Additionally, mix the batter just until combined after adding the dry ingredients to keep the cupcakes light and airy.
Is there a way to make these cupcakes dairy-free?
Absolutely! Simple swaps, like using dairy-free butter, coconut oil, and non-dairy milk, help create a delicious dairy-free version of these cookies & cream cupcakes. Additionally, substituting cream cheese with vegan cream cheese will help keep the frosting amazing without dairy. Enjoy your baking adventure!
Can pets have these cupcakes?
It’s best to keep these cupcakes away from pets. Ingredients like chocolate sandwich cookies and buttercream frosting can be harmful to animals. It’s always wise to check for pet-safe treats if you want to share some homemade love with your furry friends!
Irresistibly Moist Cookies & Cream Cupcakes You’ll Love
Ingredients
Equipment
Method
- Preheat your oven to 350°F (175°C) and prepare your cupcake pan with paper liners.
- In a large mixing bowl, cream the softened butter, coconut or vegetable oil, and granulated sugar together until light and fluffy.
- Add the egg whites one at a time, mixing well after each addition until smooth and homogenous.
- Mix in the sour cream, milk, and vanilla extract until well combined.
- Sift together the gluten-free flour, baking powder, and salt, then gradually add to the wet ingredients until just combined.
- Fold in the crushed gluten-free chocolate sandwich cookies gently to distribute without over-mixing.
- Place one chocolate sandwich cookie at the bottom of each cupcake liner.
- Fill each cupcake liner about three-quarters full with the batter.
- Bake for approximately 22 minutes or until a toothpick inserted comes out clean.
- Cool the cupcakes in the pan for 10 minutes before transferring them to a wire rack to cool completely.
- Beat the softened butter and cream cheese together until creamy and well-combined.
- Gradually mix in the powdered sugar, followed by the vanilla extract and heavy cream until light and fluffy.
- Frost the cooled cupcakes generously with the frosting, using a knife or piping bag to create swirls.
Leave a Reply