
As I stood in my kitchen, the sweet scent of coconut mingled with the earthy notes of mochiko flour, I was reminded of my first attempt at creating my own Japanese mochi. This Chewy and Delightful Rice Cake is not just a treat; it’s a celebration in each bite! What makes this the best mochi recipe is its incredible versatility—perfectly gluten-free, kid-friendly, and vegan, it caters to a range of dietary needs, allowing everyone to indulge. With just a few simple ingredients, you can whip up this delicious Japanese confection in no time, making it an economical alternative to store-bought versions that can put a dent in your wallet. Plus, it opens the door to endless flavor combinations from matcha to ube, ensuring there’s something for everyone. Ready to learn how to create this delightful dessert in your own home? Let’s dive in!
Why is Homemade Mochi So Special?
Delightfully Versatile: This recipe allows you to customize flavors, whether you prefer matcha, ube, or even chocolate. Effortless to Create: With just a handful of simple ingredients, you can whip up this delightful treat in no time. Gluten-Free & Vegan: Perfect for accommodating various dietary preferences, mochi is a crowd-pleaser for everyone. Kid-Friendly Fun: Involve the little ones in the cooking process for a fun family activity! Economical: Save money by making mochi at home rather than splurging on store-bought options. Once you’ve mastered this recipe, don’t forget to check out other delightful treats like Brie Cranberry Bites for your next gathering!
The Best Mochi Recipe Ingredients
Here are the essential ingredients you will need to make the best mochi recipe that is both delightful and versatile!
For the Mochi Batter
- Mochiko Flour – This sweet glutinous rice flour is crucial for that signature chewy texture; do not substitute with regular rice flour.
- Granulated Sugar – Provides the perfect amount of sweetness; consider using sugar substitutes like erythritol for a healthier option.
- Baking Powder – Just 1 teaspoon of baking powder gives the mochi its leavening, ensuring a soft structure.
- Water – Essential for hydrating the mixture and forming a smooth dough.
- Coconut Milk – Adds creaminess and rich flavor; regular milk can work but may alter the taste.
- Vanilla Extract – Enhances the overall flavor; feel free to swap it with other flavor extracts to personalize your mochi.
- Food Coloring – Optional for aesthetics; adjust the amount based on how vibrant you want the final product to be.
For Dusting
- Potato Starch – Prevents the mochi from sticking together; cornstarch can be substituted if needed.
With these simple ingredients, you can embark on making your very own delicious mochi right at home!
Step‑by‑Step Instructions for The Best Mochi Recipe
Step 1: Preheat Your Oven
Begin by preheating your oven to 350°F (175°C) to ensure it’s hot and ready for the mochi. This step is crucial for achieving the perfect texture. As the oven warms up, arrange your baking tools; you’ll need a medium bowl for mixing dry ingredients and a large bowl for wet ingredients.
Step 2: Mix the Dry Ingredients
In your medium bowl, combine the mochiko flour, granulated sugar, and baking powder. Whisk these dry ingredients together until well blended—this should take about 1-2 minutes. A uniform mixture will help your mochi rise properly and achieve that desired chewy texture.
Step 3: Combine Wet Ingredients
In a separate large bowl, mix the water, coconut milk, vanilla extract, and, if using, a few drops of food coloring. Stir these ingredients gently until well combined, ensuring the mixture is smooth and consistent in color. This creamy blend will be the foundation for your delightful mochi.
Step 4: Combine Dry and Wet Mixtures
Gradually pour the dry ingredients into the bowl with the wet mixture, stirring continuously to avoid lumps. Aim for a smooth batter that is slightly thick yet pourable; this should take about 3-5 minutes. Consistency is key for achieving the lovely texture that defines The Best Mochi Recipe.
Step 5: Prepare the Baking Pan
Lightly spray a 9×13 baking pan with non-stick spray to prevent the mochi from sticking. Once greased, pour your batter into the pan, spreading it evenly with a spatula. Cover the pan tightly with aluminum foil to trap moisture, which will help the mochi cook evenly.
Step 6: Bake the Mochi
Place the covered baking pan in the preheated oven and bake for approximately 60 minutes. Keep an eye on the edges; they should start to pull away from the sides of the pan as it bakes. The top will become slightly firm but should retain some softness when done.
Step 7: Cool the Mochi
Once baked, carefully remove the pan from the oven and let it cool completely at room temperature—this should take around 30 minutes. Don’t rush this step, as letting the mochi cool will help it develop the right texture without becoming too dense or sticky.
Step 8: Dust and Cut the Mochi
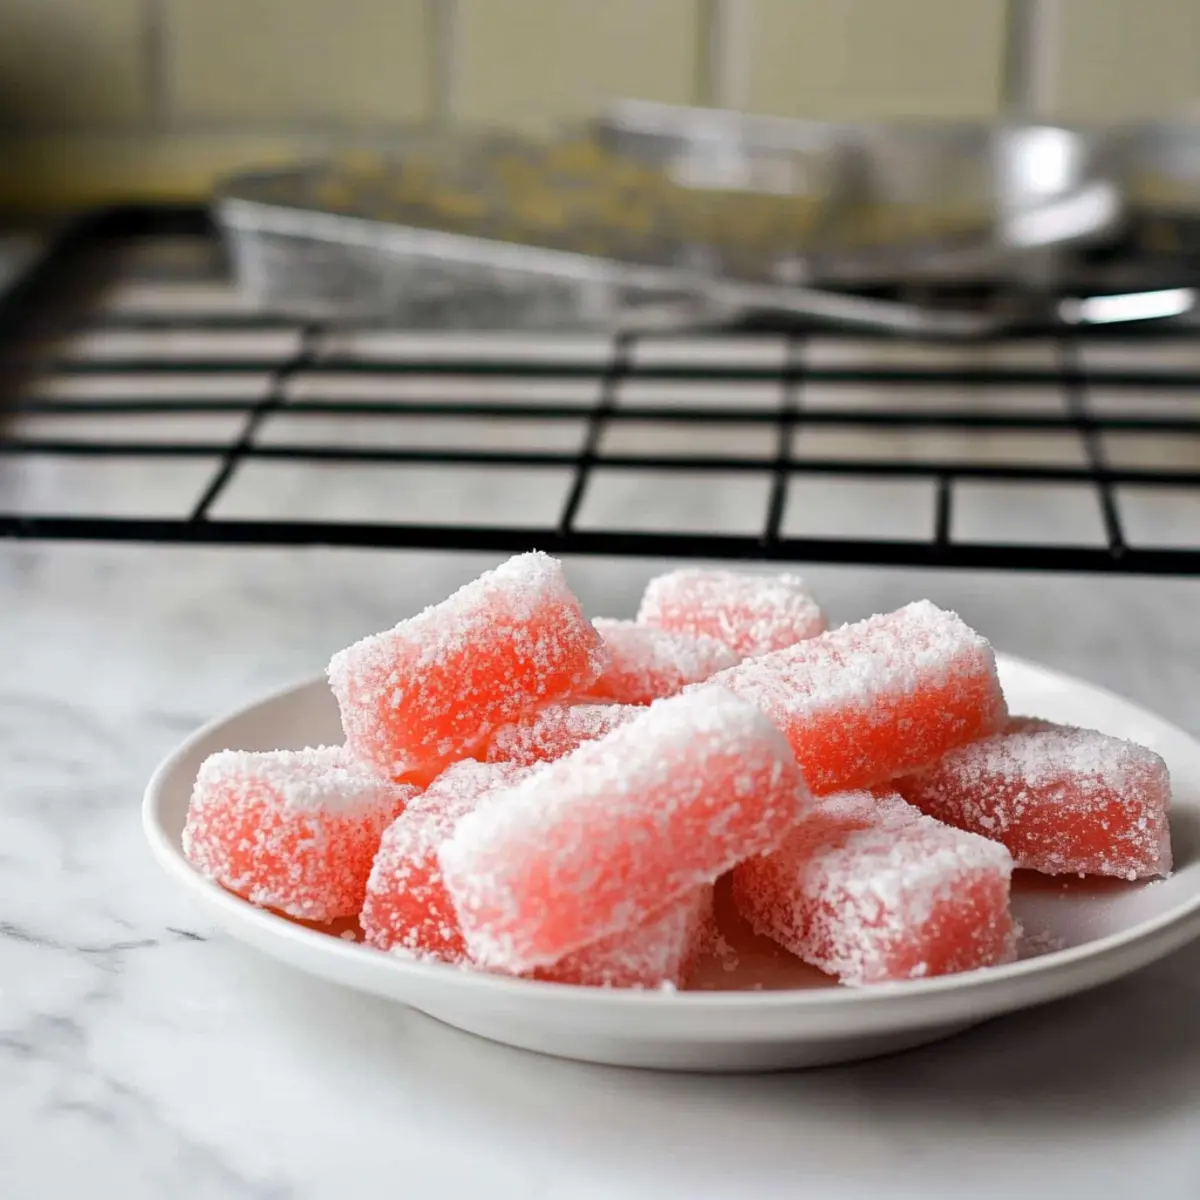
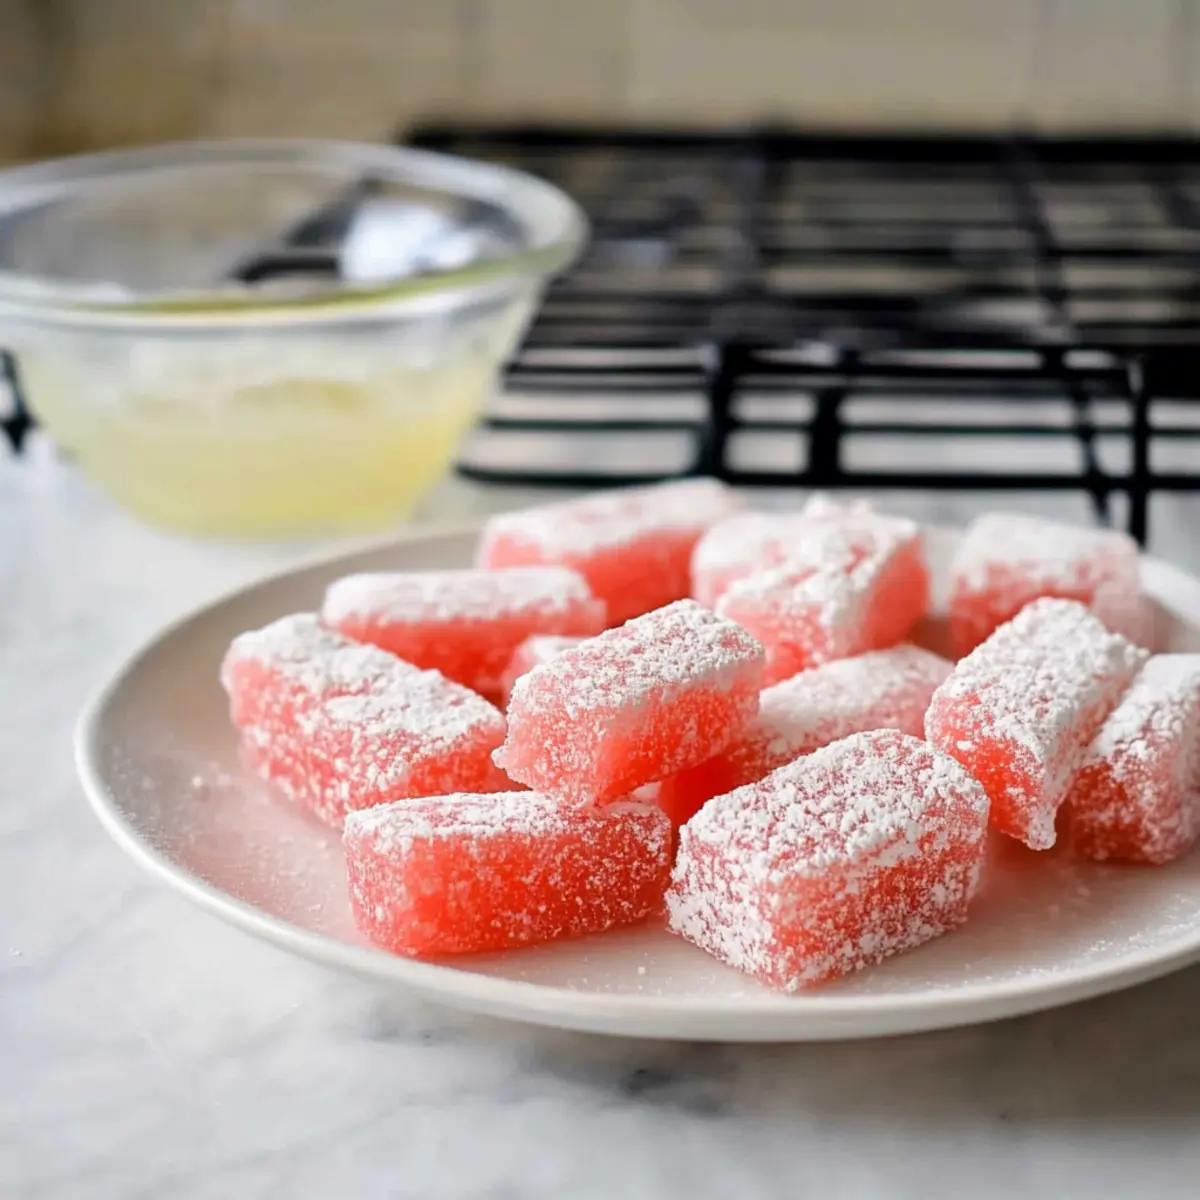
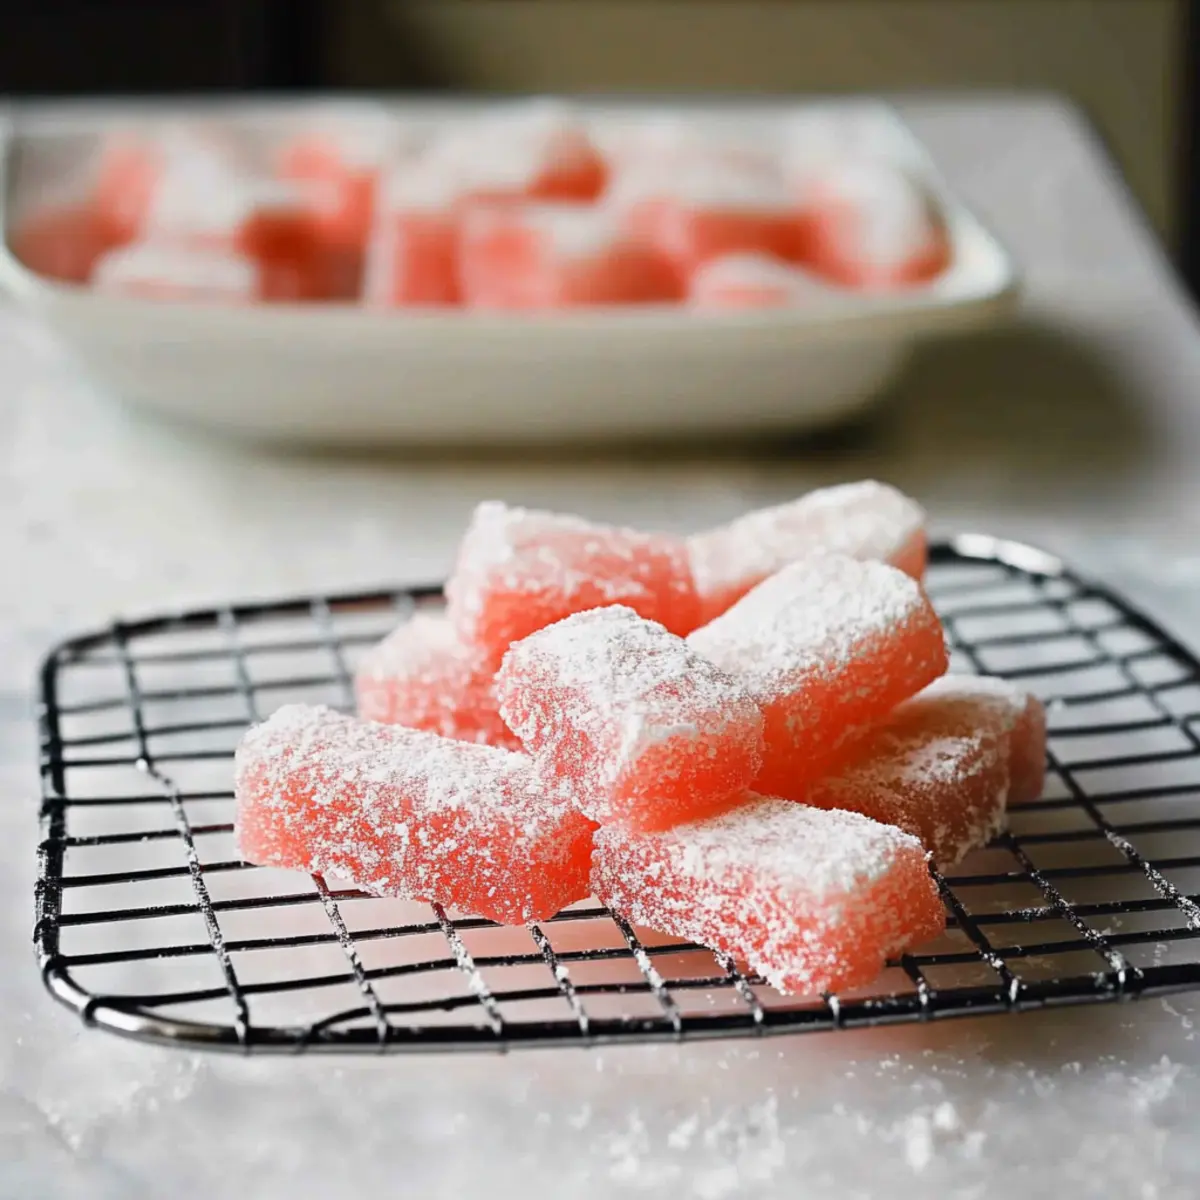
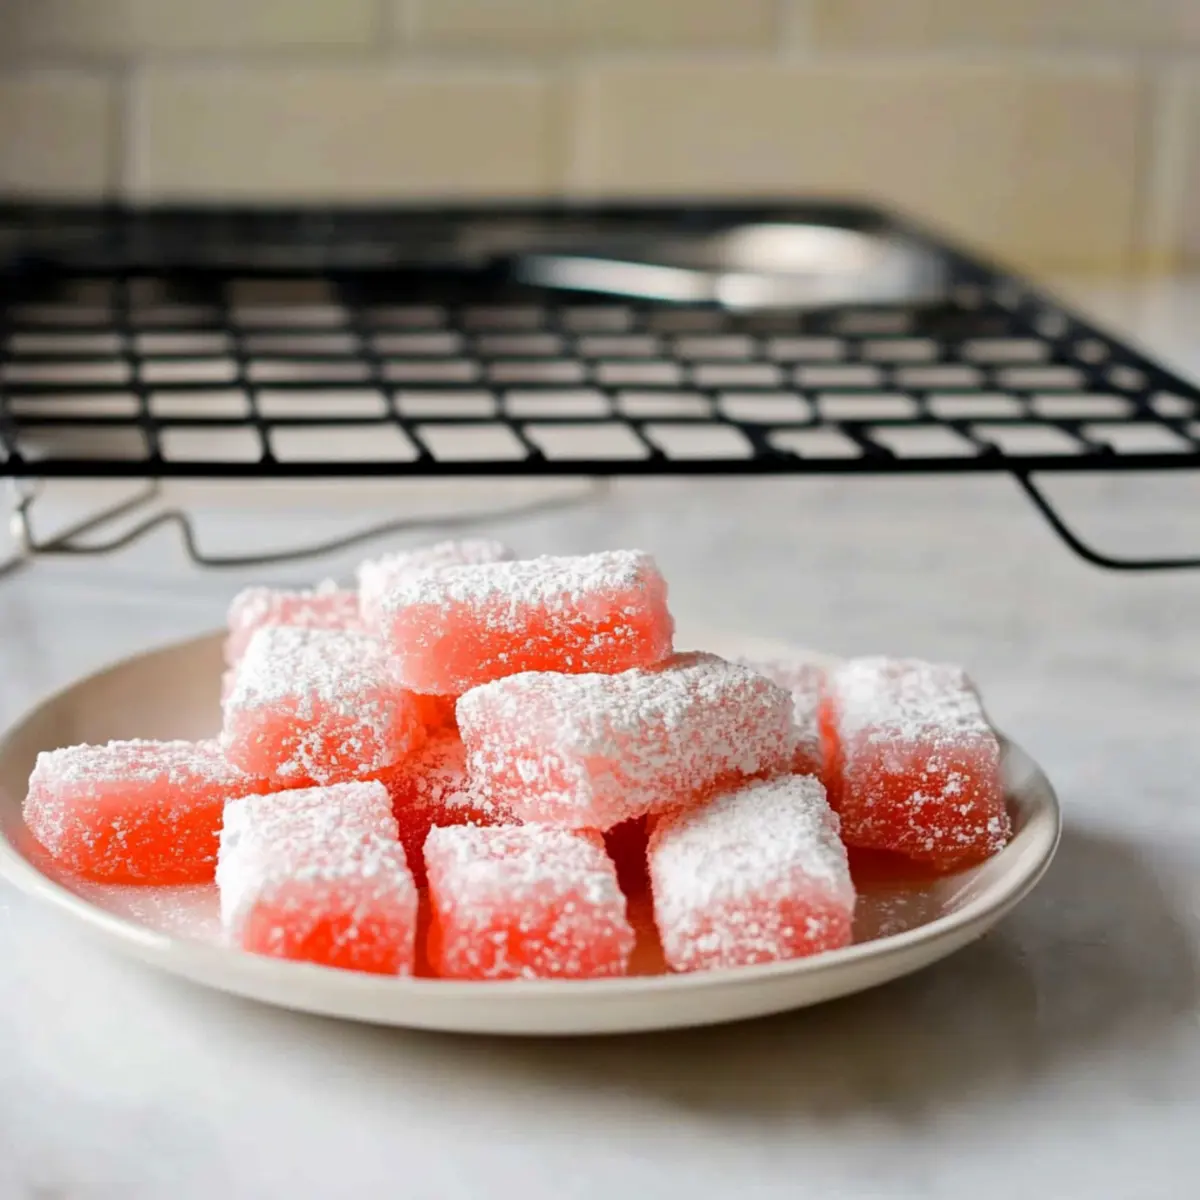
On a clean work surface, dust a generous layer of potato starch to prevent sticking. Gently release the mochi from the pan, turning it upside down if needed. Cut the soft mochi into bite-sized rectangles, dusting each piece with more potato starch to keep them from clumping together.
Step 9: Store or Serve the Mochi
Now that you’ve made the delightful Japanese mochi, serve them immediately or store in an airtight container at room temperature for 2-3 days. Be sure to keep the mochi dusted with potato starch to preserve their soft and chewy texture. Enjoy your homemade treat!
The Best Mochi Recipe Variations
Feel free to explore different flavors and textures to make this recipe truly your own!
- Matcha Mochi: Add 1-2 tablespoons of matcha powder for a delightful green tea flavor that’s both earthy and sweet.
- Fruit Extracts: Incorporate chocolate, strawberry, or raspberry extracts to infuse exciting fruity notes into your mochi batter.
- Nutty Twist: Stir in a handful of finely chopped nuts like almonds or walnuts for added crunch and protein.
- Filled Mochi: Experiment with fillings by adding sweetened red bean paste or chocolate chips inside each mochi for a surprise bite.
- Coconut Delight: Swap out half the water for coconut water to enhance the tropical flavor, making every bite feel like a vacation!
- Spiced Mochi: Blend in a pinch of ground cinnamon or nutmeg for a warm, inviting flavor that pairs beautifully with tea.
- Varied Colors: Use natural food coloring like beet juice for a vibrant pink hue or turmeric for a sunny yellow twist on appearance.
- Sugar-Free Option: Use sugar substitutes like erythritol or stevia to make a healthier version without sacrificing sweetness.
Once you’ve enjoyed crafting your mochi, don’t forget to check out other delightful recipes like Disneylands Hot Chocolate or the festive Christmas Tree Meringues for more culinary adventures!
Make Ahead Options
These delightful Japanese mochi are perfect for meal prep enthusiasts! You can prepare the mochi batter up to 24 hours in advance and store it in an airtight container in the refrigerator. Simply combine the dry ingredients and the wet ingredients, then refrigerate them separately until you’re ready to bake. When you’re ready to enjoy your mochi, just mix the batters together and proceed with baking. To maintain quality, make sure to dust the cut pieces with plenty of potato starch to prevent sticking. Each bite will be just as chewy and delicious, allowing you to savor this treat any day of the week, even during your busiest nights!
Expert Tips for The Best Mochi Recipe
-
Use Correct Flour: Always use mochiko flour instead of regular rice flour; this is essential for achieving the characteristic chewy texture of mochi.
-
Check Consistency: Aim for a thick yet pourable batter. A lumpy batter can lead to uneven cooking, affecting the final result of your mochi.
-
Don’t Skip the Starch: Dusting each mochi piece with potato starch is crucial; it prevents stickiness and preserves the lovely soft texture after slicing.
-
Cool Completely: Allow the mochi to cool completely before slicing. Cutting too early can result in a dense and gummy texture that’s less enjoyable.
-
Experiment with Flavors: Once you’ve mastered the basic recipe, feel free to incorporate flavors like matcha or fruit extracts to customize your mochi adventures!
What to Serve with Japanese Mochi: Chewy and Delightful Rice Cake
Creating the perfect dining experience means pairing this delightful Japanese confection with just the right accompaniments.
-
Fresh Fruit Salad: A vibrant mix of seasonal fruits adds a refreshing contrast to the chewy texture of mochi. Think strawberries, mangoes, and kiwis for a colorful twist.
-
Matcha Tea: The earthy flavor of matcha tea enhances the sweet notes of mochi, providing a soothing accompaniment that’s both traditional and delightful.
-
Coconut Sorbet: This light and creamy dessert mirrors the coconut milk used in the mochi, making for a harmonious flavor experience that refreshes the palate.
-
Sweetened Red Bean Paste: Traditional and beloved, this sweet filling pairs beautifully with mochi, encapsulating the essence of Japanese desserts in every bite.
-
Chocolate Sauce Drizzle: For a fun twist, drizzle some chocolate sauce over your mochi—its richness complements the subtly sweet rice cake perfectly.
-
Mochi Ice Cream: Elevate your mochi moment by serving it with mochi ice cream, providing a fun dual-layer of chewy texture and creamy indulgence.
-
Almond Milk: A generous glass of unsweetened almond milk offers a light and nutty flavor, balancing the sweetness of the mochi seamlessly.
-
Green Tea Ice Cream: The vibrant green tea flavor ties in beautifully with the mochi while offering a cooling and slightly bitter contrast that enhances the overall dessert experience.
Indulging in these pairings will surely transform your homemade Japanese mochi into an unforgettable meal that delights the senses!
Storage Tips for The Best Mochi Recipe
Room Temperature: Keep mochi in an airtight container at room temperature for up to 2-3 days. Avoid refrigeration as it can make the mochi tough.
Freezer: For longer storage, freeze mochi pieces in an airtight container for up to 2 months. Ensure to separate layers with parchment paper to prevent sticking.
Thawing: To thaw frozen mochi, let it sit at room temperature for about 30 minutes before enjoying. Reheat briefly in the microwave if you prefer a warm treat.
Reheating: If desired, reheat mochi in the microwave for 10-15 seconds for a softer texture, just be careful not to overheat to maintain the best flavor experience!
The Best Mochi Recipe FAQs
What type of flour should I use for mochi?
Absolutely! For the best results, use mochiko flour, which is a sweet glutinous rice flour specifically made for mochi. Do not substitute with regular rice flour, as it won’t provide the signature chewy texture that defines this Japanese treat.
How should I store my homemade mochi?
Mochi is best kept in an airtight container at room temperature for up to 2-3 days. I often place a piece of parchment paper between layers if I stack them to keep them from sticking together. Avoid refrigerating, as it can make the mochi tough and less enjoyable.
Can I freeze mochi, and if so, how?
Yes, you can freeze mochi! To do this, let the cut pieces cool completely, then place them in an airtight container separated by parchment paper. This will prevent them from sticking together. Frozen mochi can last for up to 2 months; just remember to thaw it at room temperature for about 30 minutes before enjoying or reheat briefly in the microwave.
Why is my mochi tough or gummy?
Tough or gummy mochi can happen due to improper mixing or if it hasn’t cooled completely before cutting. To avoid this, ensure your batter is well combined—smooth and thick but pourable. Also, let it cool for at least 30 minutes, as slicing too early can lead to density issues.
Can I use alternative sweeteners in this recipe?
Very! If you’re looking for a healthier option, you can use sugar substitutes like erythritol. Just keep in mind that the sweetness level may vary, so adjust the amount according to your taste preference. Enjoy experimenting with flavors while keeping the integrity of mochi intact!
Is mochi safe for kids or those with allergies?
Absolutely! This mochi recipe is gluten-free and vegan, making it suitable for a variety of dietary restrictions. However, always check the ingredient labels for possible allergens, especially if you are using substitutes or additional flavors. Enjoy making this delightful treat with your family!
The Best Mochi Recipe: Soft, Chewy, and Homemade Delight
Ingredients
Equipment
Method
- Preheat your oven to 350°F (175°C).
- In a medium bowl, mix the mochiko flour, sugar, and baking powder.
- In a large bowl, combine the water, coconut milk, vanilla extract, and food coloring.
- Gradually add the dry ingredients to the wet mixture, stirring continuously.
- Lightly spray a 9x13 baking pan with non-stick spray and pour the batter in.
- Cover with aluminum foil and bake for approximately 60 minutes.
- Let the mochi cool at room temperature for about 30 minutes.
- Dust a work surface with potato starch and release the mochi from the pan.
- Cut the mochi into bite-sized rectangles and dust each piece with potato starch.
- Serve immediately or store in an airtight container at room temperature.
Leave a Reply