
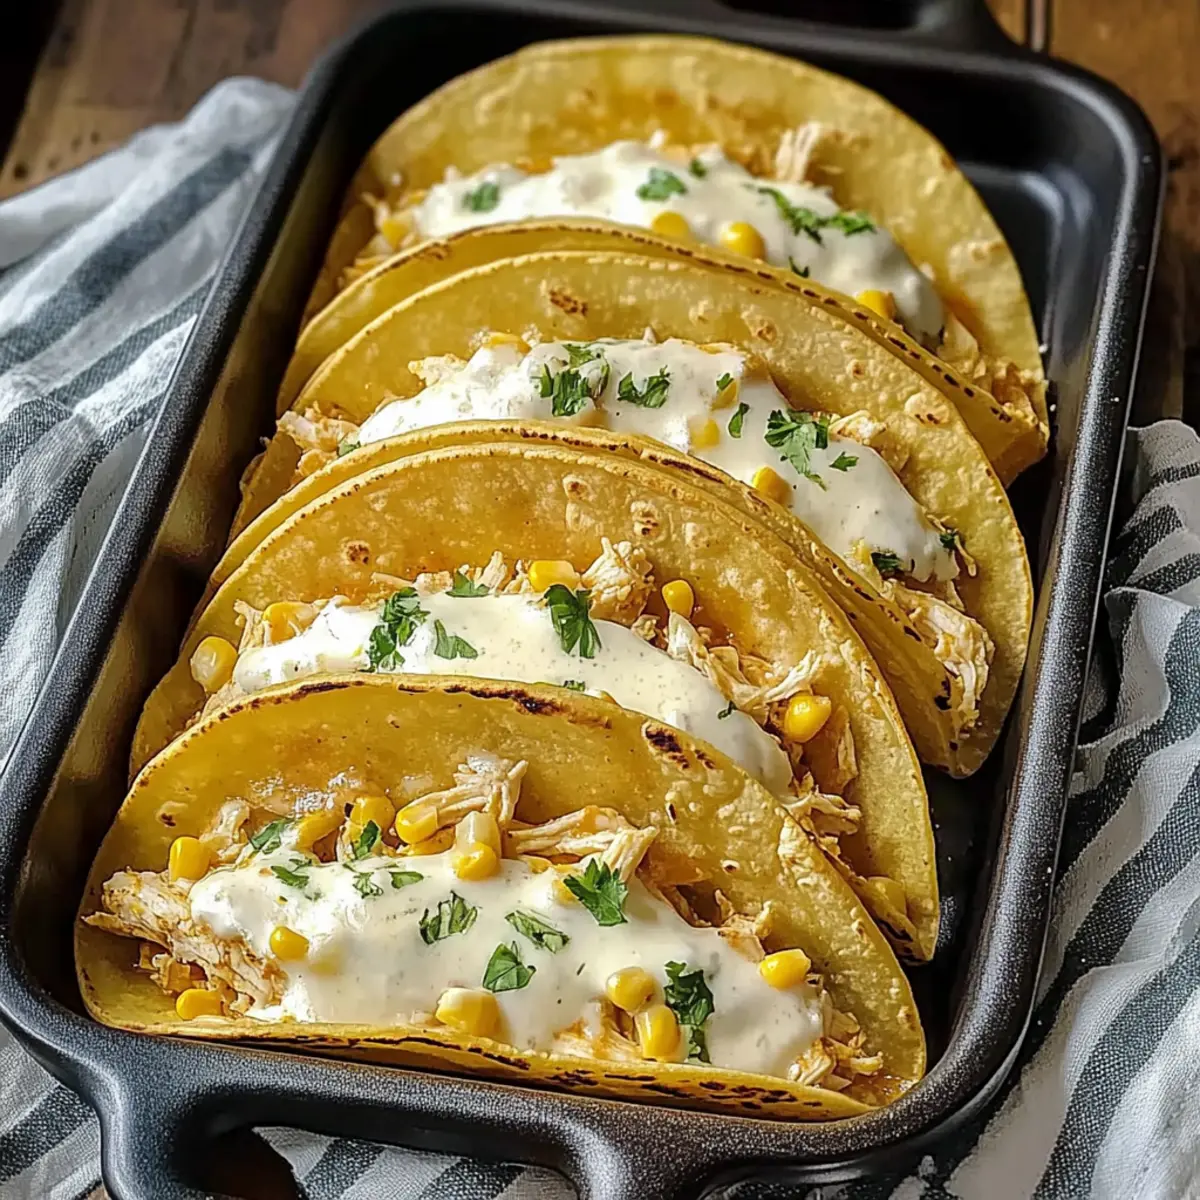
As I watched my family gather around the kitchen table, I could feel the excitement building for dinner—a tantalizing smell wafting through the air. Introducing White Chicken Chili Tacos, a dish that effortlessly marries creamy comfort with a spicy kick, making it the ultimate weeknight dinner. These tacos are not only packed with tender shredded chicken, sweet corn, and zesty green chilis; they’re also crafted for quick prep, allowing you to whip them up in no time using rotisserie chicken and pantry staples. Plus, they’re perfect for the whole family to enjoy—just the kind of comfort food we crave after a busy day! Whether you’re looking for a fun twist on taco night or a satisfying meal that can cater to gluten-free diets with the right tortillas, these tacos promise a deliciously cozy experience. Ready to discover how easy it is to make a family favorite? Let’s dive in!
Why love White Chicken Chili Tacos?
Comforting, Creamy Flavor: These tacos combine a rich, creamy filling with the heartiness of shredded chicken and sweet corn.
Quick Prep Time: Ready in under 30 minutes, perfect for busy weeknights!
Family-Friendly: Everyone will love customizing their tacos, making dinner a fun family affair.
Versatile Filling Options: Feel free to swap in different proteins or add beans for extra nutrition!
Easily Made Gluten-Free: Just choose the right tortillas, and you’re set!
Pair these with refreshing sides like cilantro lime rice or guacamole to elevate the meal. These tacos are truly a cozy staple!
White Chicken Chili Taco Ingredients
• Make your meal prep a breeze with these essentials!
For the Creamy Filling
- Sour Cream – Provides creaminess and balances flavors; use room temperature for smooth blending.
- Canned Green Chilis – Adds spice and flavor depth; substitute with fresh or roasted chilis for more heat.
- Ground Cumin – Offers earthy flavor; freshly ground is preferred for maximum taste.
- All-Purpose Flour – Thickens the sauce to achieve a creamy texture; essential for the perfect consistency.
- Chili Powder – Enhances the sauce’s complexity; adjust according to preferred heat level.
- Skim Milk – Adds creaminess without excess fat; whole milk can be used for a richer flavor.
- Chicken Broth – Infuses flavor into the sauce; can be swapped for vegetable broth for a vegetarian option.
- Unsalted Butter – Adds richness to the sauce; use olive oil for a dairy-free alternative.
- Green Onions – Adds freshness and texture; substitute with chives for a milder onion flavor.
- Shredded Chicken – Main protein source; use rotisserie chicken for convenience or poach your own for freshness.
- Frozen Corn – Provides sweetness and texture; canned corn can be used as an alternative.
For the Tacos
- Corn Tortillas – Holds the taco together; warming prevents tearing, and consider gluten-free options if needed.
- Shredded Mozzarella Cheese – Melts beautifully for a delicious topping; can substitute with pepper jack for an extra kick.
Enjoy these delectable White Chicken Chili Tacos with your preferred toppings for a truly delightful meal!
Step‑by‑Step Instructions for White Chicken Chili Tacos
Step 1: Preheat and Prepare
Start by preheating your oven to 400°F (200°C). While the oven heats, gather and measure all ingredients carefully. Finely chop the canned green chilis and slice the green onions to enhance the flavor of the white chicken chili tacos. Lay everything out for a smooth cooking experience, as each step will build on the last.
Step 2: Create the Roux
In a medium saucepan, melt 2 tablespoons of unsalted butter over medium heat. Once melted, whisk in 2 tablespoons of all-purpose flour to create a light roux, cooking for about 1 minute until lightly golden. This step is crucial for thickening the sauce, preventing any raw flour taste in your creamy filling.
Step 3: Whisk in Liquids
Gradually pour in 1 cup of skim milk and 1 cup of chicken broth, whisking continuously to avoid lumps. Continue to cook on medium heat until the mixture is smooth and begins to thicken, about 3-5 minutes. When ready, it should coat the back of a spoon, forming a luscious base for your white chicken chili tacos.
Step 4: Incorporate Flavorings
Add 1 cup of sour cream, 1 teaspoon ground cumin, the chopped green chilis, 1 teaspoon chili powder, and a pinch of salt and pepper to the thickened sauce. Whisk everything together until fully combined and simmer for another 3-5 minutes. This step infuses your sauce with wonderful flavors that will meld perfectly with the chicken and corn.
Step 5: Mix the Filling
In a large bowl, combine 2 cups of shredded rotisserie chicken, 1 cup of frozen corn, and the sliced green onions. Pour the warm, creamy sauce over the chicken mixture and stir gently until everything is evenly coated. This filling is the star of your white chicken chili tacos, offering bursts of flavor and texture in each bite.
Step 6: Prepare the Tortillas
In a skillet over medium heat, warm the corn tortillas until they’re pliable, about 10-20 seconds on each side. This ensures they won’t tear when filled. Lay them on a clean surface, and prepare to assemble your delicious white chicken chili tacos as you fill them with the savory chicken mixture.
Step 7: Assemble and Bake
Spoon about 3 tablespoons of the filling onto each tortilla, top with shredded mozzarella cheese, and fold them in half. Place the tacos seam-side up on a baking sheet lined with parchment paper. Bake in the preheated oven for 12-15 minutes, or until the cheese is melted and the edges of the tacos turn golden brown, providing that perfect crunchy texture.
Step 8: Serve and Enjoy
Once baked, allow the white chicken chili tacos to cool slightly before serving. They pair wonderfully with toppings like salsa or fresh jalapeños. Prepare to enjoy a delightful meal packed with creamy flavors and comforting textures that will keep your family coming back for more!

Variations & Substitutions for White Chicken Chili Tacos
Feel free to get creative and tailor these tacos to your taste, making them even more delicious!
-
Poached Chicken: Swap out rotisserie chicken for poached breasts or thighs for a fresher flavor. This option allows for a lighter meal that can be customized with different seasonings.
-
Spicy Cheese: Use pepper jack cheese instead of mozzarella for an added kick. The heat complements the creamy filling and brings another layer of flavor.
-
Extra Veggies: Include black beans or diced bell peppers in the filling for extra nutrition and texture. These additions not only enhance the meal but also add color and flavor.
-
Herbal Notes: Incorporate fresh cilantro or lime juice into the filling for a zesty twist. This lightens up the dish, bringing a fresh, vibrant flavor that pairs beautifully with chicken.
-
Chili Heat: Add cayenne pepper or fresh jalapeños to elevate the spice level. Don’t be shy—this versatility allows you to tailor the heat to your family’s preferences.
-
Gluten-Free: Choose gluten-free tortillas to accommodate dietary needs. This way, everyone can enjoy the same delicious tacos without missing out.
-
Creamy Variation: For a richer filling, mix in cream cheese along with the sour cream. This adds an extra layer of creaminess and delightful richness.
-
Flavor Experiment: Try different spices like smoked paprika or taco seasoning, giving your tacos a unique flair. Adjust to your taste, and don’t hesitate to explore new flavors.
These variations will keep your taco nights fresh and exciting, and if you’re looking for more inspiration, try serving your tacos alongside a side of cilantro lime rice or refreshing guacamole. Enjoy exploring every delicious twist!
Make Ahead Options
These White Chicken Chili Tacos are perfect for busy home cooks looking to save time! You can prepare the creamy filling up to 3 days in advance by mixing the shredded chicken, corn, and sauce, then refrigerating it in an airtight container. To maintain freshness and flavor, keep the tortillas separate and warm them just before serving. When you’re ready to enjoy your meal, simply fill the tortillas with the prepped filling, sprinkle on the cheese, and bake them for about 12-15 minutes at 400°F until golden and bubbly. This makes it incredibly easy to enjoy a delicious family dinner with minimal effort on hectic weeknights!
How to Store and Freeze White Chicken Chili Tacos
Fridge: Store any leftover filling in an airtight container for up to 4 days. Keep the tortillas separate to maintain their texture.
Freezer: Freeze the filling in freezer bags for up to 3 months. For best results, thaw in the fridge overnight before reheating.
Reheating: Reheat the filling in a skillet over medium heat until warmed through, then warm the tortillas before assembling for optimal freshness.
Avoid Overfilling: When reheating or filling your tacos, use 2-3 tablespoons of filling per tortilla to prevent spillage and ensure easy folding.
What to Serve with Quick and Creamy White Chicken Chili Tacos
Enhance your taco night with these delightful pairings that bring extra joy to your dining experience.
- Cilantro Lime Rice: This fragrant rice offers a zesty contrast that perfectly balances the creamy filling of the tacos.
- Guacamole: The rich, creamy texture and avocado flavor complement the spices in the tacos, adding a fresh, cool element to every bite.
- Pico de Gallo: A burst of freshness! The tangy tomatoes, onions, and cilantro lighten the dish and provide a vibrant counterpoint to the creamy tacos.
- Black Beans: Rich in protein and fiber, these beans add a hearty texture and earthy flavor that rounds out the meal nicely. Adding herbs or spices can elevate this option even further!
- Corn Salad: Sweet corn, red onion, and lime create a bright and crunchy side that mirrors the sweet corn inside the tacos, making every bite delightful.
- Mexican Street Corn (Elote): Creamy, spicy, and sweet, this iconic dish can amplify the flavors of your tacos while adding a fun twist that everyone will love.
- Chilled Horchata: The sweet and creamy rice drink is a refreshing beverage that pairs perfectly with the spiciness of the tacos!
- Tropical Fruit Salad: Fresh fruits like mangoes and pineapples provide a juicy and refreshing contrast to the savory tacos, bringing a lovely sweetness to your meal!
- Spicy Pickled Jalapeños: If you’re a fan of heat, these will add fiery flavor with each taco bite, elevating your meal to new levels of deliciousness.
Expert Tips for Making White Chicken Chili Tacos
-
Perfectly Cooked Roux: Ensure you cook the roux for a full minute to avoid any raw flour taste in your tacos. The longer cooking time deepens the flavor!
-
Gradual Liquid Addition: Always add liquids slowly while whisking constantly. This technique helps prevent lumps, resulting in a smooth, creamy sauce for your white chicken chili tacos.
-
Warm Tortillas: Never skip warming your corn tortillas! This simple step keeps them pliable, making it easier to fold without tearing.
-
Filling Proportions: Ideally, use 2-3 tablespoons of filling per tortilla. This ensures easy folding with less risk of spillage, guaranteeing a delightful meal for everyone!
-
Experiment with Spices: Feel free to adjust the heat level by increasing the chili powder or adding fresh jalapeños. A dash of cayenne can bring delightful warmth to your white chicken chili tacos!
-
Make-Ahead Tips: Prepare the filling in advance and refrigerate for up to 4 days. This makes for a quick weeknight dinner when time is tight!
White Chicken Chili Tacos Recipe FAQs
How do I choose the best canned green chilis?
When selecting canned green chilis, look for brands with minimal additives; opt for those labeled “mild” or “hot” based on your preference. Ideally, pick chilis with a clean label—ingredients should only list chilis and perhaps salt. If possible, check for vibrant color and a well-sealed can which indicates freshness.
How should I store leftover white chicken chili taco filling?
Absolutely! Store the leftover filling in an airtight container in the refrigerator for up to 4 days. Make sure to keep the tortillas separate to prevent them from becoming soggy. This will allow you to enjoy these delicious tacos again without compromising quality.
Can I freeze the taco filling for later use?
Yes, you can! To freeze the filling, portion it into freezer bags, ensuring to squeeze out all excess air before sealing. It can be stored for up to 3 months. Simply thaw it in the fridge overnight when you’re ready to use it and reheat it on the stove to ensure a delightful meal.
What can I substitute for sour cream in this recipe?
If you’re looking for alternatives due to dietary preferences or allergies, Greek yogurt makes a fantastic substitute for sour cream. For a dairy-free option, consider using a plant-based sour cream or a cashew cream—blend soaked cashews with a bit of lemon juice to replicate that creamy tang.
Why did my white chicken chili sauce turn out lumpy?
Very! Lumpy sauces often result from adding liquids too quickly without constant whisking. To prevent lumps, whisk continuously as you gradually pour in the milk and chicken broth. If lumps do appear, you can blend the mixture in a blender to smooth it out. Remember, patience is key!
How can I adjust this recipe for gluten-free diets?
To make your white chicken chili tacos gluten-free, simply substitute the all-purpose flour with a 1:1 gluten-free flour blend for the roux. Ensure that the corn tortillas are labeled gluten-free as some brands may use allergens. Replacing chicken broth with a certified gluten-free option is also essential. Happy cooking!
Creamy White Chicken Chili Tacos for Cozy Weeknight Dinners
Ingredients
Equipment
Method
- Preheat your oven to 400°F (200°C), gather and measure all ingredients.
- In a medium saucepan, melt 2 tablespoons of unsalted butter over medium heat, whisk in 2 tablespoons of all-purpose flour to create a light roux.
- Gradually pour in 1 cup of skim milk and 1 cup of chicken broth, whisking continuously to avoid lumps, cooking until thickened.
- Add 1 cup of sour cream, 1 teaspoon ground cumin, the chopped green chilis, 1 teaspoon chili powder, and salt and pepper to the thickened sauce, whisk everything together.
- In a large bowl, combine 2 cups of shredded rotisserie chicken, 1 cup of frozen corn, and sliced green onions, pour the creamy sauce over and mix gently.
- Warm the corn tortillas in a skillet until pliable, about 10-20 seconds on each side.
- Spoon about 3 tablespoons of the filling onto each tortilla, top with shredded mozzarella cheese, and fold them in half, placing seam-side up on a baking sheet.
- Bake for 12-15 minutes until the cheese is melted and edges are golden brown.
- Allow to cool slightly before serving, and enjoy with toppings like salsa or fresh jalapeños.
Leave a Reply