
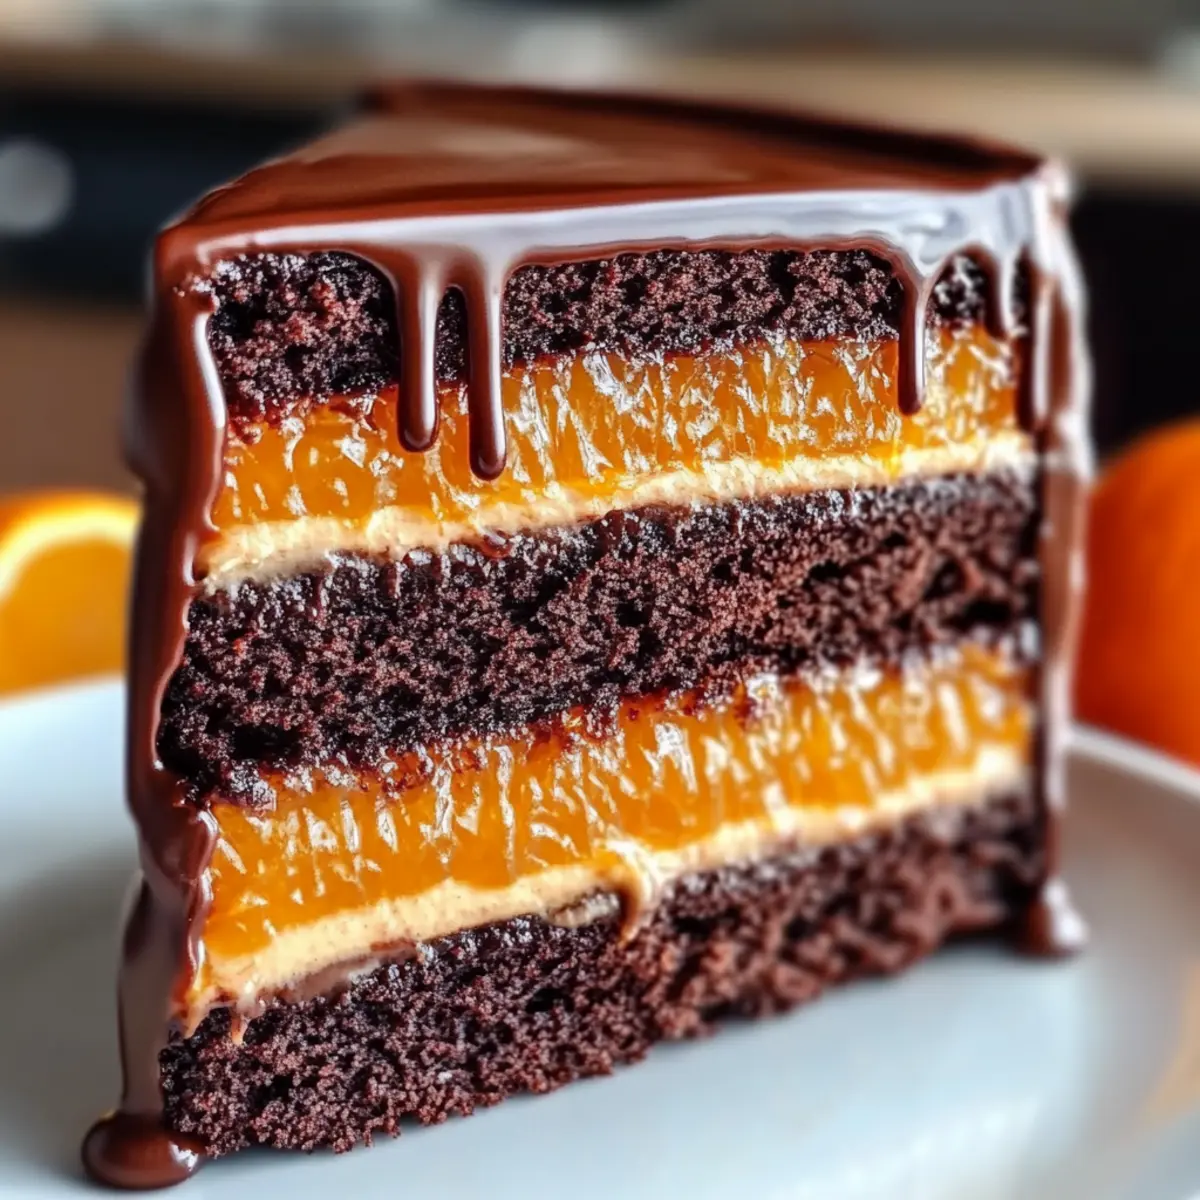
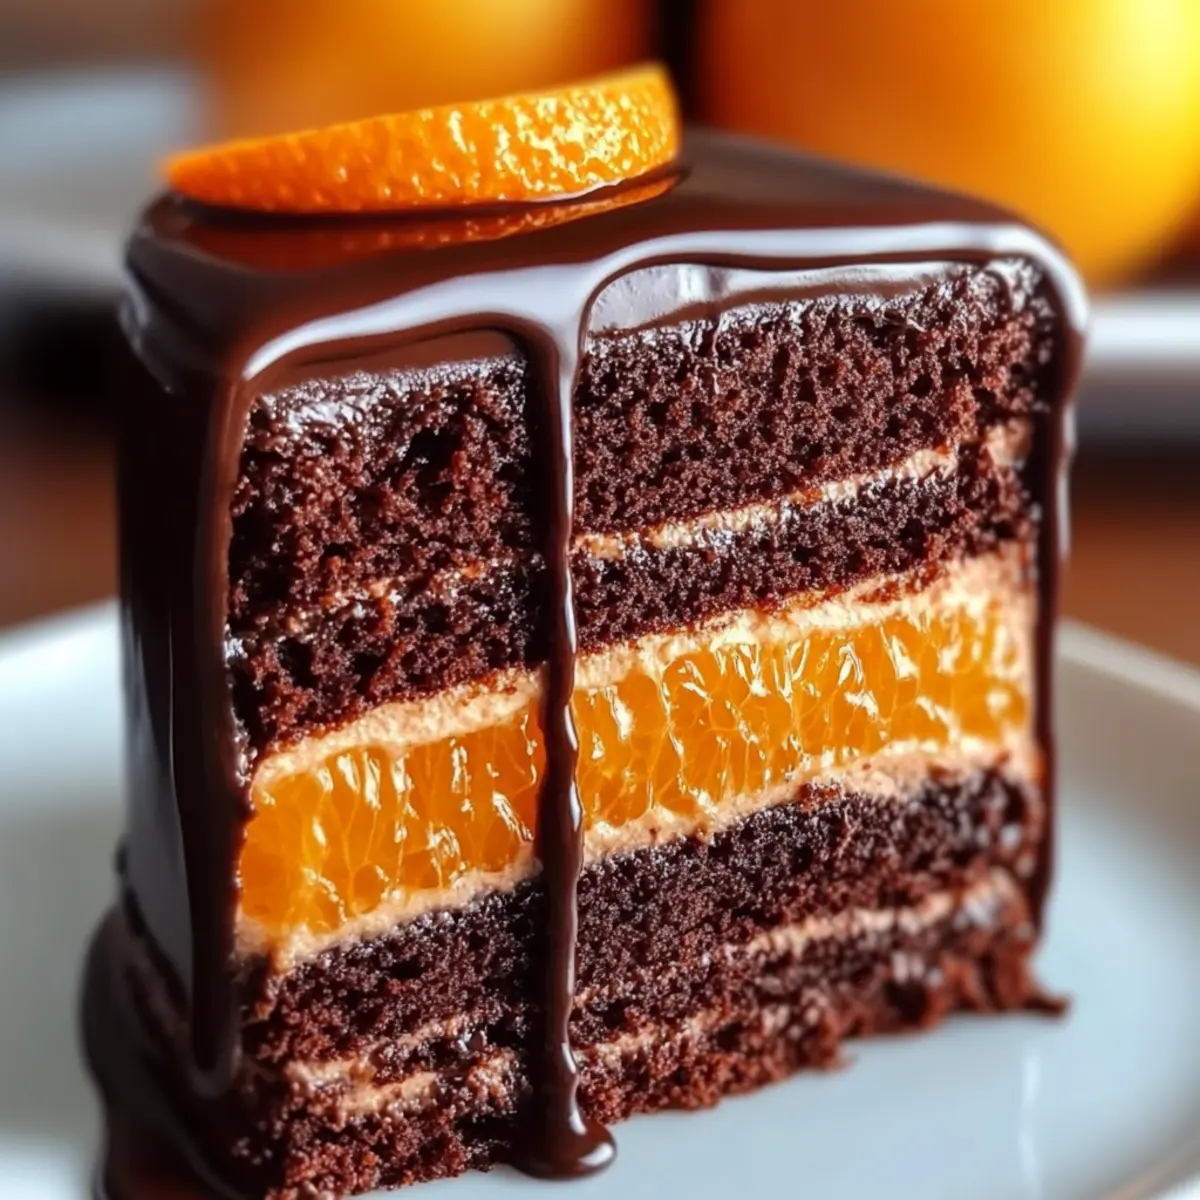
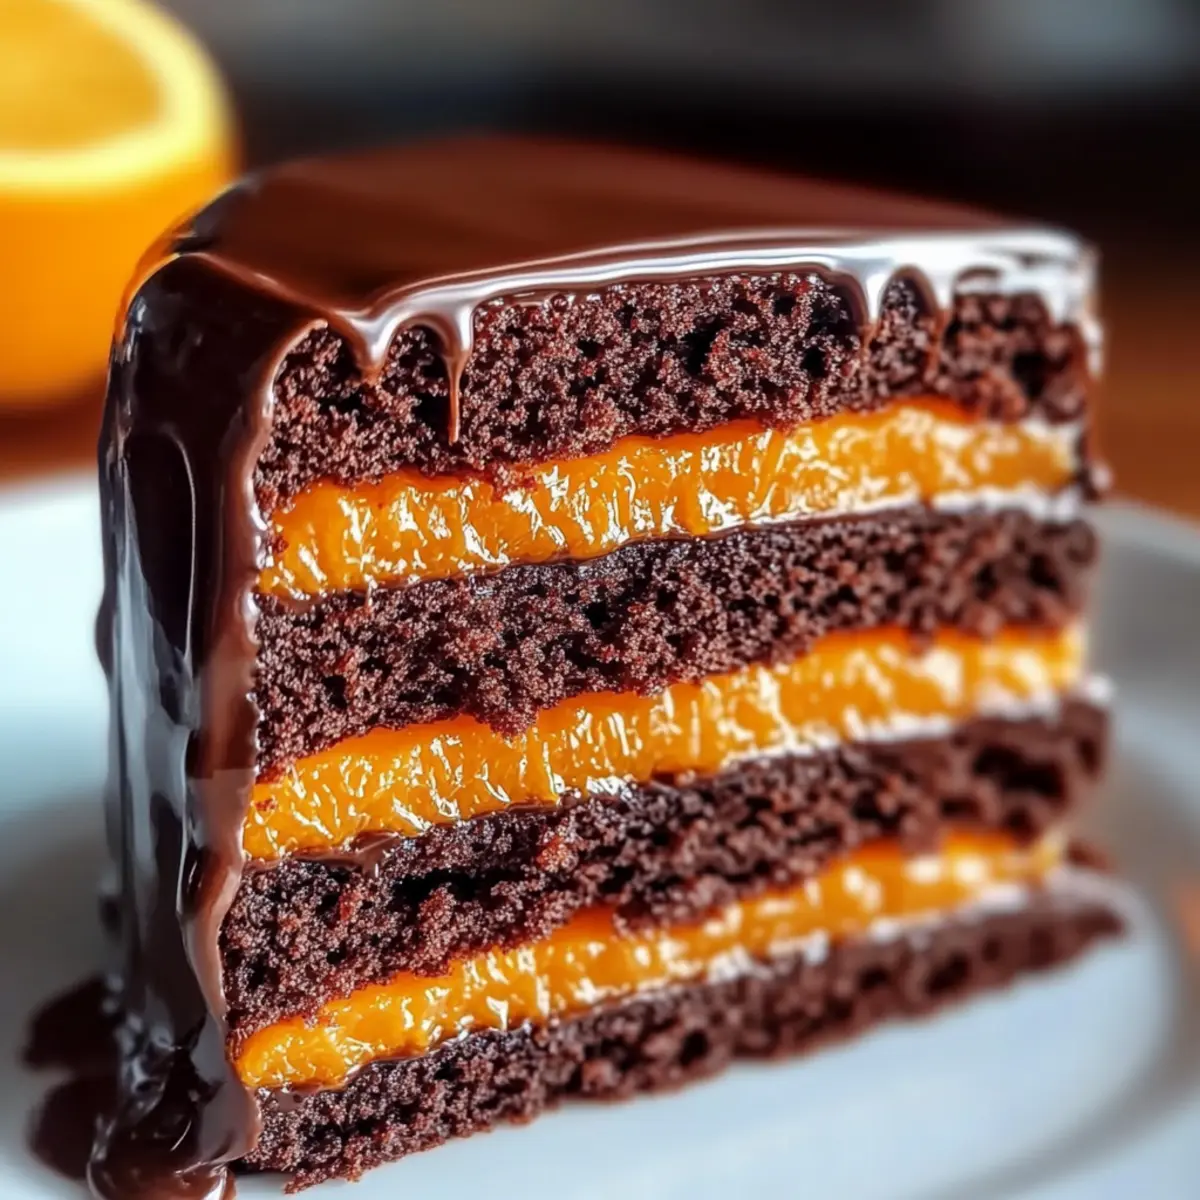
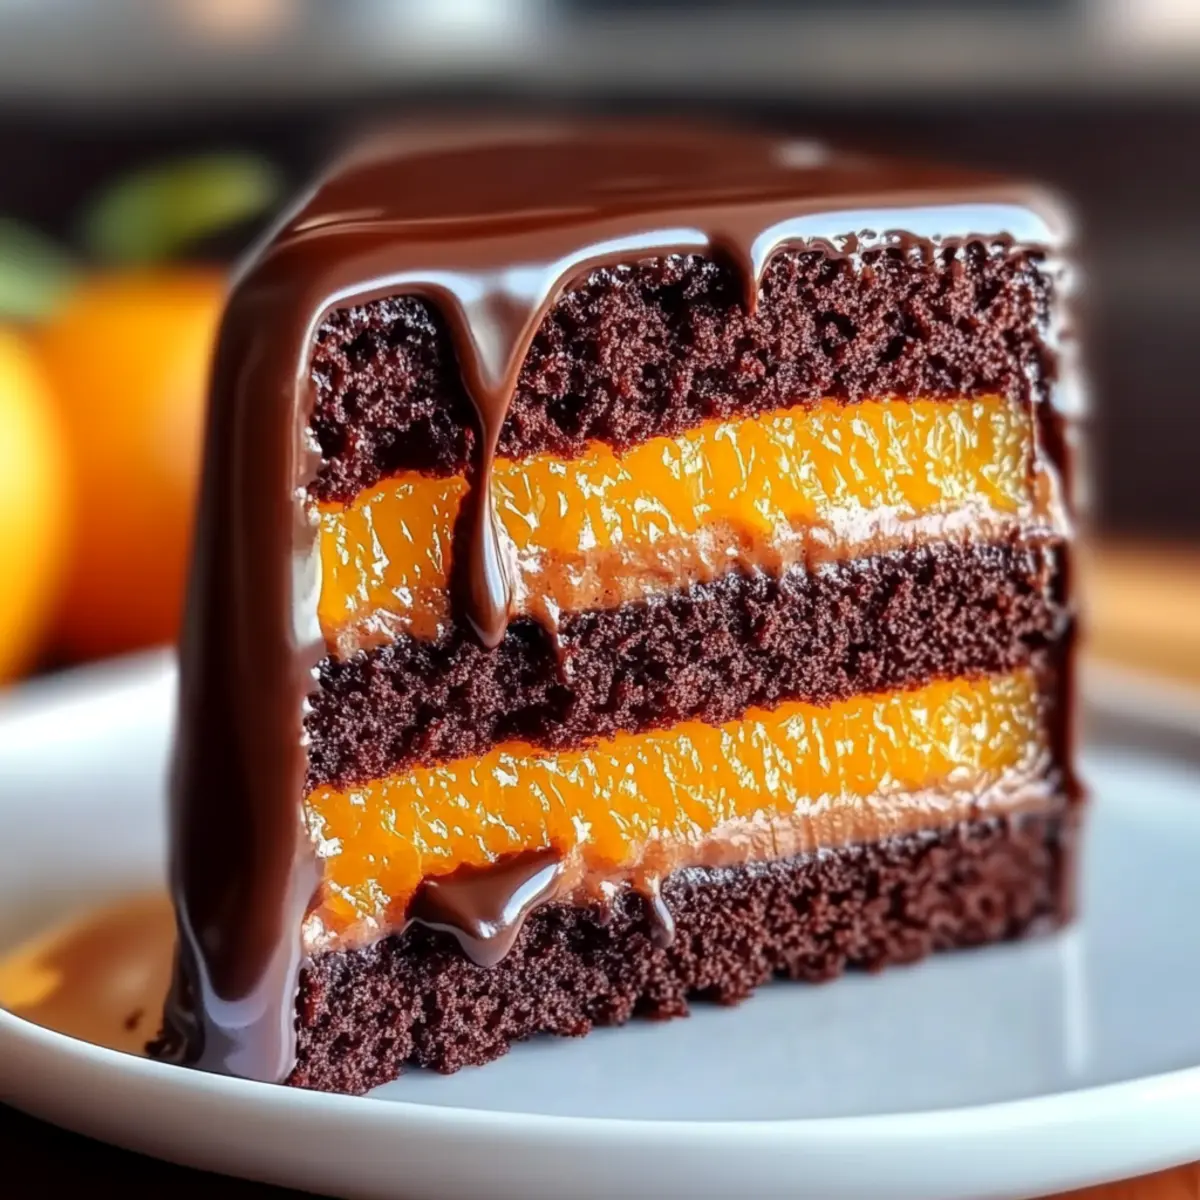
The aroma of freshly baked cake always fills my kitchen with a sense of warmth and nostalgia, and today, it’s a delightful Chocolate Orange Layer Cake that’s taking center stage. This easy-to-make dessert is not just a visual showstopper, but it balances rich chocolate with a refreshing burst of orange, making it the perfect crowd-pleaser for any celebration. Whether you’re hosting a birthday party or simply want to indulge on a quiet afternoon, this recipe ensures you’ll impress with minimal fuss. With layers of fluffy chocolate and creamy orange filling, you’ll find every bite is a sweet reminder of the joy that comes from homemade treats. Are you ready to learn how to bring this delicious vision to life?
What Makes This Cake So Special?
Irresistible Flavor: The pairing of rich chocolate and zesty orange creates a flavor explosion that’s both decadent and refreshing.
Easy to Make: Don’t worry if you’re not a baking pro! This Chocolate Orange Layer Cake is designed to be straightforward, making it accessible for everyone.
Visual Delight: A stunning layered cake that looks as good as it tastes, perfect for impressing guests at any occasion.
Versatile Options: Feel free to personalize it! Try using lemon juice for a citrus twist or layer in fresh fruit for added freshness.
Perfect for Celebrations: Whether it’s a birthday, holiday, or just because, this dessert is sure to be a hit among friends and family. Treat your loved ones to something special – perhaps serving it with a scoop of vanilla ice cream, like a classic Swirled Chocolate Cupcake would be delightful!
Chocolate Orange Layer Cake Ingredients
Get ready to bake an unforgettable treat!
For the Cake Batter
- All-purpose flour – Provides structure; consider using gluten-free flour for a gluten-free option.
- Unsweetened cocoa powder – Adds rich chocolate flavor; ensure it’s unsweetened for balanced sweetness.
- Granulated sugar – Sweetens the cake; coconut sugar can be used for a lower glycemic index.
- Baking powder & Baking soda – Leavening agents for a light cake texture; always check for freshness.
- Salt – Enhances flavors; use fine sea salt for better blending.
- Large eggs – Binds ingredients and adds moisture; room temperature eggs work best.
- Whole milk – Adds moisture and richness; substitute with almond milk for a dairy-free version.
- Vegetable oil – Provides moisture; can be replaced with canola oil or melted butter.
- Vanilla extract – Enhances overall flavor; opt for pure vanilla extract for best results.
- Hot coffee – Intensifies chocolate flavor; hot water can work in a pinch if coffee is unavailable.
For the Orange Filling
- Sugar – Sweetens the orange cream filling; honey or agave syrup can be substituted but may alter the texture.
- Cornstarch – Thickens the orange cream filling; can be replaced with flour, though it’ll need adjusted cooking time.
- Egg yolks – Adds richness; extra whites can be used if yolks are scarce.
- Freshly squeezed orange juice – Provides zesty flavor; fresh juice is preferred for a bright taste.
- Orange zest – Enhances the orange flavor; remember to wash the oranges before zesting.
- Butter – Adds richness; vegan butter works well for a plant-based option.
For the Ganache
- Heavy cream – Essential for ganache, creating a velvety texture; use full-fat cream for optimal results.
- Chopped dark chocolate – Forms the base of the ganache; choose high-quality chocolate for the best flavor.
With these ingredients ready to go, your Chocolate Orange Layer Cake will surely be a showstopper at any celebration! Happy baking!
Step‑by‑Step Instructions for Chocolate Orange Layer Cake
Step 1: Preheat and Prepare Pans
Begin by preheating your oven to 350°F (175°C). While it heats, prepare three 8-inch round cake pans by greasing them generously with butter or oil and lining the bottoms with parchment paper. This will ensure your Chocolate Orange Layer Cake releases easily once baked.
Step 2: Mix Dry Ingredients
In a large mixing bowl, whisk together the all-purpose flour, unsweetened cocoa powder, granulated sugar, baking powder, baking soda, and salt until evenly combined. Take a moment to enjoy the rich aroma of the cocoa powder, which sets the stage for your decadent cake layers.
Step 3: Add Wet Ingredients
Next, add the large eggs, whole milk, vegetable oil, and vanilla extract to the dry ingredients. Using an electric mixer, beat everything together on medium speed until the mixture is smooth and well-blended, about 2-3 minutes. The batter will be quite thick but should flow smoothly from the mixer.
Step 4: Incorporate Coffee
Gradually stir in the hot coffee until fully combined. This step enhances the chocolate flavor of your batter and will thin it out slightly, creating a pourable consistency. The warmth of the coffee will also bloom the cocoa, bringing out its rich essence.
Step 5: Bake the Cake Layers
Divide the batter evenly among the three prepared cake pans. Slide them into the preheated oven and bake for 25-30 minutes. When done, a toothpick inserted into the center should come out clean or with just a few moist crumbs attached, indicating perfect moisture and doneness.
Step 6: Cool the Cake Layers
Once baked, let the cakes cool in their pans for about 10 minutes. Then gently transfer them to a wire rack to cool completely. This cooling process is crucial before adding any fillings or ganache to your Chocolate Orange Layer Cake to prevent melting.
Step 7: Prepare Orange Cream Filling
For the orange cream filling, whisk together the sugar, cornstarch, and egg yolks in a medium saucepan. Gradually stir in the freshly squeezed orange juice while cooking over medium heat, whisking constantly until the mixture thickens, about 7-10 minutes. Once thick, mix in the orange zest and butter before setting aside to cool.
Step 8: Make the Ganache
In a small saucepan, heat the heavy cream over medium-low heat until steaming but not boiling. Remove from heat and pour the hot cream over the chopped dark chocolate in a heatproof bowl. Let it sit for 5 minutes, then stir gently until smooth and glossy, achieving a luscious ganache perfect for your cake.
Step 9: Assemble the Cake
To assemble your Chocolate Orange Layer Cake, place one cooled cake layer on a serving plate. Spread a generous layer of the orange cream filling on top, then add the second cake layer. Repeat the filling process, and finally, top with the third layer of cake.
Step 10: Pour Ganache and Garnish
Pour the smooth ganache evenly over the top of the assembled cake, allowing it to cascade down the sides for a beautiful finish. To elevate the presentation, garnish with fresh orange slices or candied orange peel. Your delightful Chocolate Orange Layer Cake is now ready to impress!
Make Ahead Options
Preparing your Chocolate Orange Layer Cake ahead of time can be a fantastic way to save time and ensure a stress-free celebration! You can bake the cake layers up to 3 days in advance; simply cool them completely, wrap each layer tightly in plastic wrap, and refrigerate. The orange cream filling can also be made ahead and stored in the refrigerator for up to 24 hours; be sure to cover it well to prevent a skin from forming. When ready to assemble, let the cake layers come to room temperature, spread the filling between them, and pour over the ganache for a delicious finale. This way, your cake will be just as tasty and beautiful, with minimal effort when it’s time to serve!
Chocolate Orange Layer Cake Variations & Substitutions
Feel free to let your creativity shine by customizing this delightful cake with these tasty twists!
-
Gluten-Free: Use a 1:1 gluten-free flour blend to make this cake suitable for gluten-sensitive friends and family without sacrificing flavor.
-
Dairy-Free: Swap whole milk for almond milk and use vegan butter for a plant-based version that still satisfies sweet cravings.
-
Herbal Twist: Add a hint of fresh rosemary or thyme to the orange filling to create an aromatic flavor profile that surprises the palate.
-
Citrus Delight: Substitute orange juice with lemon juice for a zesty variation. A citrus twist brings out a different kind of refreshing brightness.
-
Nutty Crunch: Fold in some finely chopped nuts, like hazelnuts or almonds, into the batter for added texture and a delightful crunch in every bite.
-
Flavor Boost: Enhance the ganache by adding a splash of orange liqueur or espresso – both options will deepen the flavors and elevate the experience.
-
Layering with Fresh Fruit: Layer in fresh berries, like raspberries or strawberries, between the cake layers for a fruity kick and a refreshing contrast to the rich chocolate.
-
Gourmet Presentation: Consider using a drizzle of caramel sauce on top or serve it alongside a scoop of vanilla ice cream, similar to the indulgence found in a classic Chocolate Mousse Cake dessert, for an impressive finish!
Each of these variations guarantees that your Chocolate Orange Layer Cake can please every guest and occasion. Enjoy sharing your delicious creation!
Expert Tips for Chocolate Orange Layer Cake
-
Measure Accurately: Proper measurements are essential for baking success. Use a kitchen scale or measuring cups for precision to make the best Chocolate Orange Layer Cake.
-
Room Temperature Ingredients: Ensure eggs and milk are at room temperature before mixing. This helps create a smooth batter and a light, airy texture in your cake.
-
Cool Completely: Allow the cake layers to cool fully before adding the orange cream filling and ganache. This prevents the filling from melting and ensures better layering.
-
Fresh Ingredients: Use fresh baking essentials, especially for baking powder and baking soda, to achieve the desired fluffiness in your Chocolate Orange Layer Cake.
-
Ganache Tips: When making ganache, let the cream cool slightly after heating, as boiling can cause graininess. Stir gently for a smooth finish.
-
Garnish Creativity: Don’t hesitate to personalize your presentation! Fresh orange zest or a sprinkle of sea salt can add delightful touches to your Chocolate Orange Layer Cake.
What to Serve with Chocolate Orange Layer Cake
Elevate your dessert experience by pairing this show-stopping cake with delightful accompaniments that enhance its fabulous flavors.
- Fresh Whipped Cream: A dollop of lightly sweetened whipped cream adds a creamy texture that beautifully complements the cake’s richness.
- Vanilla Ice Cream: The cool creaminess of vanilla ice cream contrasts perfectly with the warm notes of chocolate and zesty orange, creating a comforting experience.
- Espresso or Coffee: A cup of strong espresso enhances the chocolate flavor, providing a rich, aromatic backdrop that elevates each bite.
- Chocolate-Covered Strawberries: These sweet, tart berries offer a delightful contrast, enhancing the cake’s chocolatey richness with refreshing fruitiness.
- Candied Citrus Peel: Sprinkling this sweet, tangy treat on top adds an extra burst of flavor while echoing the cake’s orange notes beautifully.
- Orange Marmalade: A thin spread of orange marmalade on each slice creates an additional layer of orange flavor, enhancing the cake’s overall taste profile.
- A Sparkling Wine: Pair with a sweet Moscato or Prosecco for an elegant touch that plays well with the cake’s rich flavors and festive spirit.
These thoughtfully selected pairings will not only elevate your Chocolate Orange Layer Cake but also create a harmonious dining experience that will leave everyone wanting more!
Storage Tips for Chocolate Orange Layer Cake
Room Temperature: Store leftover cake at room temperature for up to 1 day, covered loosely with plastic wrap to prevent drying out.
Fridge: Kept in an airtight container, your Chocolate Orange Layer Cake can stay fresh in the refrigerator for 3-4 days. Allow it to come to room temperature before serving for the best flavor.
Freezer: For longer storage, wrap slices tightly in plastic wrap and then in aluminum foil, freezing for up to 3 months. Thaw overnight in the fridge before enjoying.
Reheating: If you prefer a warm slice, gently microwave a piece for about 10-15 seconds, just until warmed through to savor that rich chocolate flavor.
Chocolate Orange Layer Cake Recipe FAQs
Which oranges are best for juicing and zesting?
Absolutely! For the best flavor, choose medium-sized, bright orange blood oranges or Navel oranges. Look for fruit that feels heavy for its size and has smooth skin, avoiding any that are soft or have dark spots.
How should I store leftover Chocolate Orange Layer Cake?
Store your leftover cake in an airtight container in the refrigerator for 3-4 days. If you want it to stay fresh longer, let it return to room temperature before serving for the best taste and texture. It’s that easy!
Can I freeze Chocolate Orange Layer Cake?
Very! To freeze slices, wrap each one tightly in plastic wrap, then add a layer of aluminum foil. This protects against freezer burn. You can keep it frozen for up to 3 months. When you’re ready to enjoy, thaw it overnight in the fridge. Voila!
What should I do if my ganache is too thick?
If your ganache ends up thicker than you’d like, don’t worry! Add a tablespoon of warm cream and stir thoroughly until it reaches the desired pourable consistency. Remember, a gentle hand keeps it smooth and luscious!
Can I make this cake dairy-free?
Absolutely! To make a dairy-free Chocolate Orange Layer Cake, substitute whole milk with almond milk or any non-dairy alternative and use vegan butter for the filling. Your family and friends will enjoy every delectable bite without even noticing the change!
Is this recipe suitable for pets?
No, chocolate is toxic to pets, particularly dogs. When serving this delicious Chocolate Orange Layer Cake, be sure to keep it out of reach of your furry friends to keep them safe and sound.
Ultimate Chocolate Orange Layer Cake for Every Celebration
Ingredients
Equipment
Method
- Preheat your oven to 350°F (175°C) and prepare three 8-inch round cake pans by greasing them generously with butter or oil and lining the bottoms with parchment paper.
- In a large mixing bowl, whisk together the all-purpose flour, unsweetened cocoa powder, granulated sugar, baking powder, baking soda, and salt until evenly combined.
- Add the large eggs, whole milk, vegetable oil, and vanilla extract to the dry ingredients. Beat on medium speed until smooth and well-blended, about 2-3 minutes.
- Gradually stir in the hot coffee until fully combined.
- Divide the batter evenly among the three prepared cake pans and bake for 25-30 minutes.
- Let the cakes cool in their pans for about 10 minutes, then transfer to a wire rack to cool completely.
- For the orange cream filling, whisk together the sugar, cornstarch, and egg yolks in a medium saucepan. Stir in the freshly squeezed orange juice while cooking over medium heat.
- Heat the heavy cream until steaming, then pour over the chopped dark chocolate and stir until smooth to make the ganache.
- To assemble, place one cooled cake layer on a serving plate, spread a layer of orange cream filling, then add the second layer. Repeat the filling process and top with the third layer.
- Pour the ganache evenly over the top, allowing it to cascade down the sides, and garnish with fresh orange slices or candied orange peel.
Leave a Reply