
As the aroma of sautéing shallots fills my kitchen, I’m reminded of family gatherings where homemade perogies reigned supreme. This delightful homemade perogies recipe captures the essence of comfort food, showcasing soft dumplings filled with velvety mashed potatoes and sharp cheddar cheese. The best part? They’re not just delicious; these little pockets of joy are also freezer-friendly, making them perfect for quick weeknight dinners or cozy weekends. Plus, their versatility means you can easily switch up the fillings to suit your mood—think adventurous spinach and feta or sweet berry surprises! Ready to transform your kitchen into a warm haven of flavor? Let’s dive in!
Why Make Homemade Perogies?
Comforting and truly satisfying, these homemade perogies embrace the essence of indulgent comfort food. Freezer-friendly functionality means you can whip up a batch ahead of time for busy weeknight meals. Endless variations allow you to experiment with sweet or savory fillings, from classic potato and cheese to adventurous spinach with feta. Crowd-pleaser appeal makes them perfect for family gatherings or dinner parties, ensuring everyone leaves with a happy belly. Enjoy them boiled or pan-fried for that delightful crispiness, and don’t forget to pair with sour cream, chives, or your choice of toppings! If you love comforting dishes, you might also enjoy making Christmas Tree Meringues or Disneyland’s Hot Chocolate.
Homemade Perogies Recipe Ingredients
• Dive into this delightful mix of flavors!
For the Dough
- Flour – Provides the perfect structure for these homemade perogies; consider whole wheat or gluten-free flour for a twist.
- Salt – Enhances the overall flavor in both dough and filling, making every bite more delicious.
- Egg – Acts as a binding agent; for a vegan option, substitute with aquafaba.
- Sour Cream – Adds moisture and richness to the dough; Greek yogurt works beautifully as an alternative.
- Butter – Infuses flavor and tenderness into the dough; swap for margarine for a dairy-free choice.
For the Filling
- Mashed Potatoes – Provides a creamy texture and is the star of the filling; leftovers or instant mashed potatoes can save time.
- Cheddar Cheese – Adds a sharp, savory flavor to the filling; mozzarella or dairy-free cheese are great substitutes.
For Cooking
- Chilled Butter – Essential for pan-frying the perogies to achieve that desired crispy finish.
- Shallots/Onion – Introduces sweetness and depth when sautéed; garlic can offer an extra flavor kick!
Feel free to mix and match fillings to create your own perfect version of this homemade perogies recipe!
Step‑by‑Step Instructions for Homemade Perogies Recipe
Step 1: Prepare the Dough
In a large mixing bowl, whisk together 2 cups of flour and 1 teaspoon of salt. Create a well in the center, then add one beaten egg, ½ cup of sour cream, and 2 tablespoons of softened butter. Gradually mix until a smooth dough forms. Knead for about 5 minutes until the dough is elastic, then cover with a towel and let it rest for 30 to 60 minutes.
Step 2: Make the Filling
While the dough rests, prepare the filling by combining 2 cups of warm mashed potatoes and 1 cup of shredded cheddar cheese in a separate bowl. Season with half a teaspoon of salt and pepper to taste. Stir until well mixed, ensuring the cheese melts slightly from the warmth of the potatoes. Keep the mixture warm as you shape your perogies.
Step 3: Shape the Perogies
Once the dough has rested, roll it out on a floured surface to about 1/8-inch thickness. Use a round cutter or cup to cut the dough into circles, about 3 inches in diameter. Place a teaspoon of the potato-cheese filling in the center of each circle. Fold the dough over to create a half-moon shape, pressing the edges firmly to seal each perogy and prevent any filling from escaping.
Step 4: Cook the Perogies
Bring a large pot of salted water to a gentle boil. Carefully drop the perogies into the boiling water, being careful not to overcrowd the pot. Boil them until they float to the surface, which usually takes 3 to 5 minutes. Once they float, let them cook for an additional 2 to 3 minutes. Use a slotted spoon to remove them from the pot and drain well.
Step 5: Pan-Fry for Crispiness (Optional)
In a large skillet over medium heat, melt 2 tablespoons of chilled butter. Add diced shallots or onions, sautéing until they soften and become translucent, around 3 to 4 minutes. Then, add the boiled perogies to the skillet. Fry until they are golden brown and crispy on both sides, about 2 to 3 minutes per side, for a delicious texture contrast.
Step 6: Serve
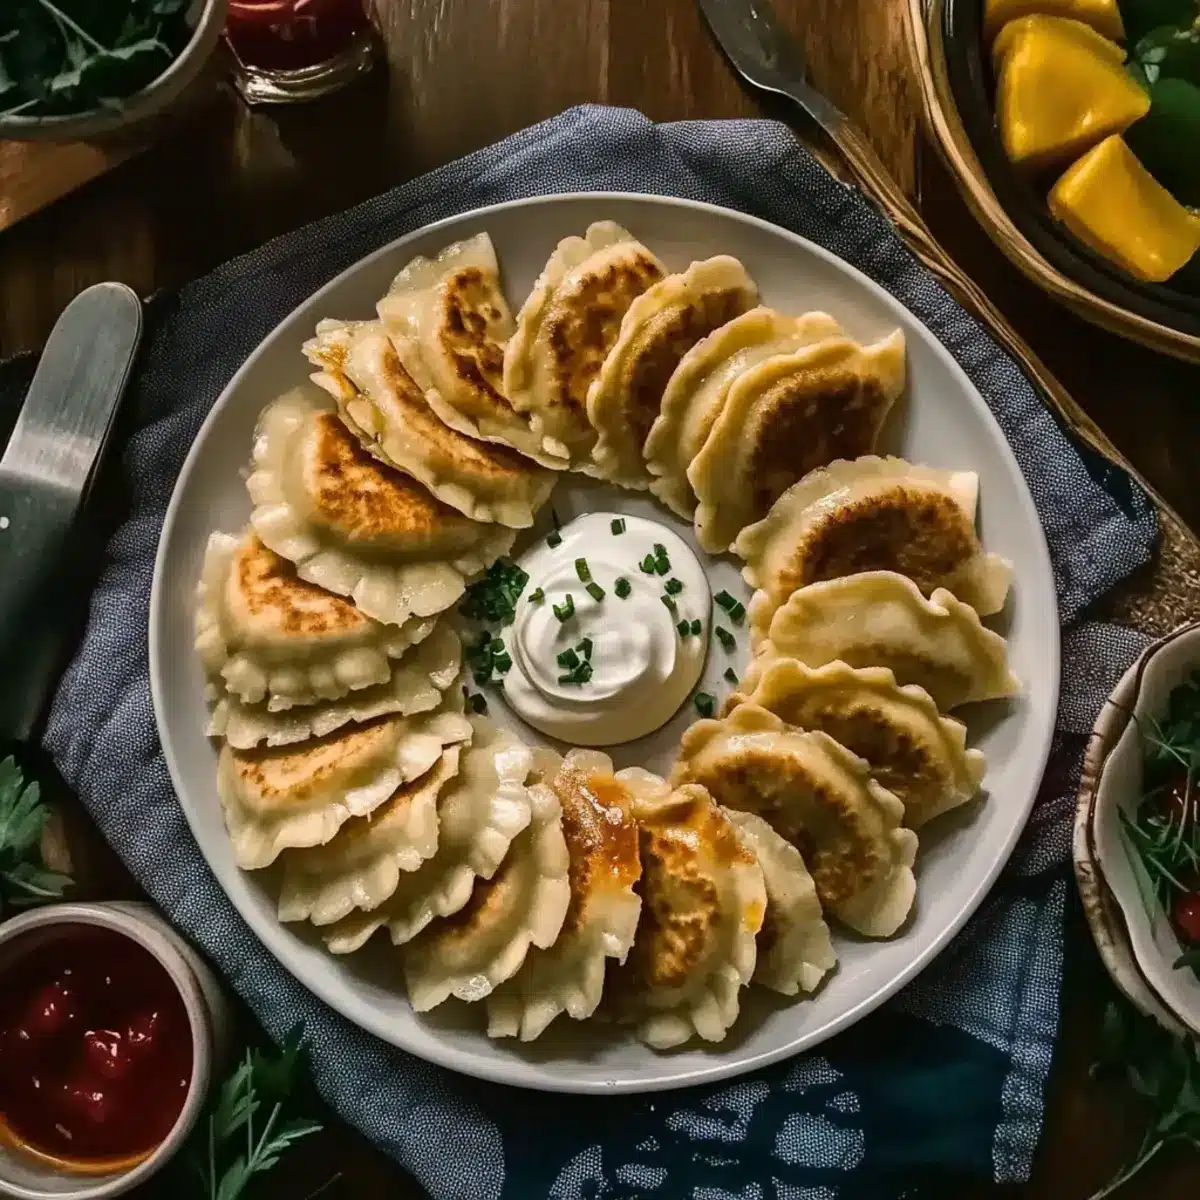
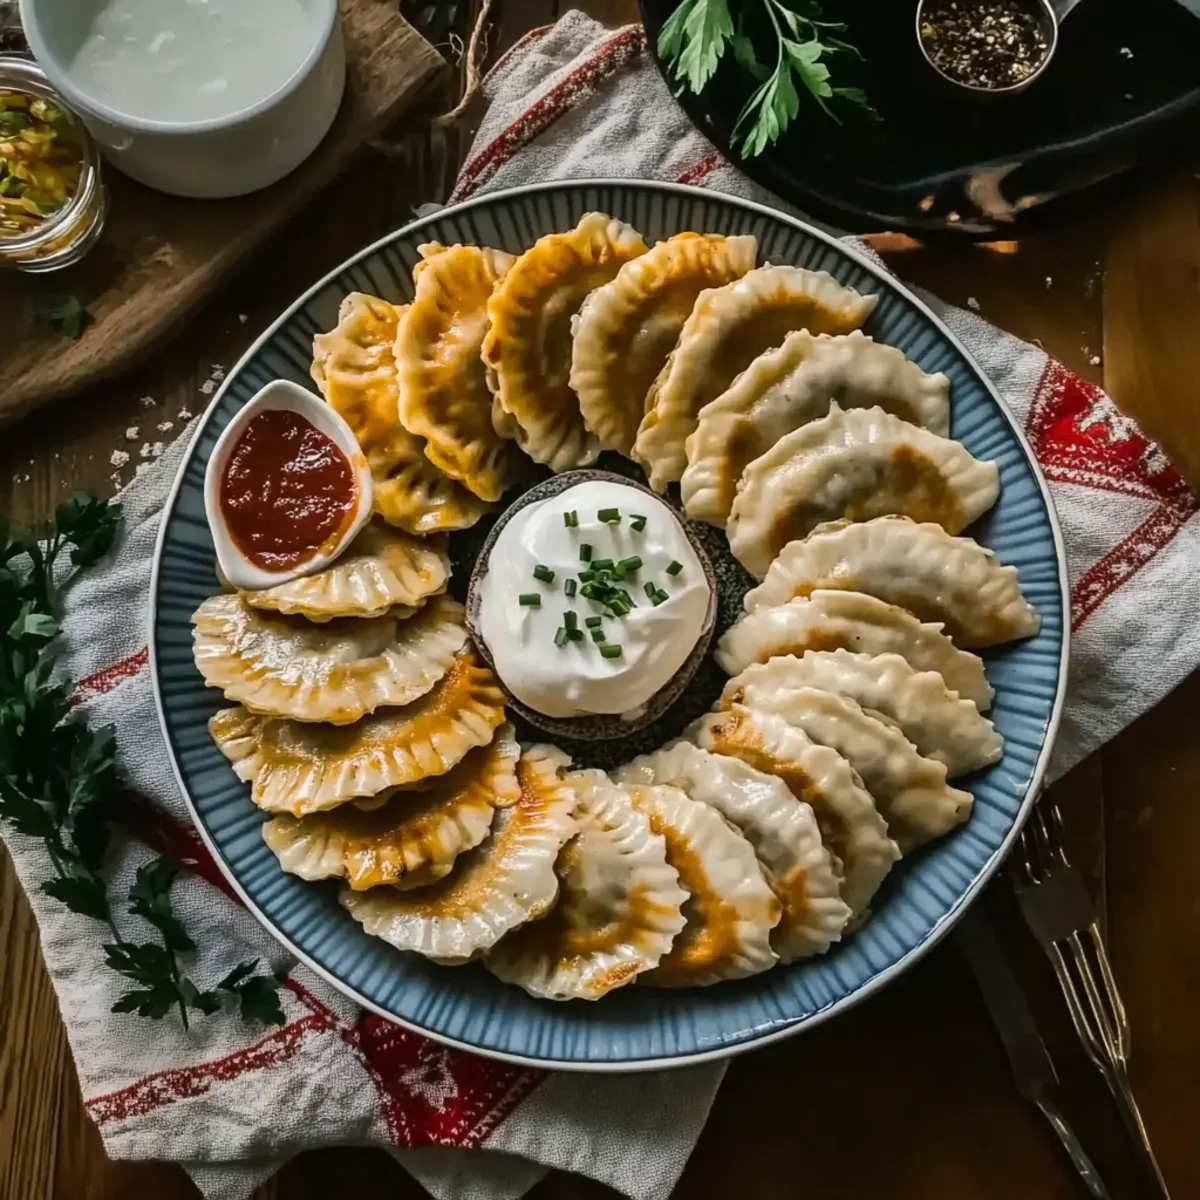
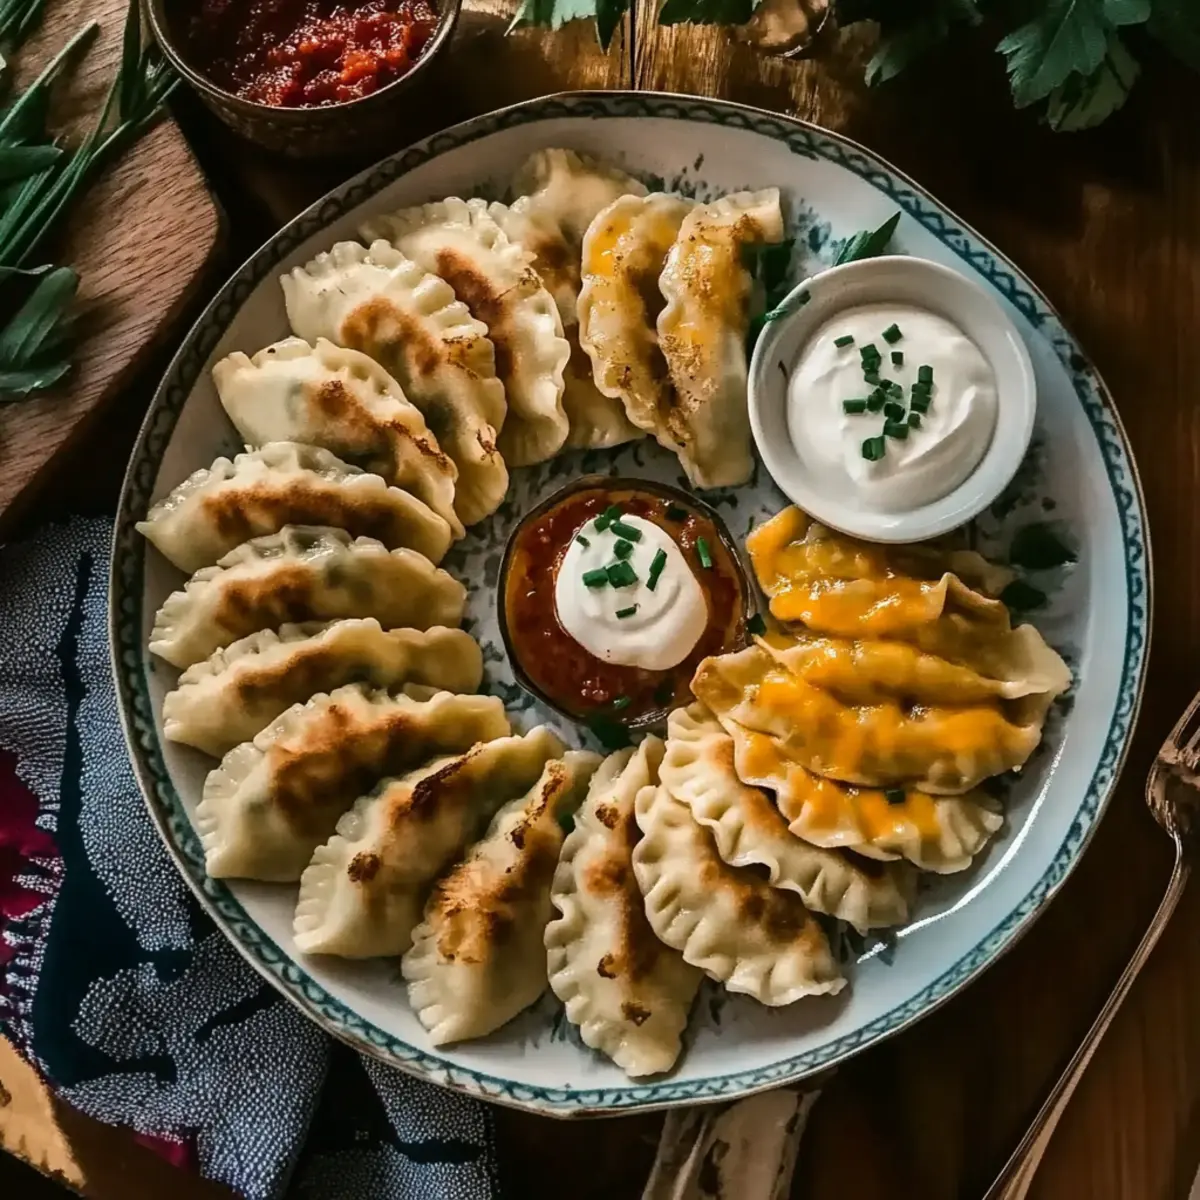
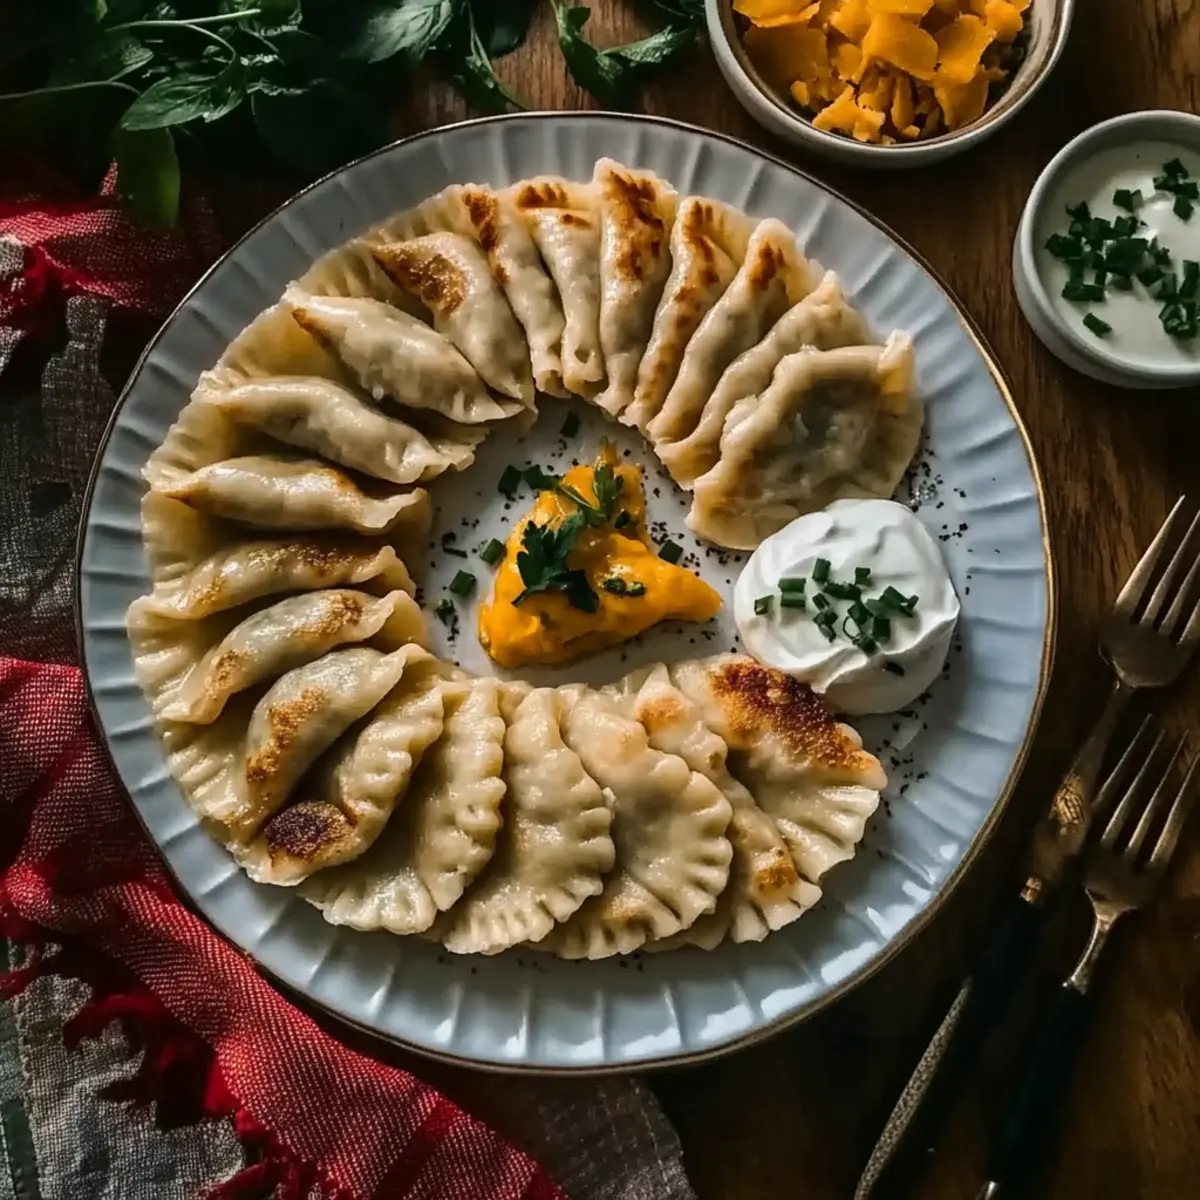
Plate the perogies while they’re hot, and serve them alongside a dollop of sour cream or a sprinkle of fresh chives or scallions. For an extra indulgence, consider adding crispy bacon bits or a side of sautéed cabbage. Enjoy the comforting flavors of your homemade perogies, a true delight for any meal!
How to Store and Freeze Homemade Perogies
- Room Temperature: Homemade perogies should be consumed within a few hours of cooking if left at room temperature. Keep them covered to avoid drying out.
- Fridge: Store leftover perogies in an airtight container in the fridge for up to 3 days. Reheat them gently in a skillet with a little butter to retain their texture.
- Freezer: For longer storage, freeze uncooked perogies on a floured baking sheet. Once frozen solid, transfer them to a zip-top bag and store for up to 3 months. Boil directly from frozen when ready to enjoy your homemade perogies.
- Reheating: To reheat frozen perogies, simply boil them in salted water until they float, then sauté in a bit of butter for a crispy finish.
Make Ahead Options
These homemade perogies are a perfect meal prep option for busy cooks! You can prepare the dough and filling up to 24 hours in advance—just store them separately in airtight containers in the refrigerator to maintain their freshness. Additionally, after shaping the perogies, you can freeze them for up to 3 months; simply place them in a single layer on a baking sheet until frozen solid before transferring to a freezer bag. When you’re ready to enjoy your homemade perogies, boil them from the frozen state for about 8-10 minutes, until they float to the surface, then pan-fry for that irresistibly crispy finish. This way, you have delicious, comforting perogies ready with minimal effort on hectic weeknights!
Homemade Perogies Recipe Variations
Feel free to unleash your creativity and customize this delightful dish to your liking!
- Vegan Twist: Substitute mashed potatoes with mashed sweet potatoes or create a filling using roasted carrots and spices.
- Cheese Change: Switch out cheddar for a creamy Gruyère or a dairy-free cheese option for lovely variation in flavor.
- Savory Spinach: Swap potato and cheese for a savory filling of wilted spinach mixed with feta and herbs for a Mediterranean flair.
- Mushroom Medley: Use a combination of sautéed mushrooms and onions instead of the classic filling for an earthy, umami-rich flavor.
- Sweet Surprise: Fill with a mixture of strawberries or blueberries, sprinkled with a touch of sugar, for a delicious dessert option.
- Herbed Delight: Mix in freshly chopped herbs like dill or chives into the potato filling for an aromatic twist.
- Spicy Kick: Add diced jalapeños or red pepper flakes to the filling for a delightful heat that will awaken your taste buds.
- Loaded Version: Turn your perogies into loaded ones by adding crispy bacon, scallions, and a dollop of sour cream on top before serving.
With these variations, your homemade perogies can always feel like a brand-new adventure! And if you love experimenting in the kitchen, why not try making some decadent Red Velvet Cheesecake for dessert or create delightful Brie Cranberry Bites for a perfect appetizer!
Expert Tips for Homemade Perogies
-
Dough Consistency: Ensure the dough isn’t too sticky; if it is, gradually add more flour until you achieve a smooth and pliable consistency.
-
Sealing Technique: Take your time to seal the edges of the perogies properly to prevent any filling from leaking during cooking. A pinch and fold method works best!
-
Cooking Temperature: When boiling, maintain a gentle simmer; a rolling boil can break the delicate dumplings apart.
-
Pan-Frying Flavor: If you choose to pan-fry, don’t overcrowd the skillet—this allows for even crispiness. Flip them gently to retain their shape!
-
Freezing Tips: For make-ahead meals, freeze unboiled perogies on a floured tray. Once frozen solid, transfer them to a zip-top bag for easy storage and use them as needed!
-
Filling Ideas: Don’t hesitate to experiment with different fillings for your homemade perogies! Think outside the box with combinations like roasted vegetables or even sweet fruit fillings.
What to Serve with Homemade Perogies?
Imagine a cozy meal perfectly balanced with flavors and textures; let’s complete your homemade perogies experience!
-
Sautéed Cabbage: The slightly sweet and tender cabbage adds a lovely contrast to the crispy perogies, enhancing the meal’s heartiness.
-
Crispy Bacon Bits: A sprinkle of savory bacon on top introduces a delightful crunch and flavor burst, elevating the overall comfort food appeal.
-
Grilled Kielbasa: This flavorful sausage complements the perogies with its smoky richness, creating a classic Eastern European feast.
-
Fresh Chives or Scallions: Their mild onion flavor brightens the dish while adding a fresh touch, making each bite more vibrant.
-
Creamy Mushroom Sauce: Drizzling a rich mushroom sauce over perogies adds umami depth for an indulgent twist that comforts the soul.
-
Apple Sauce: A surprising yet delightful pairing, the sweet tartness of apple sauce balances the savory flavors beautifully, especially for sweet variations.
-
Chilled Beet Salad: The earthiness of beets paired with tangy dressing adds a refreshing contrast that rounds out the meal nicely, perfect for sharing.
-
Glass of Light Beer: A crisp, refreshing beer complements the rich perogies while enhancing the overall dining experience with its effervescence.
-
Dessert Option: Apple Strudel: Continue the warm, comforting theme with this flaky dessert, perfectly sweetened to finish on a satisfying note.
-
Sour Cream Dip: A side of sour cream or herbed sour cream dip ensures an indulgent touch, adding creaminess while balancing flavors beautifully.
Homemade Perogies Recipe FAQs
What type of flour should I use for the dough?
I recommend using all-purpose flour as it provides the best structure for homemade perogies. However, you can absolutely experiment with whole wheat or gluten-free flour if you’re looking for a healthier or dietary-friendly option. Just be mindful that the dough’s texture may change slightly depending on the flour used.
How should I store leftover perogies?
To store leftover perogies, place them in an airtight container in the fridge where they’ll be good for up to 3 days. When reheating, I like to gently sauté them in a skillet with a bit of butter to restore their crispy texture. This method gives them a delightful, warm finish ready to be enjoyed again!
Can I freeze homemade perogies?
Absolutely! To freeze homemade perogies, arrange them in a single layer on a floured baking sheet, ensuring they don’t touch. Once they are frozen solid (approximately 1-2 hours), transfer them into a zip-top bag or airtight container for up to 3 months. To cook from frozen, simply boil them directly in salted water until they float, then sauté for crispy perfection!
What should I do if my dough is too sticky?
If you find your dough is too sticky while preparing, just sprinkle a bit more flour onto the surface and knead gently until it reaches a non-sticky consistency. Be careful not to add too much flour at once; start with a tablespoon at a time as you knead. This will help you achieve that beautiful, elastic dough you need for perfect perogies!
Are there any dietary considerations I should be aware of?
Yes, if you’re cooking for someone with dietary restrictions, there are great alternatives available! You can substitute the egg with aquafaba for a vegan result, and try using dairy-free butter and cheese. Additionally, if you’re making them for kids or pets, simply stick to plain potato filling without any garlic or onion, as those can be harmful to dogs. Enjoy crafting your perogies with peace of mind!
Homemade Perogies Recipe: Comfort Food Made Easy
Ingredients
Equipment
Method
- In a large mixing bowl, whisk together flour and salt. Create a well in the center, add the beaten egg, sour cream, and softened butter. Gradually mix until a smooth dough forms. Knead for about 5 minutes, then let it rest for 30 to 60 minutes.
- While the dough rests, combine warm mashed potatoes and shredded cheddar cheese in a bowl. Season with salt and pepper to taste, ensuring the cheese melts slightly.
- Roll out the rested dough to about 1/8-inch thickness. Cut into circles, place a teaspoon of filling in each, and fold to seal.
- Bring a large pot of salted water to a boil. Drop perogies into boiling water, boil until they float, and cook an additional 2 to 3 minutes. Remove with a slotted spoon.
- In a skillet, melt chilled butter and sauté diced shallots until translucent. Add boiled perogies and fry until golden brown on both sides.
- Serve hot, optionally with sour cream, chives, or crispy bacon bits.
Leave a Reply