
A delightful discovery awaited me on my last culinary adventure, as I wandered through the bustling aisles of my local Asian market. The enticing aroma of savory sauces and fragrant spices beckoned me, leading me to dream up my own version of Chicken Onigiri. This Easy Chicken Onigiri with Teriyaki Glaze recipe transforms simple ingredients into a beautiful, bite-sized treat that’s perfect for snacking or packing on-the-go. The combination of marinated chicken and short-grain sushi rice, all wrapped in a touch of nori, brings a taste of Japan right into your home. Best of all, it’s ready in just 45 minutes—ideal for busy weeknights when you crave something special without the fuss. Curious to learn how to create these portable wonders? Let’s dive into the recipe!
Why try making Chicken Onigiri?
Irresistible flavors: With tender, marinated chicken glazed in homemade teriyaki sauce, every bite packs a punch of savory goodness.
Quick and easy: This recipe can be ready in just 45 minutes, perfect for busy days when you want a delicious homemade meal in no time.
Travel-friendly: The compact size and mess-free wrapping make Chicken Onigiri an ideal snack for on-the-go adventures.
Customizable: Feel free to swap chicken for tofu or add your favorite veggies, like cucumber or avocado, for a delightful twist.
Nostalgic taste: Enjoy a taste of Japan right at home, reminiscent of your favorite convenience store snacks. For more delicious ideas, don’t forget to check out my Asian Chicken Cranberry or Mediterranean Chicken Bowls recipes to satisfy your cravings!
Chicken Onigiri Ingredients
-
For the Rice
-
Short-grain (sushi) rice – Essential for its sticky texture that holds the onigiri shape; remember to use 15% more water than regular rice when cooking.
-
Fine salt (½ teaspoon) – Enhances the rice’s flavor for a well-seasoned bite; opt for fine salt for better mixing.
-
Furikake (Optional, 2 tablespoons) – A wonderful Japanese rice seasoning that adds an extra layer of flavor and texture to your onigiri.
-
For the Chicken
-
Boneless skinless chicken (½ pound) – Tenderizes beautifully with the marinade; consider using drumsticks or thighs for more flavor.
-
Soy sauce (2 teaspoons for marinade, 1½ tablespoons for sauce) – Infuses the chicken with umami richness and deeper color.
-
Sake (1 tablespoon or water) – Tenderizes the chicken; if not available, water works just fine.
-
Baking soda (¼ teaspoon) – A gentle tenderizing agent that enhances the chicken’s texture.
-
Cornstarch (1 teaspoon) – Helps the chicken develop a deliciously crispy exterior when stir-fried.
-
Mirin (1 tablespoon) – Sweet rice wine that enriches your teriyaki sauce with depth and brightness.
-
Brown sugar (1 tablespoon, firmly packed) – Adds a satisfying sweetness to balance the savory flavors in the glaze.
-
Oil (1 tablespoon) – A neutral oil like vegetable or canola is ideal for frying the chicken; it helps achieve that perfect golden-brown color.
-
Garlic (1 tablespoon, minced) – Adds a fragrant aromatic note to the chicken that elevates the dish.
-
For Assembly
-
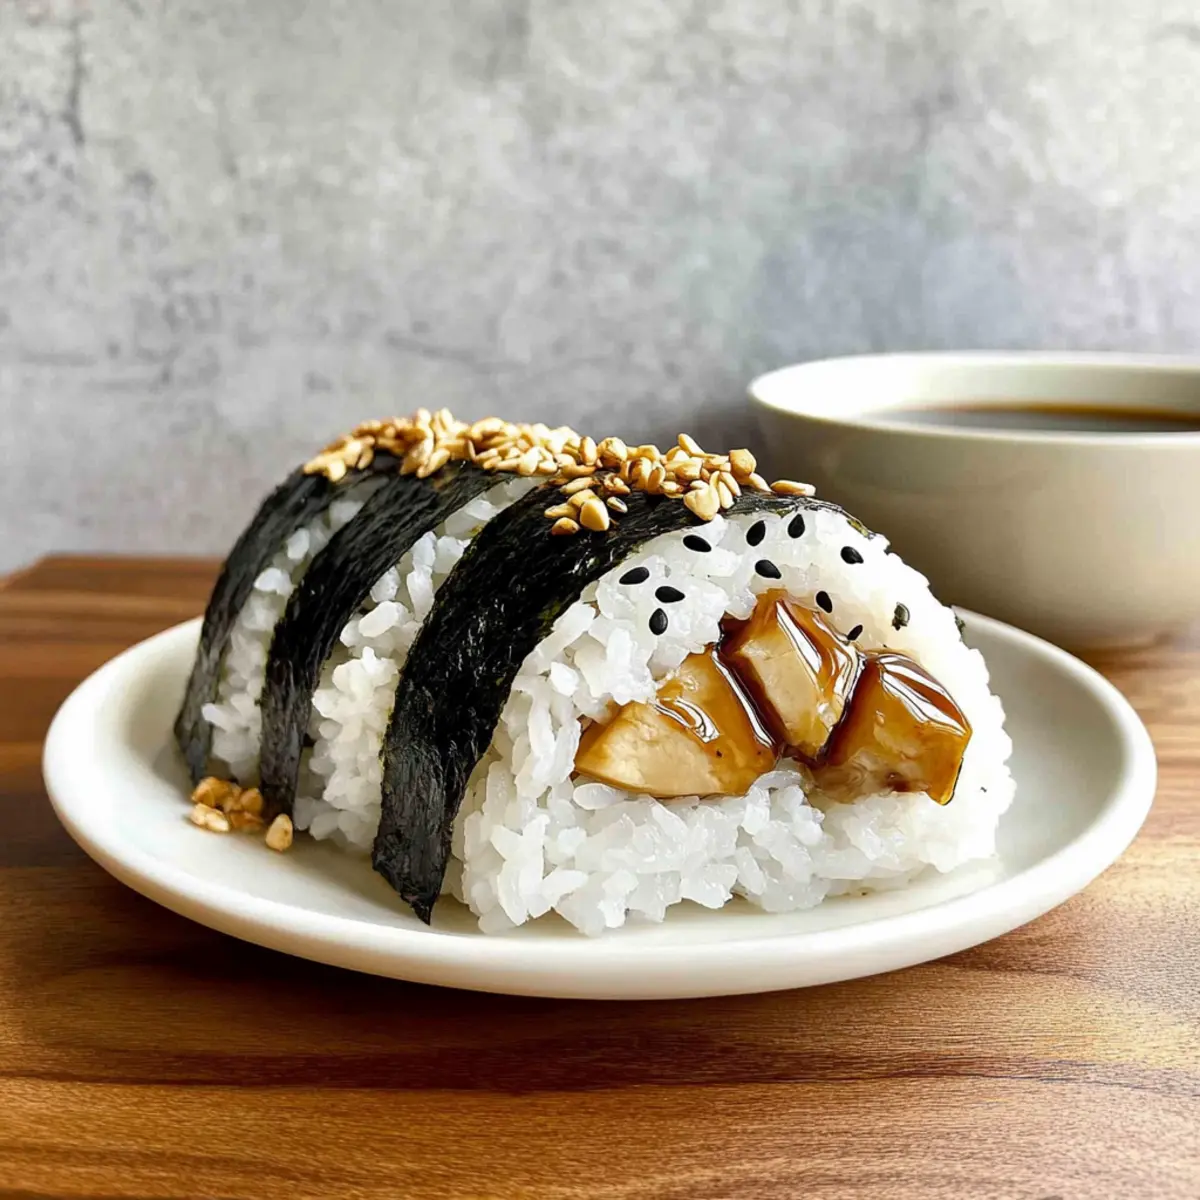
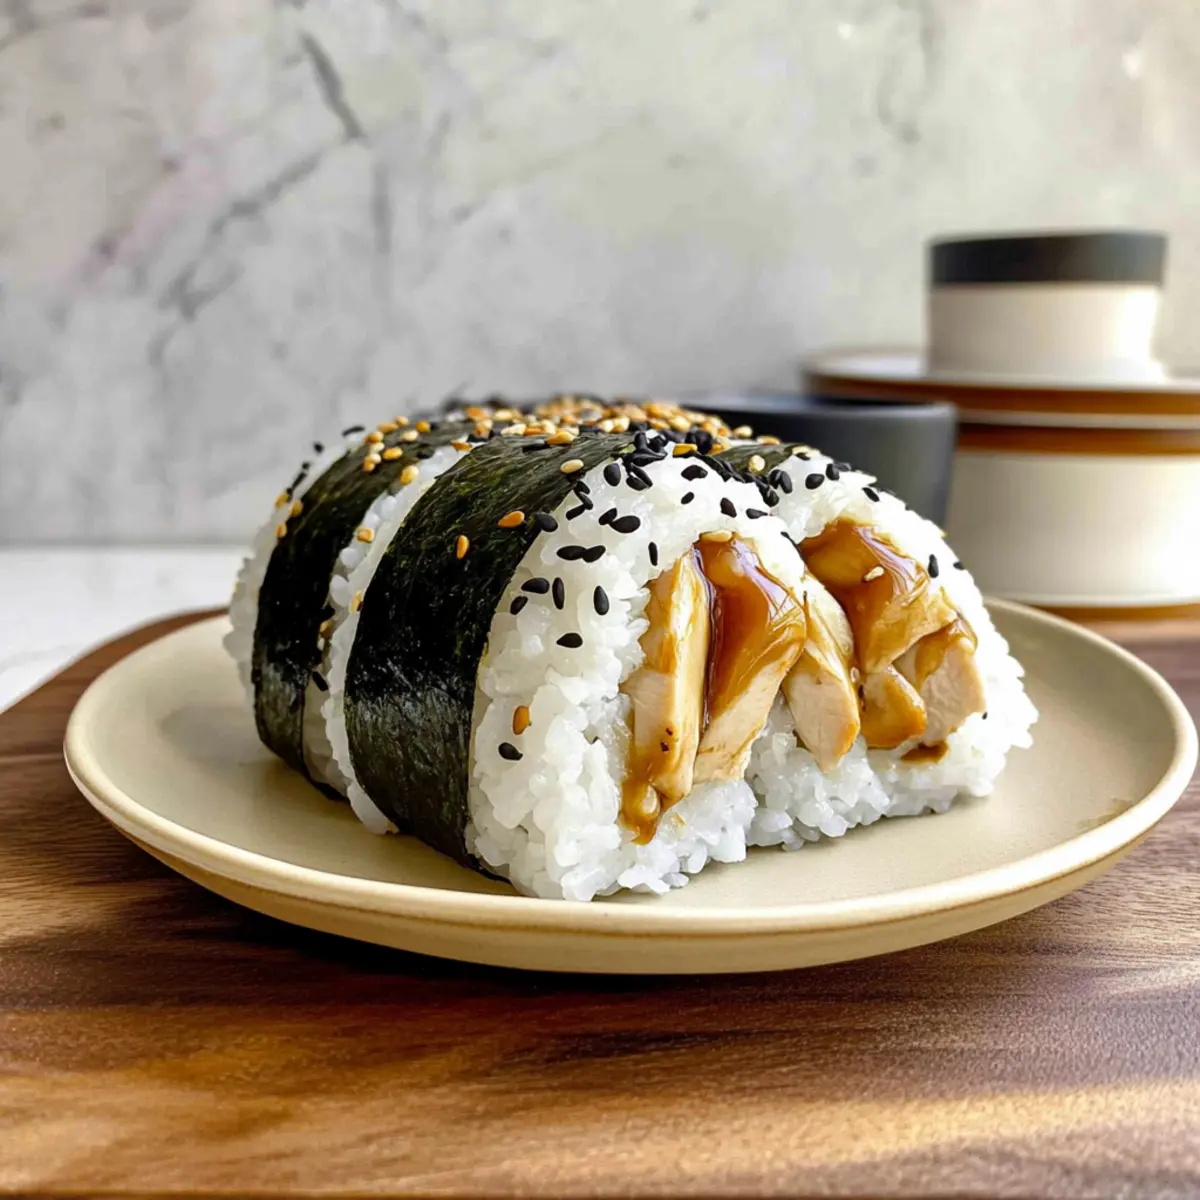
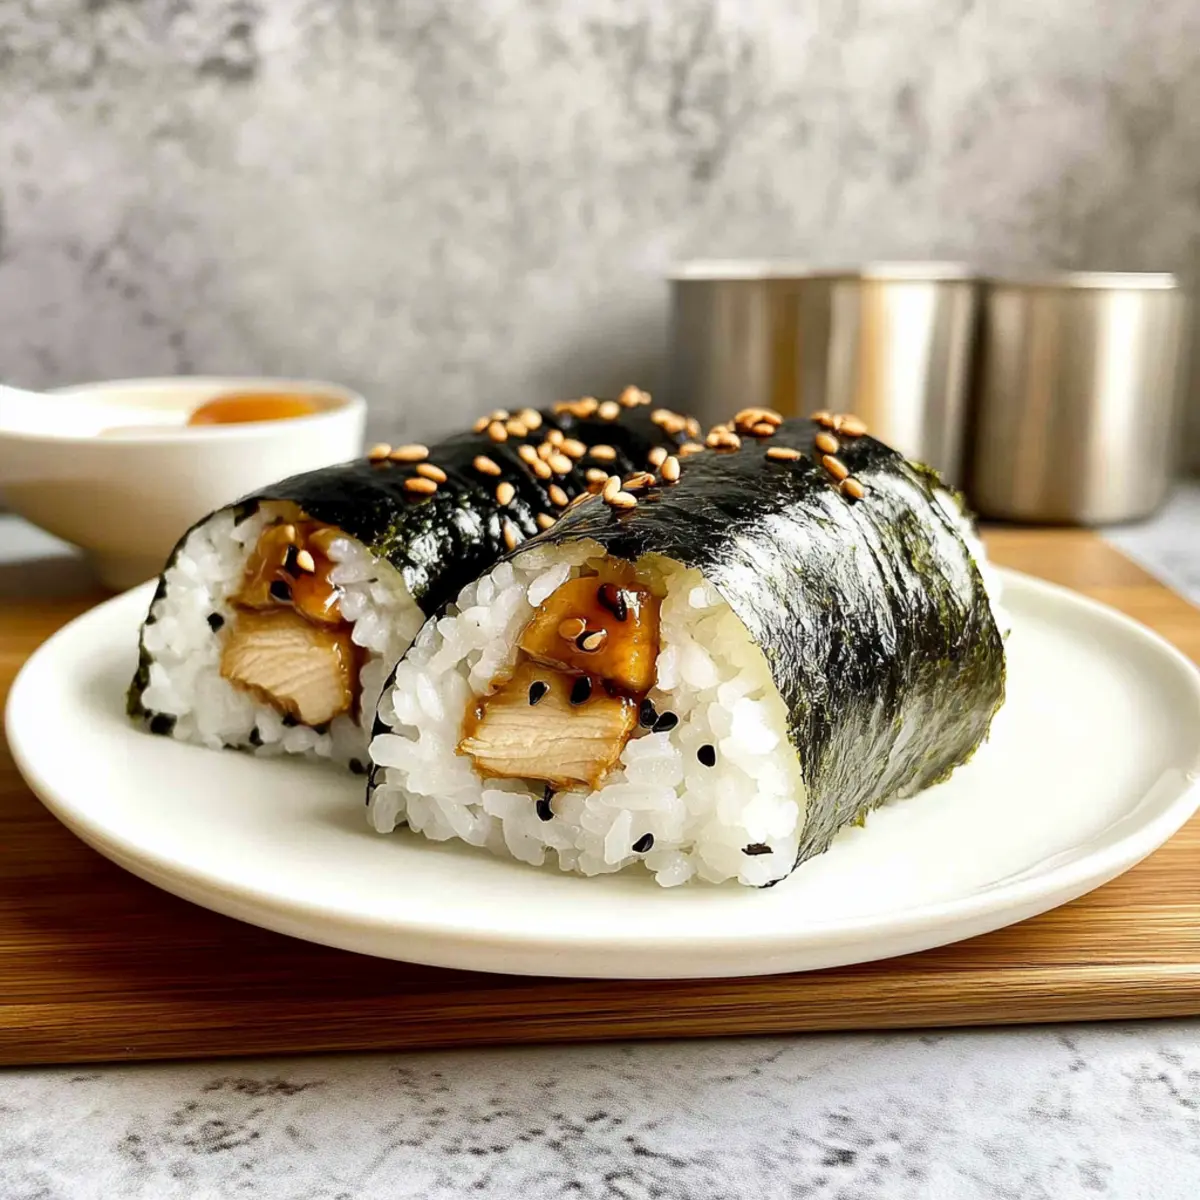
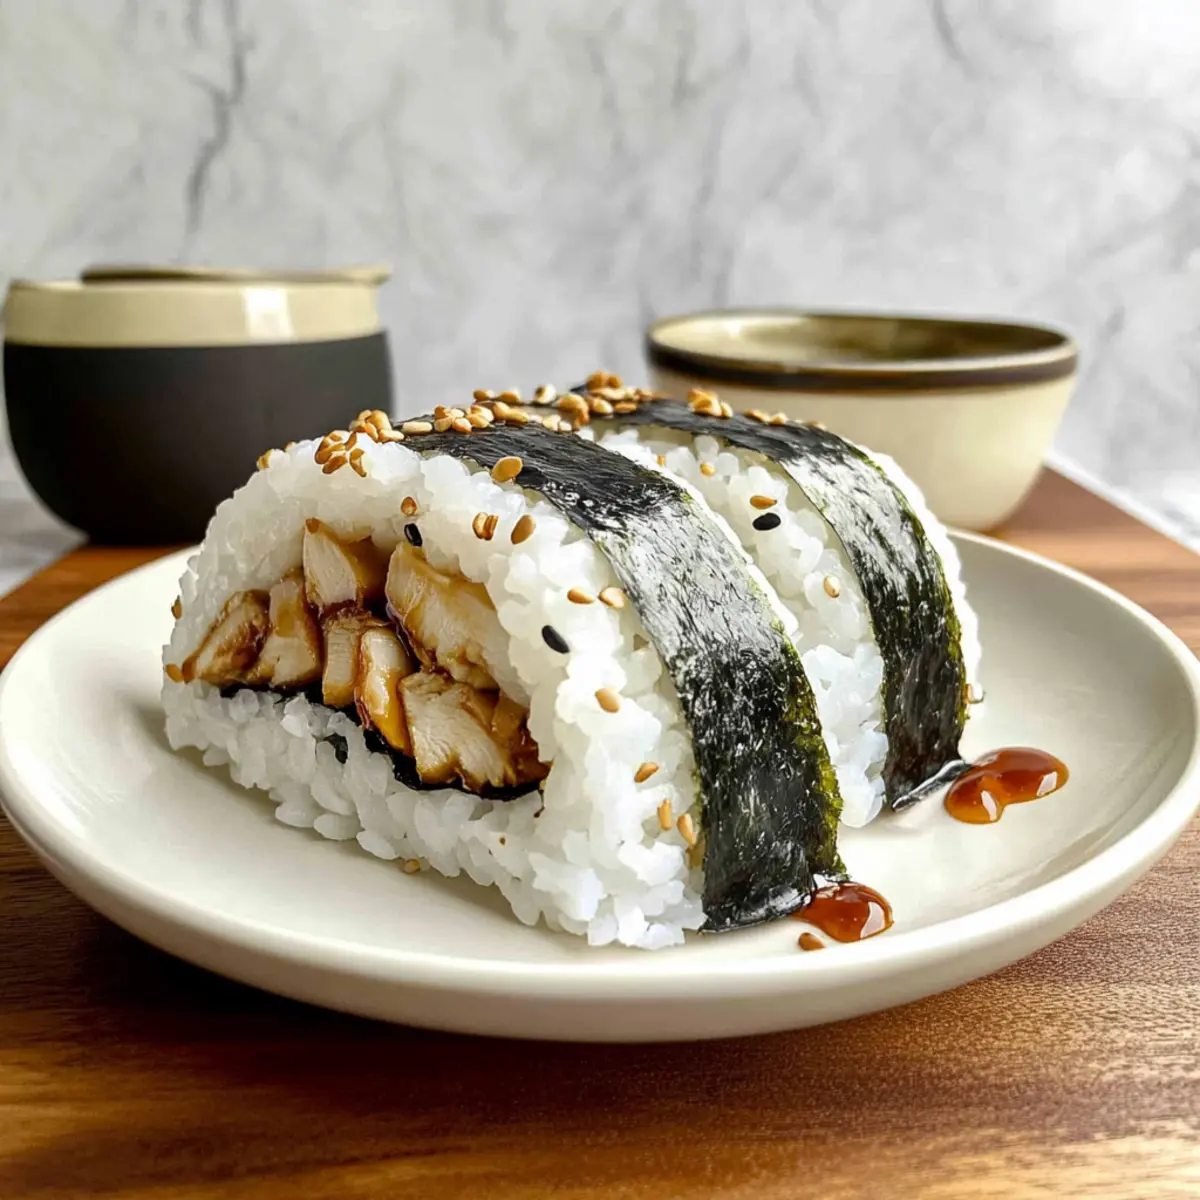
Nori (1 sheet, cut into small rectangles) – Delicately wraps each onigiri, contributing a delicious flavor and texture.
In just 45 minutes, you can bring the delightful taste of Chicken Onigiri right into your home!
Step‑by‑Step Instructions for Chicken Onigiri
Step 1: Prepare the Rice
Start by rinsing 1 cup of short-grain rice under cold water until the water runs clear. Then, cook the rice in a rice cooker with 1.15 cups of water, allowing it to steam for about 20 minutes. Once done, let it sit for another 10 minutes to achieve a perfect sticky texture, then mix in ½ teaspoon of fine salt and optional 2 tablespoons of furikake to enhance the flavor.
Step 2: Marinate the Chicken
While the rice is cooking, cut ½ pound of boneless skinless chicken into small, bite-sized pieces. In a bowl, combine the chicken with 2 teaspoons of soy sauce, 1 tablespoon of sake (or water), ¼ teaspoon of baking soda, and 1 teaspoon of cornstarch. Mix well, cover, and refrigerate for at least 30 minutes to allow the flavors to meld and the chicken to tenderize.
Step 3: Make the Teriyaki Sauce
In a separate small bowl, whisk together 1½ tablespoons of soy sauce, 1 tablespoon of mirin, and 1 tablespoon of firmly packed brown sugar. Stir until the sugar is dissolved completely—this will create a delicious teriyaki glaze that adds depth and sweetness to your Chicken Onigiri. Set aside as you prepare the chicken.
Step 4: Cook the Chicken
Heat 1 tablespoon of neutral oil in a large nonstick pan over medium-high heat. Once hot, add the marinated chicken pieces and stir-fry for about 2-3 minutes until fully cooked and golden brown, ensuring the juices run clear. This step will create a wonderfully crispy exterior while keeping the chicken juicy inside.
Step 5: Add Garlic and Sauce
Lower the heat to medium, then add 1 tablespoon of minced garlic to the pan with the cooked chicken. Sauté for around 30 seconds until fragrant, ensuring not to burn the garlic. Next, pour in the prepared teriyaki sauce, allowing it to simmer for an additional 2-3 minutes—this will help thicken the sauce and coat the chicken beautifully.
Step 6: Shape the Onigiri
Once the rice has cooled enough to handle, wet your hands to prevent sticking. Scoop about ⅓ cup of sushi rice, create a small well in the center, and place 1 tablespoon of the chicken filling into it. Cover with more rice, gently pressing to form a triangle shape. Finally, wrap each onigiri with a small rectangle of nori for that classic presentation.
Step 7: Serve and Enjoy
Your homemade Chicken Onigiri is ready to be served! These delightful bites can be enjoyed warm or at room temperature, making them perfect for snacking or packing for lunch. Pair with pickled vegetables or a dipping sauce of your choice for an extra kick of flavor.
Expert Tips for Chicken Onigiri
-
Perfect Rice Consistency: Ensure your sushi rice is adequately sticky by adjusting the water ratio; use 15% more than regular rice for the ideal texture.
-
Marination Time Matters: Allow the chicken to marinate for at least 30 minutes—this step is crucial for infusing flavor and ensuring tenderness in your Chicken Onigiri.
-
Use Wet Hands: Wet your hands while shaping the onigiri to prevent the rice from sticking, making the molding process easier and ensuring a beautiful triangular shape.
-
Watch Your Cooking Time: Keep an eye on the chicken while stir-frying; 2-3 minutes on medium-high heat is perfect to avoid overcooking and drying out the meat.
-
Nori Application: Choose fresh nori sheets and cut them into the right size for wrapping; this gives your Chicken Onigiri a pleasant flavor contrast with the rice.
-
Furikake for Extra Flavor: Don’t skip the optional furikake. Sprinkling it on the rice before shaping adds a delightful umami touch to your Chicken Onigiri.
Storage Tips for Chicken Onigiri
Fridge: Store leftover Chicken Onigiri in an airtight container for up to 2 days. Keeping them sealed prevents moisture loss and maintains flavor.
Freezer: Freeze Chicken Onigiri by wrapping each piece tightly in plastic wrap and placing them in a freezer-safe container. They can be stored for up to 1 month.
Reheating: To reheat, thaw in the fridge overnight, then warm in a microwave for 30-45 seconds. Enjoy them cold or at room temperature for a quick snack!
Wrapping: For best results, wrap the onigiri in nori just before serving to maintain its crisp texture and to enhance the flavor of these delightful Chicken Onigiri.
Chicken Onigiri Variations & Substitutions
Feel free to play around with these variations and discover new twists to elevate your Chicken Onigiri experience!
-
Tofu Option: Swap the chicken for firm tofu for a wonderful vegetarian alternative. Just marinate and prepare it the same way!
-
Extra Veggies: Add cucumber or avocado slices in the filling for a refreshing flavor and extra nutrition. These will brighten up each bite!
-
Spicy Kick: Incorporate chili flakes or sriracha into the marinade for a delightful heat that pairs beautifully with the teriyaki glaze. Your taste buds will thank you!
-
Alternative Proteins: Consider ground chicken or turkey; they cook quickly and still absorb that flavorful marinade just as beautifully. A simple substitute that brings a new texture!
-
Sushi Rice Variations: Try using brown rice for a nutty flavor profile or quinoa for a gluten-free option. Both bring a heartiness that complements the chicken well.
-
Flavorful Furikake: Experiment with different furikake varieties or even homemade blends. Sesame or wasabi versions can add unique flavor twists that will surprise your guests.
-
Dipping Sauce: Serve with a side of ponzu sauce for dipping or drizzle a spicy mayo around the plate for a creamy balance with your onigiri.
-
Sweet Twist: For a sweet variation, replace the brown sugar with honey or maple syrup in your teriyaki sauce for an unexpected flavor dimension.
These options let you explore various flavors and textures to find your perfect Chicken Onigiri creation. You might also enjoy my delightful Creamy Rotisserie Chicken Pasta or perhaps a light and refreshing Chinese Chicken Salad as you embark on your culinary journey!
What to Serve with Easy Chicken Onigiri with Teriyaki Glaze
Creating a complete meal around these delightful bites can elevate your dining experience, bringing a taste of Japan to your table.
-
Pickled Vegetables: The tangy crunch of pickled vegetables cuts through the savory chicken, offering a refreshing contrast that brightens each bite. Serve a colorful mix to delight both the eyes and the palate.
-
Edamame: Lightly salted edamame provides a satisfying pop of flavor and texture, making it a perfect side for snacking alongside Chicken Onigiri. The protein in edamame also complements the dish’s hearty nature.
-
Miso Soup: A warm bowl of miso soup offers a comforting, umami-rich backdrop that balances the flavors of the onigiri. Adding tofu and seaweed to the soup makes it even heartier.
-
Seaweed Salad: The slight sweetness and umami flavor of a seaweed salad pair wonderfully with chicken onigiri. This light, refreshing dish adds an additional textural element that enhances the meal.
-
Sushi Roll: For a delightful feast, serve some simple sushi rolls alongside your onigiri. Their variety of textures and flavors will create an enjoyable culinary journey right in your home.
-
Green Tea: A cup of freshly brewed green tea offers a soothing experience that beautifully complements the entire spread. Its subtle earthiness balances the savory notes from the Chicken Onigiri.
-
Homemade Fruit Salad: For dessert, a vibrant fruit salad made with seasonal fruits can cleanse the palate. The sweetness of fruits like mango and berries brings a delightful finish to this flavorful meal.
Make Ahead Options
These Chicken Onigiri are perfect for meal prep enthusiasts looking to save time on busy weeknights! You can marinate the chicken up to 24 hours in advance—just combine the chicken with soy sauce, sake, baking soda, and cornstarch, then refrigerate. The sushi rice can also be cooked ahead and stored in the refrigerator for up to 3 days; simply cover it with a damp cloth to maintain moisture and prevent hardening. When ready to serve, quickly sauté the marinated chicken and assemble the onigiri, wrapping them in nori just before enjoying for that fresh taste. With these make-ahead tips, you’ll have delicious Chicken Onigiri at your fingertips with minimal effort!
Chicken Onigiri Recipe FAQs
How do I choose the right rice for Chicken Onigiri?
Absolutely! For Chicken Onigiri, using short-grain sushi rice is essential. It provides the sticky texture necessary for forming the onigiri. Make sure to use about 15% more water than you would for regular rice when cooking, as this promotes that perfect stickiness.
What are the best storage methods for leftover Chicken Onigiri?
Very! Store any leftover Chicken Onigiri in an airtight container in the refrigerator for up to 2 days. This helps maintain their moisture and flavor. If you want to keep them longer, wrap each onigiri tightly in plastic wrap and place them in a freezer-safe container for up to 1 month.
Can I freeze Chicken Onigiri, and if so, how?
Yes, you can freeze Chicken Onigiri! To freeze, wrap each piece individually in plastic wrap, then place them in a freezer-friendly bag or container. When you’re ready to enjoy them, simply thaw in the refrigerator overnight for best results. Reheat in the microwave for about 30-45 seconds.
What should I do if my rice doesn’t hold its shape?
Oh no! If your rice is not holding its shape, it may be due to insufficient stickiness. Ensure you’re using the correct type of short-grain sushi rice and try cooking it with 15% more water next time. If it’s too dry, add a splash of water while forming the onigiri to help it stick together.
Are there any dietary considerations for Chicken Onigiri?
Yes, definitely! If you’re making Chicken Onigiri for someone with allergies, be cautious with the soy sauce, which contains gluten. You can substitute it with a gluten-free soy sauce or coconut aminos. Additionally, to make a vegetarian version, consider swapping the chicken for tofu or your favorite veggies.
Can I add other ingredients to my Chicken Onigiri?
The more the merrier! Feel free to customize your Chicken Onigiri by adding ingredients like avocado, cucumber, or even cooked shrimp for a different flavor. Additionally, experimenting with different seasonings like chili flakes or sesame seeds can elevate your onigiri to new heights!
Savory Chicken Onigiri: Your New Go-To Snack Adventure
Ingredients
Equipment
Method
- Rinse 1 cup of short-grain rice under cold water until clear. Cook in rice cooker with 1.15 cups of water for 20 minutes, then let sit for 10 minutes. Mix in 0.5 tsp salt and optional 2 tbsp furikake.
- Cut 0.5 lbs of chicken into small pieces. Marinate with 2 tsp soy sauce, 1 tbsp sake, 0.25 tsp baking soda, 1 tsp cornstarch. Cover and refrigerate for 30 minutes.
- In a bowl, whisk 1.5 tbsp soy sauce, 1 tbsp mirin, and 1 tbsp brown sugar until dissolved to prepare teriyaki sauce.
- Heat 1 tbsp oil in a pan over medium-high heat. Add marinated chicken; stir-fry for 2-3 minutes until cooked and golden brown.
- Lower heat, add 1 tbsp minced garlic and sauté for 30 seconds. Pour in teriyaki sauce and simmer for 2-3 minutes until thickened.
- Wet your hands, scoop about ⅓ cup rice, create a well, add 1 tbsp chicken filling, cover with rice, and shape into a triangle. Wrap with nori.
- Serve warm or at room temperature. Enjoy with pickled vegetables or dipping sauce.
Leave a Reply